Easy Vertical Stripe Lounge/Sleep Tunic Dress
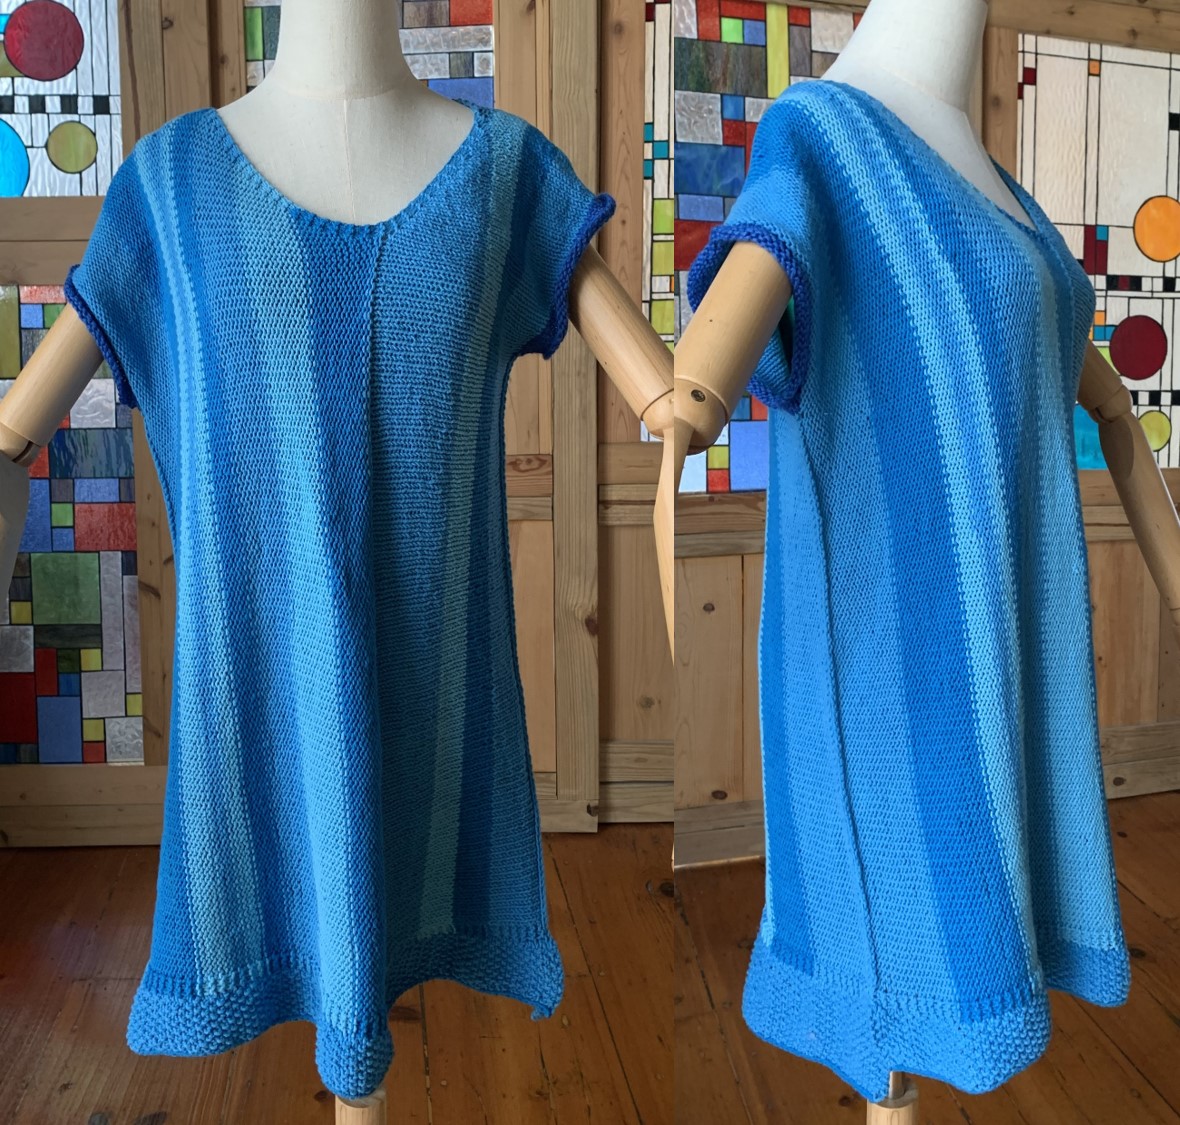
Like many knitters, I have random bits of yarns from various projects I stash for future “fun” projects. If you also have those, and especially in cotton, linen, rayon, or modal, try this simple vertical stripe lounge/sleep tunic dress project. The finished garment may not be ready for a prime time because of random stripes and potentially some weaved ends sticking out, but can make a comfortable companion for relaxing at home. And it’s reversible!
Of course, you can use new yarns and design your random stripes with unexpected combination of colors, which can go beyond lounging at home.
Fun, random stripes with leftover yarns
I have done projects using leftover yarns, like this Accidental Stripe Blanket Poncho which uses different fibers and colors. While your design options are somewhat limited in those projects, you can feel free to experiment with different color combinations, often in ways you might not normally opt for. And still, striped knits are, in my experience, easiest ways, because if you don’t like it, you can always unravel and try different color combinations.
This time, I wanted to re-knit yarns from the Easy Breezy Hooded Lace Tunic project. I liked how the yarn feels, but got a bit tired of the garment itself. So this time, all the yarn bits are the same sort, just in different colors and lengths.
Knitting tips for lounge/sleep tunic/dress
There are a couple of things to consider in knitting lounge wear:
- Overall construction: since the length and width are somewhat constrained by the amount of left-over yarns you have, I recommend you knit in one sweep of (i.e., front and back) stripes in the approx. preferred length so that you can make adjustments. On this project, after a while I realized that the length would be a tad too short, so decided to add a bottom border after the body was completed.
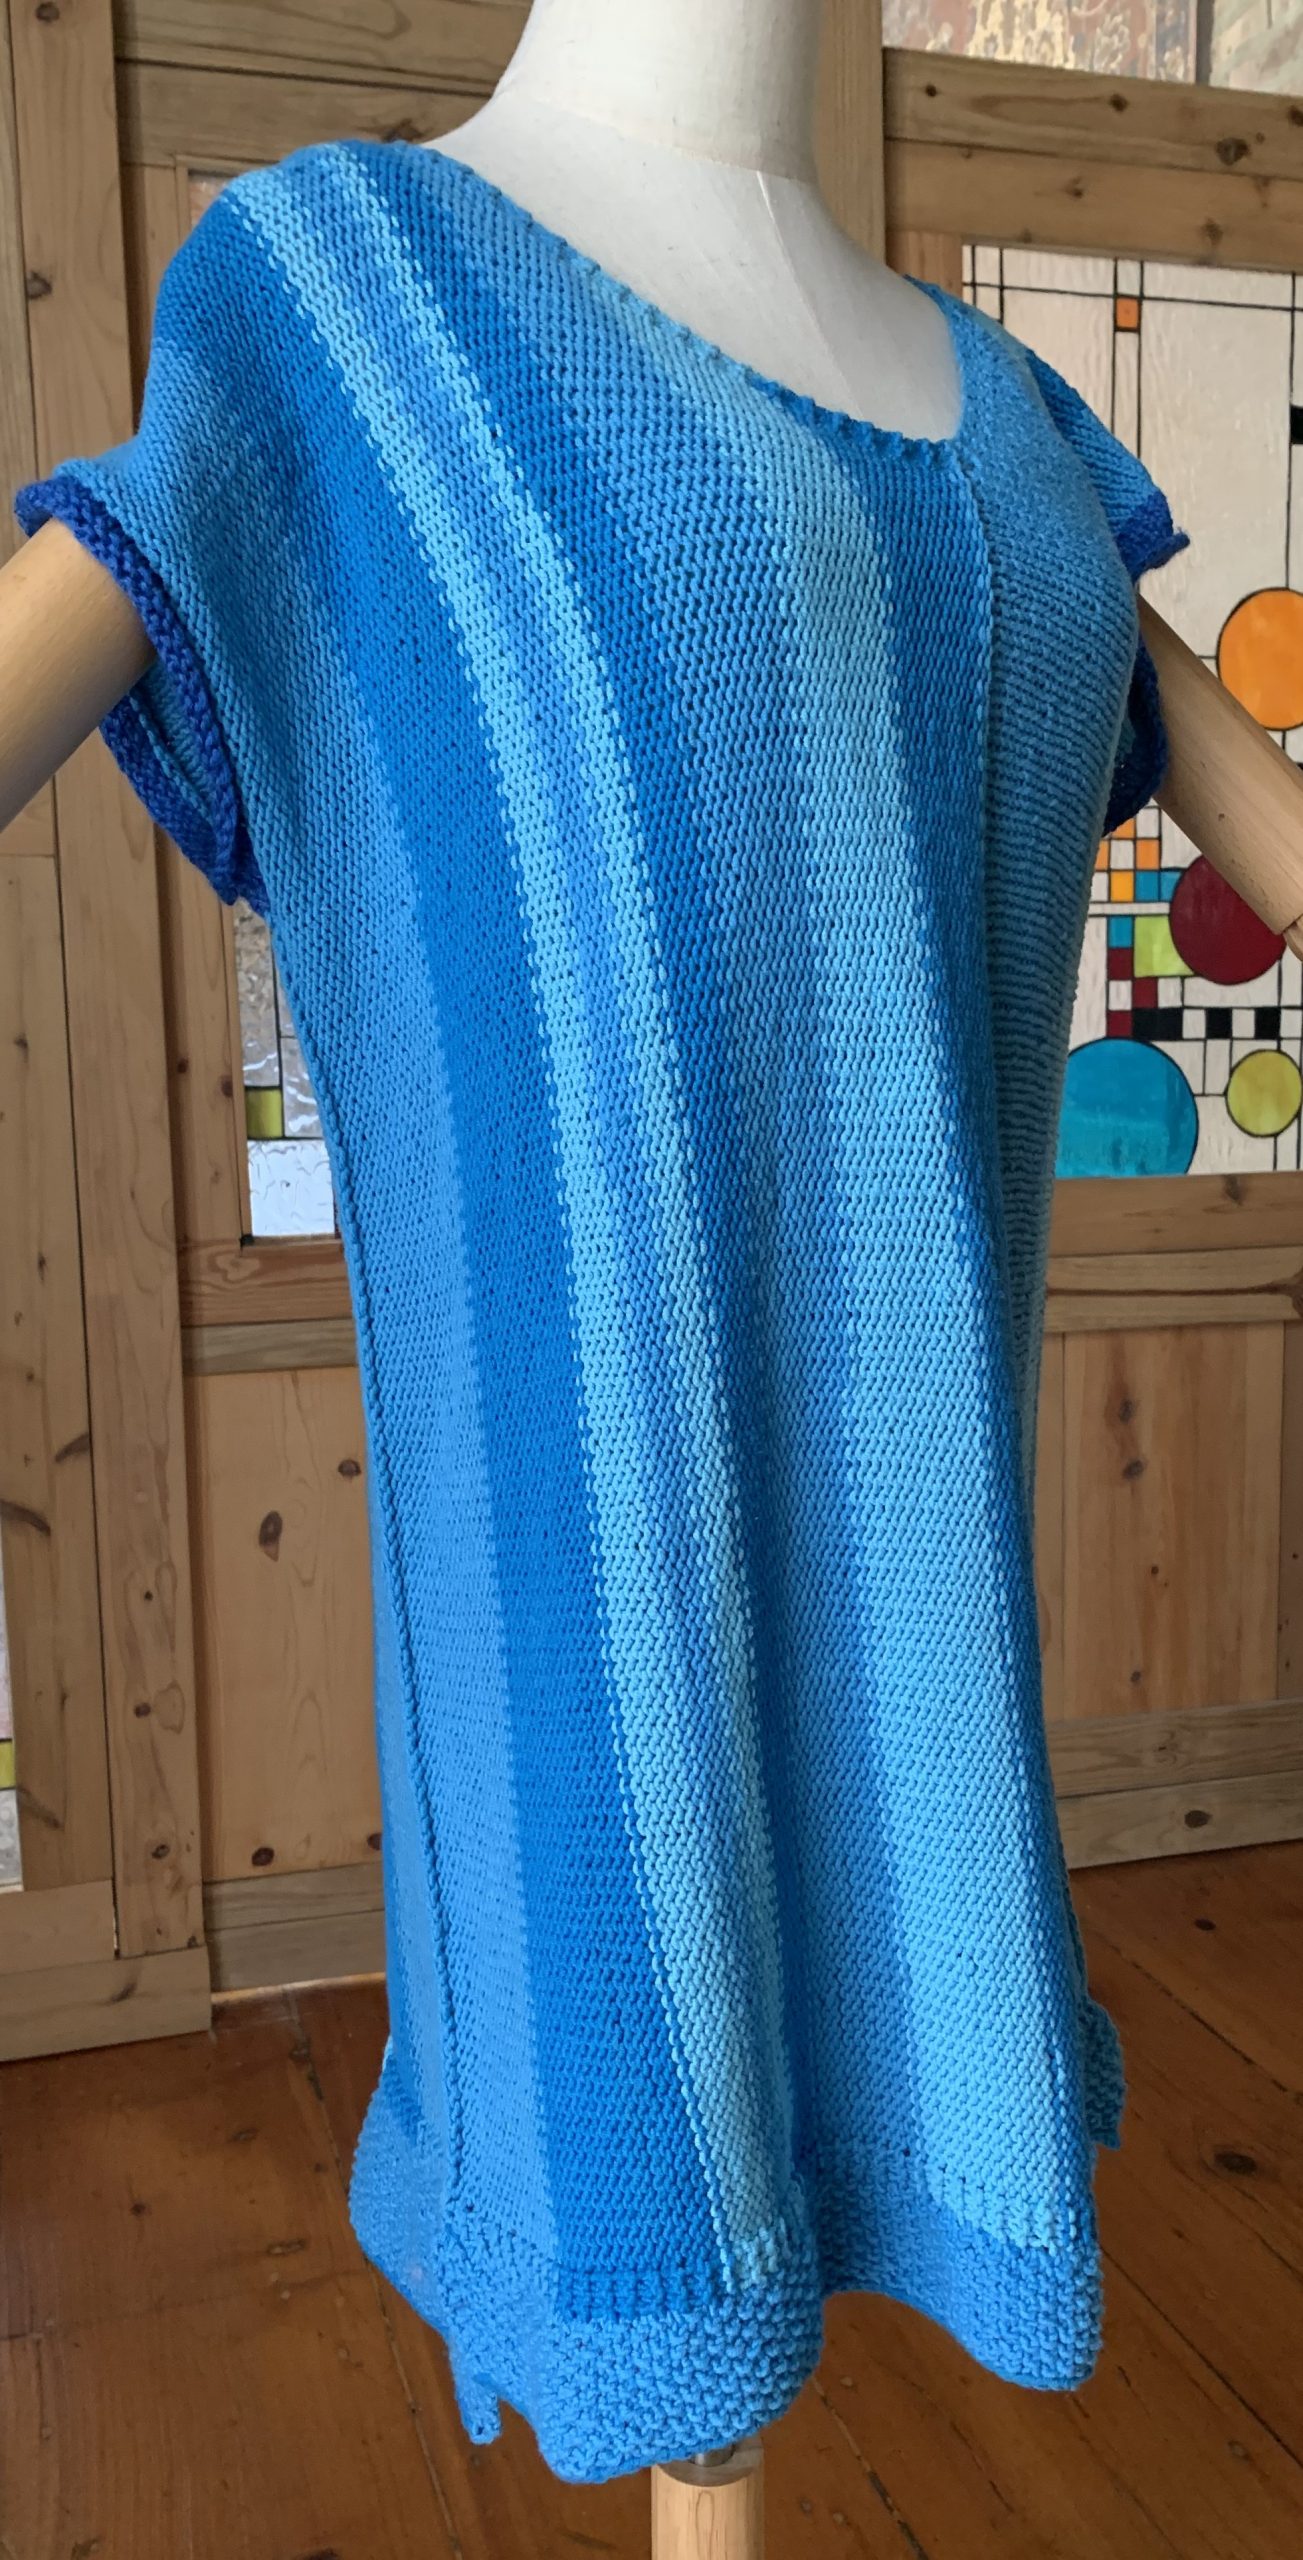
- CYA and side slits: For the comfort, I recommend adding short side slits at the bottom, and making the back side slightly longer.
- Yarn: choose types of yarns that feel comfortable on your skin and machine washable – either soft (rayon, modal) or crisp (cotton, linen), depending on your preference.
- Yarn weight and needle: to keep the garment relatively light and airy, and yet keeping the project within a manageable time frame, I would say sock or worsted would be ideal. Also, to keep it airy but not see through, pick a needle a size or two larger than what you might normally use.
- Back neck loop: it’s a must because you’ll likely be hanging it from a some sort of hook.
- Stitches: because you will be transitioning to different yarns, possibly mid-row, you would want to keep the stitches simple. In this case, I used only knit or purl stitches, sometimes just strait k or p, in garter edges, or in seed stitch borders. Further, because I liked both how the knit side and purl side looked, I switched from purl as the “right” side to knit as the “right” side a little after half-way through. I happen to like asymmetrical pattern, and when to switch over, or not to switch at all, is purely up to your preference.
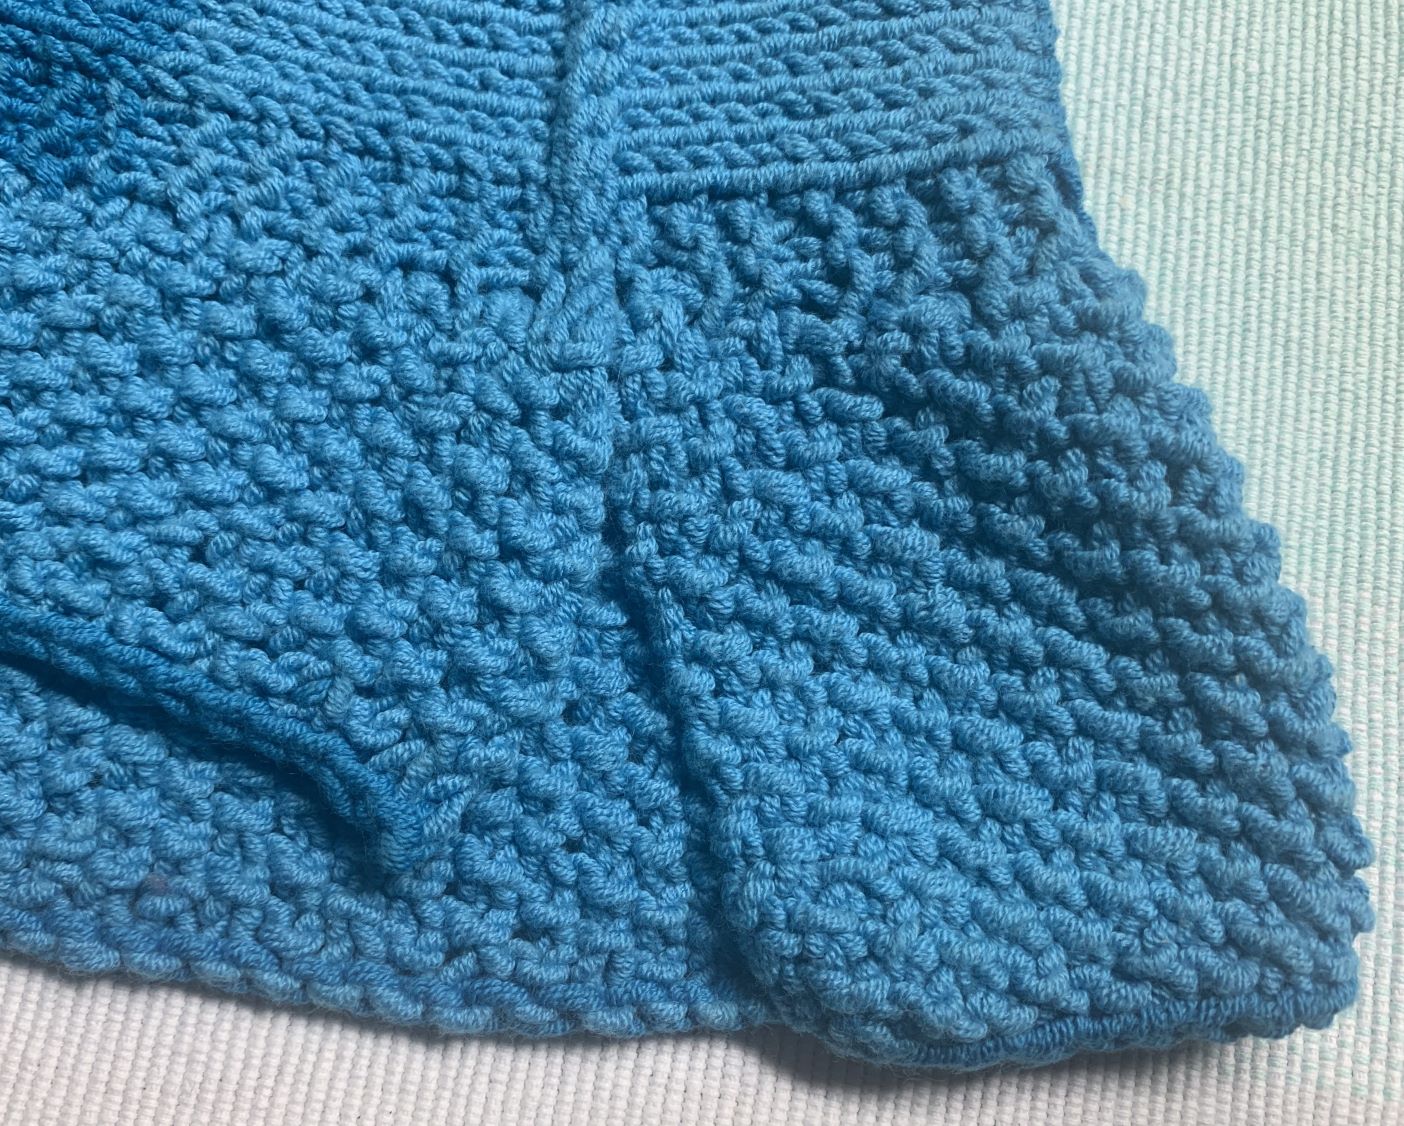
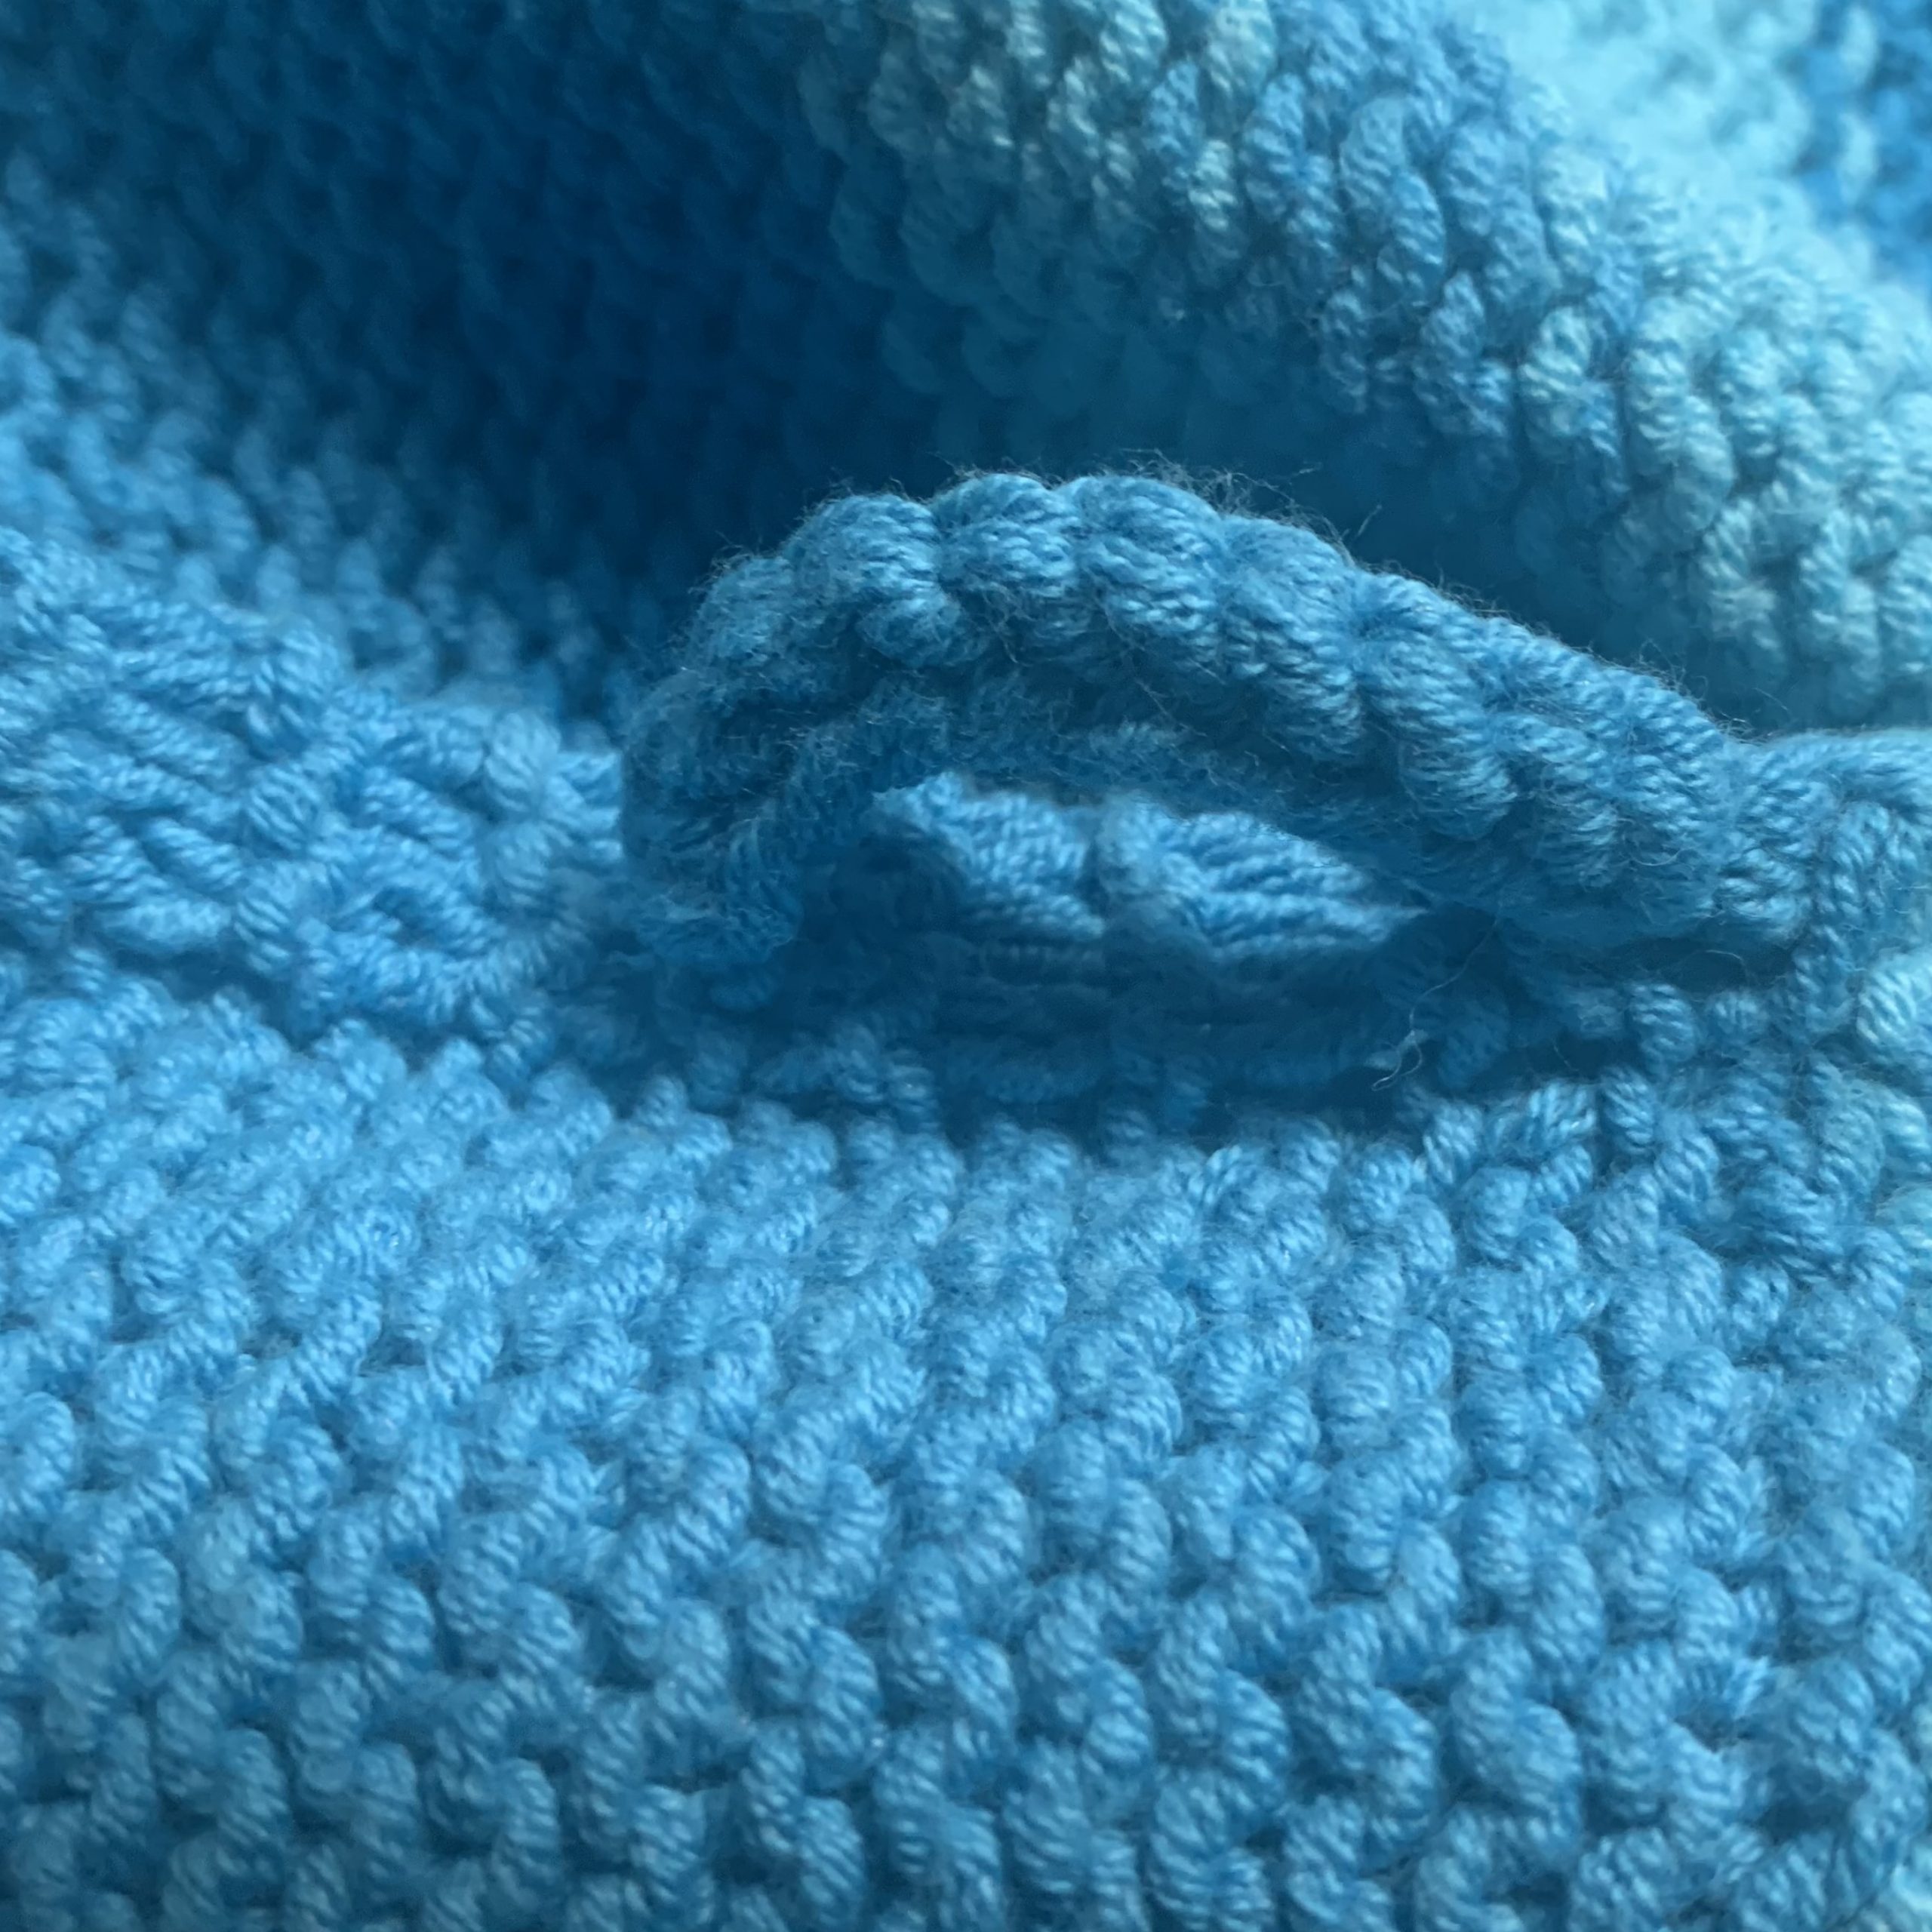
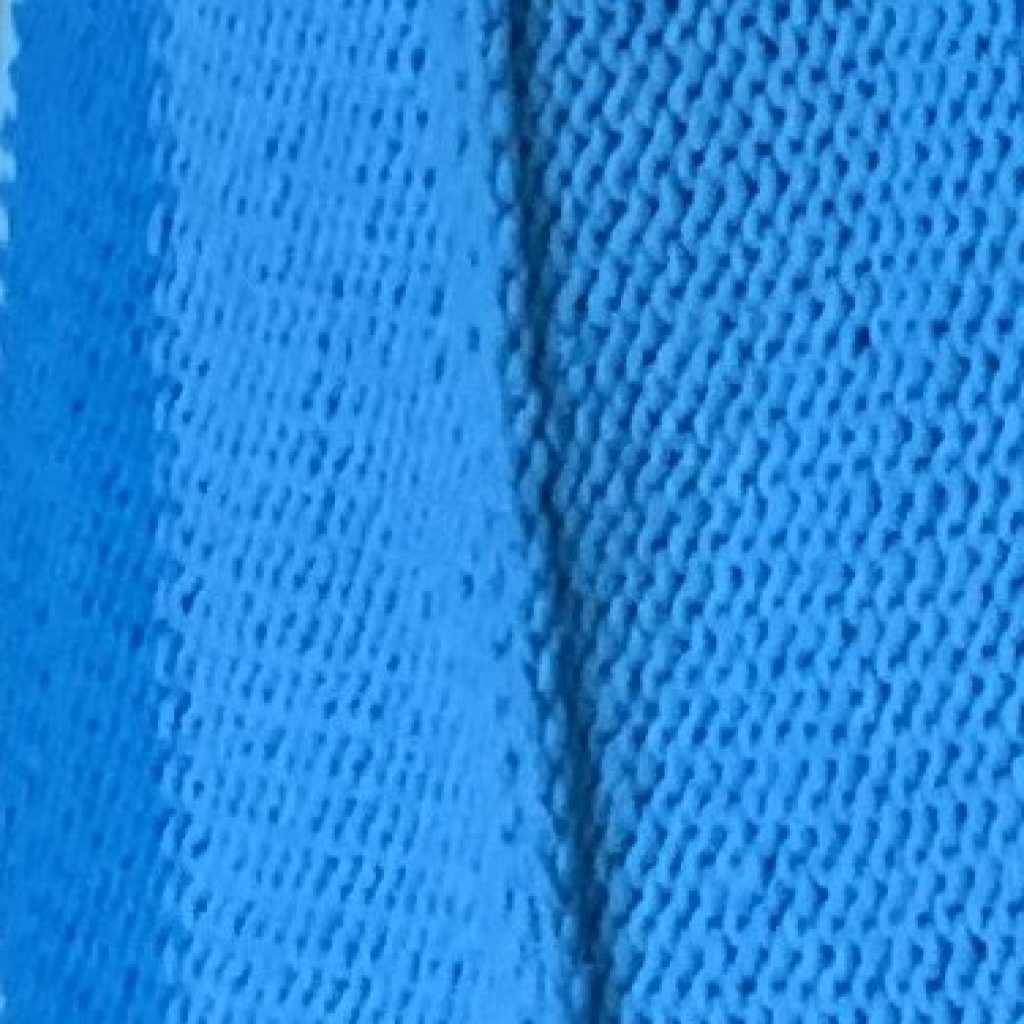
As you can see in the knitting instructions/suggestions below, depending the amount of yarns you have, it is very easy to customize the lengths, width, sleeves, and border. Hope this will give you an option to use up your left-over yarns.
Knitting instructions/suggestions
- Yarn: sock or worsted cotton, linen, rayon, or modal yarn. Need approx. 1,000 – 1,200 yrds. The yarn used in the project is Lana Grossa Cool Cotton (93% cotton, 7% polyester; 50g, 115 yrds)
- Needles: US#8 or 9 (depending on your gauge) circular needle, 40″ or longer. Use one size larger than recommended size for airiness.
US J crochet hook for the bottom trim
- Size (easily adjustable) – Width: 42″ – 50″
Front Length: 31″ – 34″
Back length: 33″ – 36″ - Gauge: 14 sts x 16 rows in stockinette st.
Abbreviations:
- CO: cast on; BO: bind off
- R: row; st(s): stitch(es)
- RS: right side; WS: wrong side
- k: knit
- p: purl
- m1L: make one left
- m1R: make one right
- See excellent graphic tutorials on these sts in Tin Can Knit
- k2tog: knit two stitches together; right-leaning one stitch decrease
- ssk: slip, slip, knit; left-leaning one stitch decrease
Body
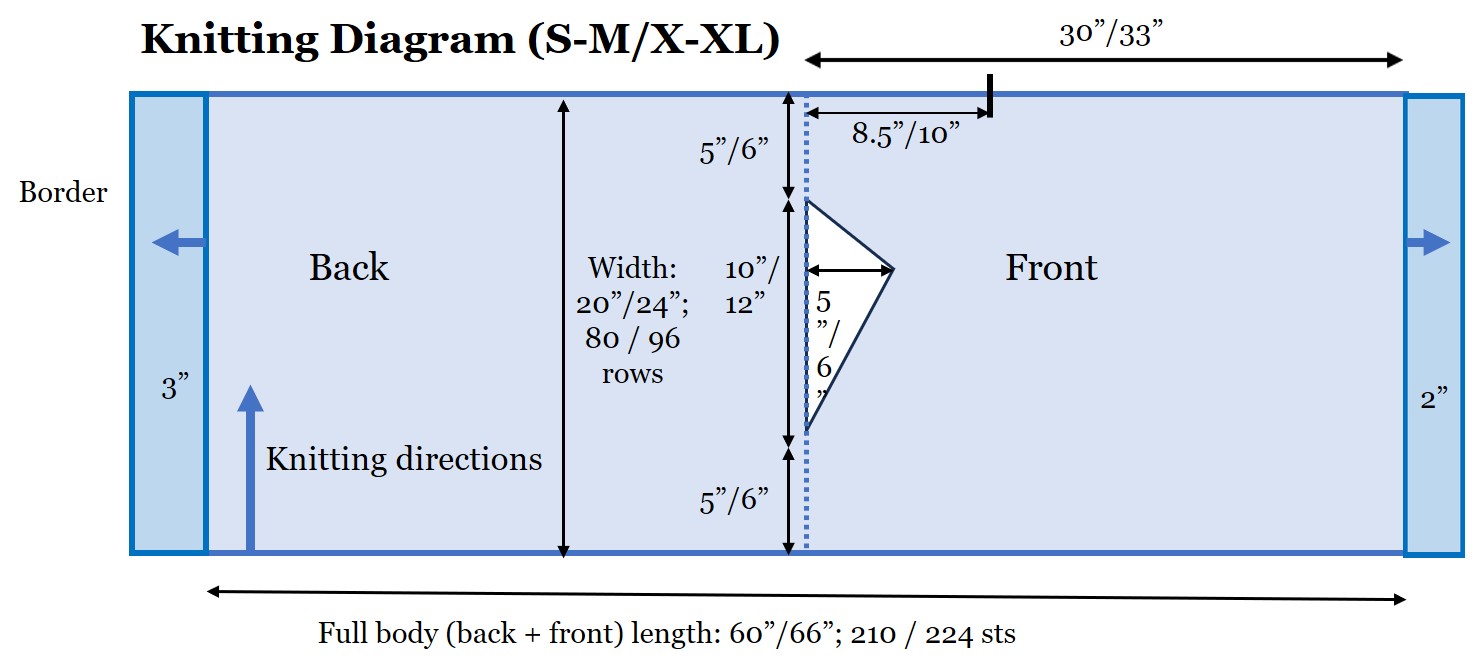
- Start from one side toward the middle of the body:
- CO loosely 210/224 sts.
- R1 (WS): knit the entire row.
- R2 (RS): k 3 sts (for garter edge), purl until 3 sts to the end of row, k 3 sts.
- Continue R1 and R2, changing yarns when you run out of a color, creating random vertical stripes, until it measures 5″/6″ from the cast-on edge, ending in WS.
- Create neck opening: Next RS: P through halfway (105/112 sts). Transfer the remaining (back side) sts to another circular needle.
- Work on front side:
- First WS: k3 (for front neck trim), k to end of row.
- First RS: k3 (for garter edge), p until 3 sts to end of row, k3.
- Next WS: start front neck edge decrease. k3, k1, ssk1, k to end of row.
- Continue RS and WS with ssk1 decrease on WS until the opening measures 6.5/8″ from the start of neck edge, ending with WS.
- Switch purl RS to knit RS. If you prefer, continue with the same RS st. you started with.
- Next RS: start front neck edge increase. k until 4 sts to end of row. m1R, k 4.
- Next WS: k3, p until 3 sts to end of row, k3.
- Continue RS and WS with m1R increase on RS until the opening measures 10/12″ from the start of neck edge, ending with RS.
- Count the number of rows for neck opening for reference for back side.
- Hold sts until you completed the back neck opening and ready to join and resume working on the entire body.
- Work on back side:
- First RS: k3 (for back neck garter edge), p until 3 sts to end of row, k3.
- Next WS: k4, m1L (only once), k to end of row.
- After you worked on 6.5/8″, switch RS from p to k and WS from k to p, if you prefer.
- Work RS/WS rows until the neck opening measures 10/12″, ending with RS or matches the number of rows you worked on front side.
- Join front & back and complete body:
- Resume combined WS: k3, p to 3 sts to end of row, k3.
- Next RS: k to end of row.
- Continue RS and WS until it measures 5/6″.
- Seam sides:
- Bring the two ends together and seam the left side. You will be starting at the bottom of body and ending at the end of of sleeve opening. Please use your favorite method. For a casual piece like this, I like to start the process while live sts are still on circular needle, and use a BO seaming that leaves a visible seam line.
Add sleeves
Depending on how much usable yarns you have, you can simply add crochet edges around armholes, or add sleeves, stopping at your preferred length. In this case, I opted for very short roll-up sleeves. To do this, you can simply pick up sts from each armhole, knit several rows, loosely BO.
Add borders (if needed)
If you are satisfied with the length, you can stop work after adding armhole edges or sleeves.
If you, like me, found that you want a longer piece after finished working on body, you can add short borders. For this, I used a seed sts border. It’s basically an offset k1/p1 every row, so easy to work on and create beautiful edging.


Leave A Comment