Accidental stripe blanket poncho + skinny scarf (with left-over yarns)
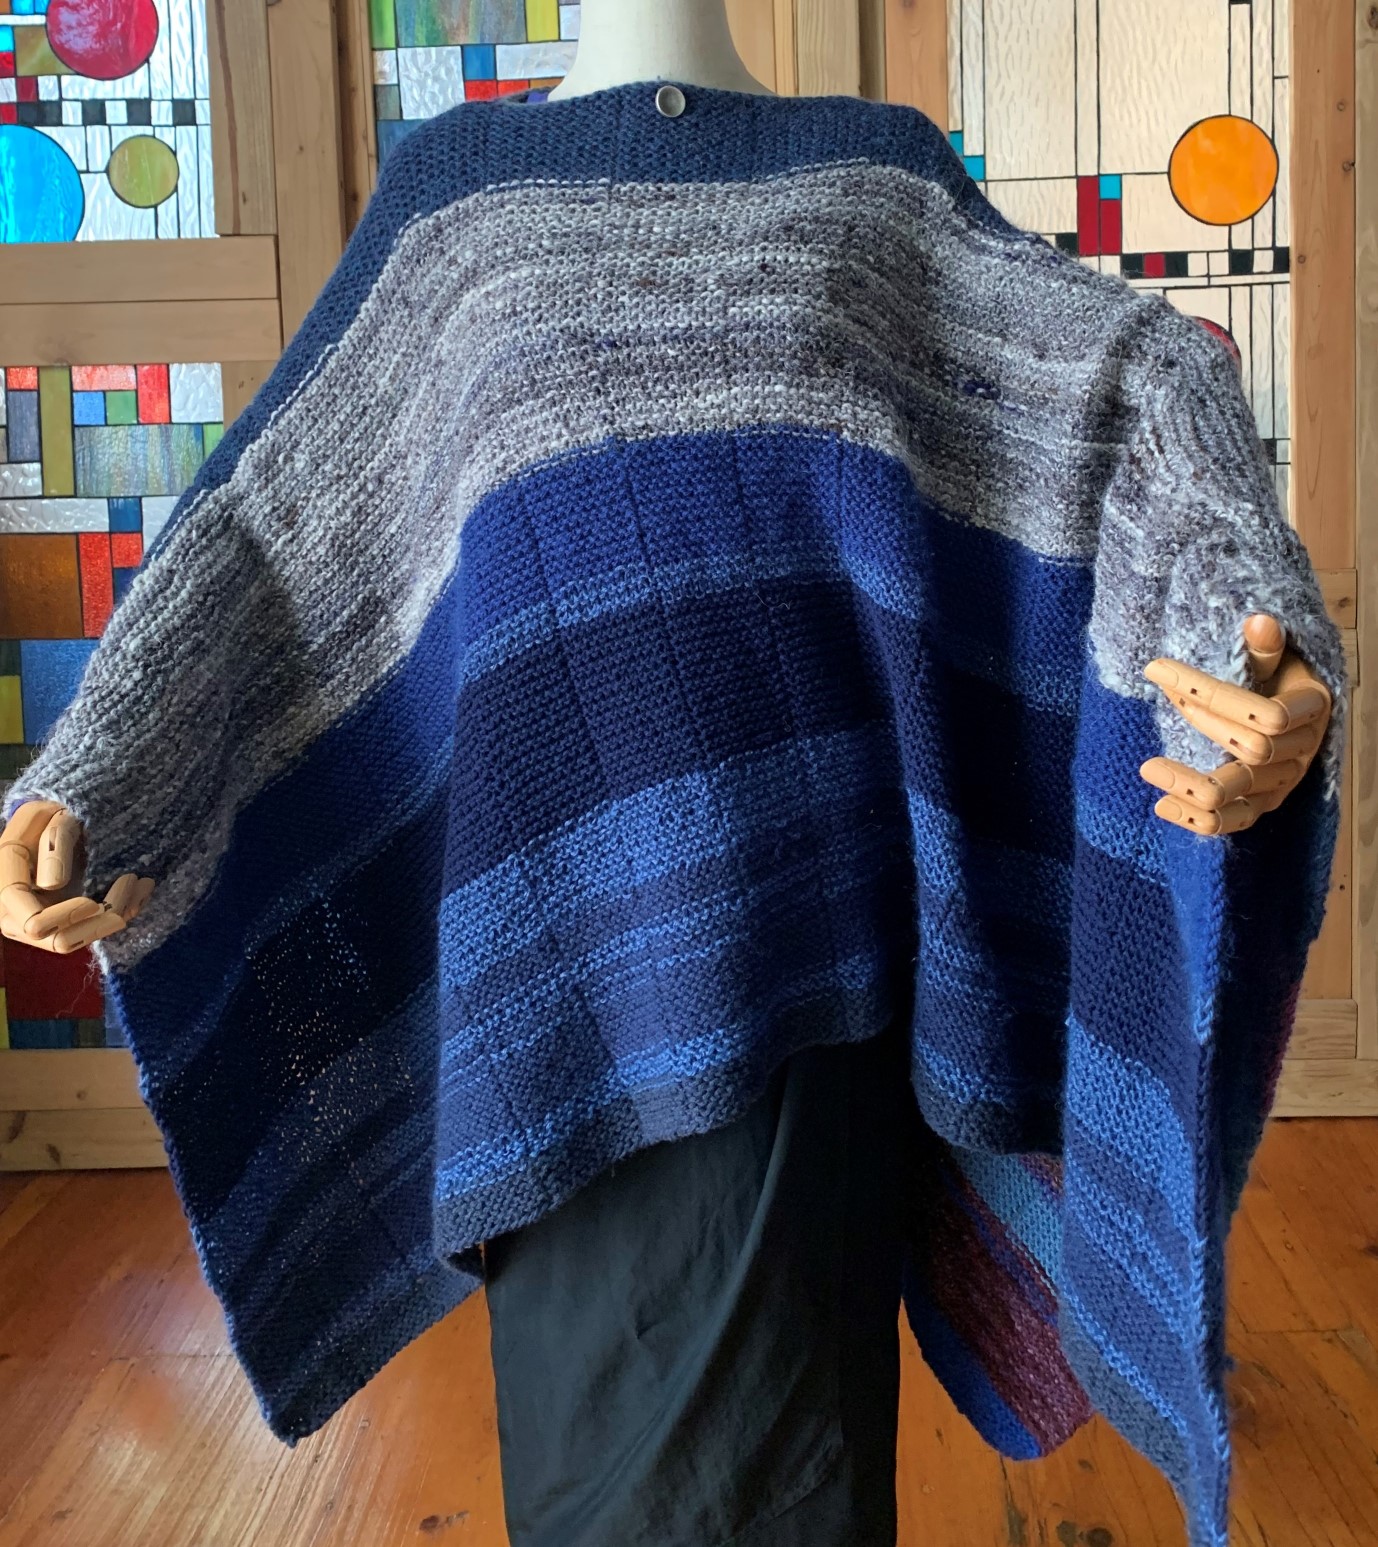
Have a bunch of left-over yarns?
Have you ever thought “what am I going to do with all these left-over yarns!?”? If you have worked on several (or more) knitting projects, you are likely to have yarns in different colors, weights, and perhaps in different bits of length that accumulated in a basket (or box).
Well, it happened to me at least a couple of times and after a while, I decided to start a big blanket project. At the start, I did not have a definite idea of how it might look at the end, or when I might complete it. I just thought I would keep going until I ran out of left-over yarns or reached the size I wanted.
Figuring out color sequences and transitions
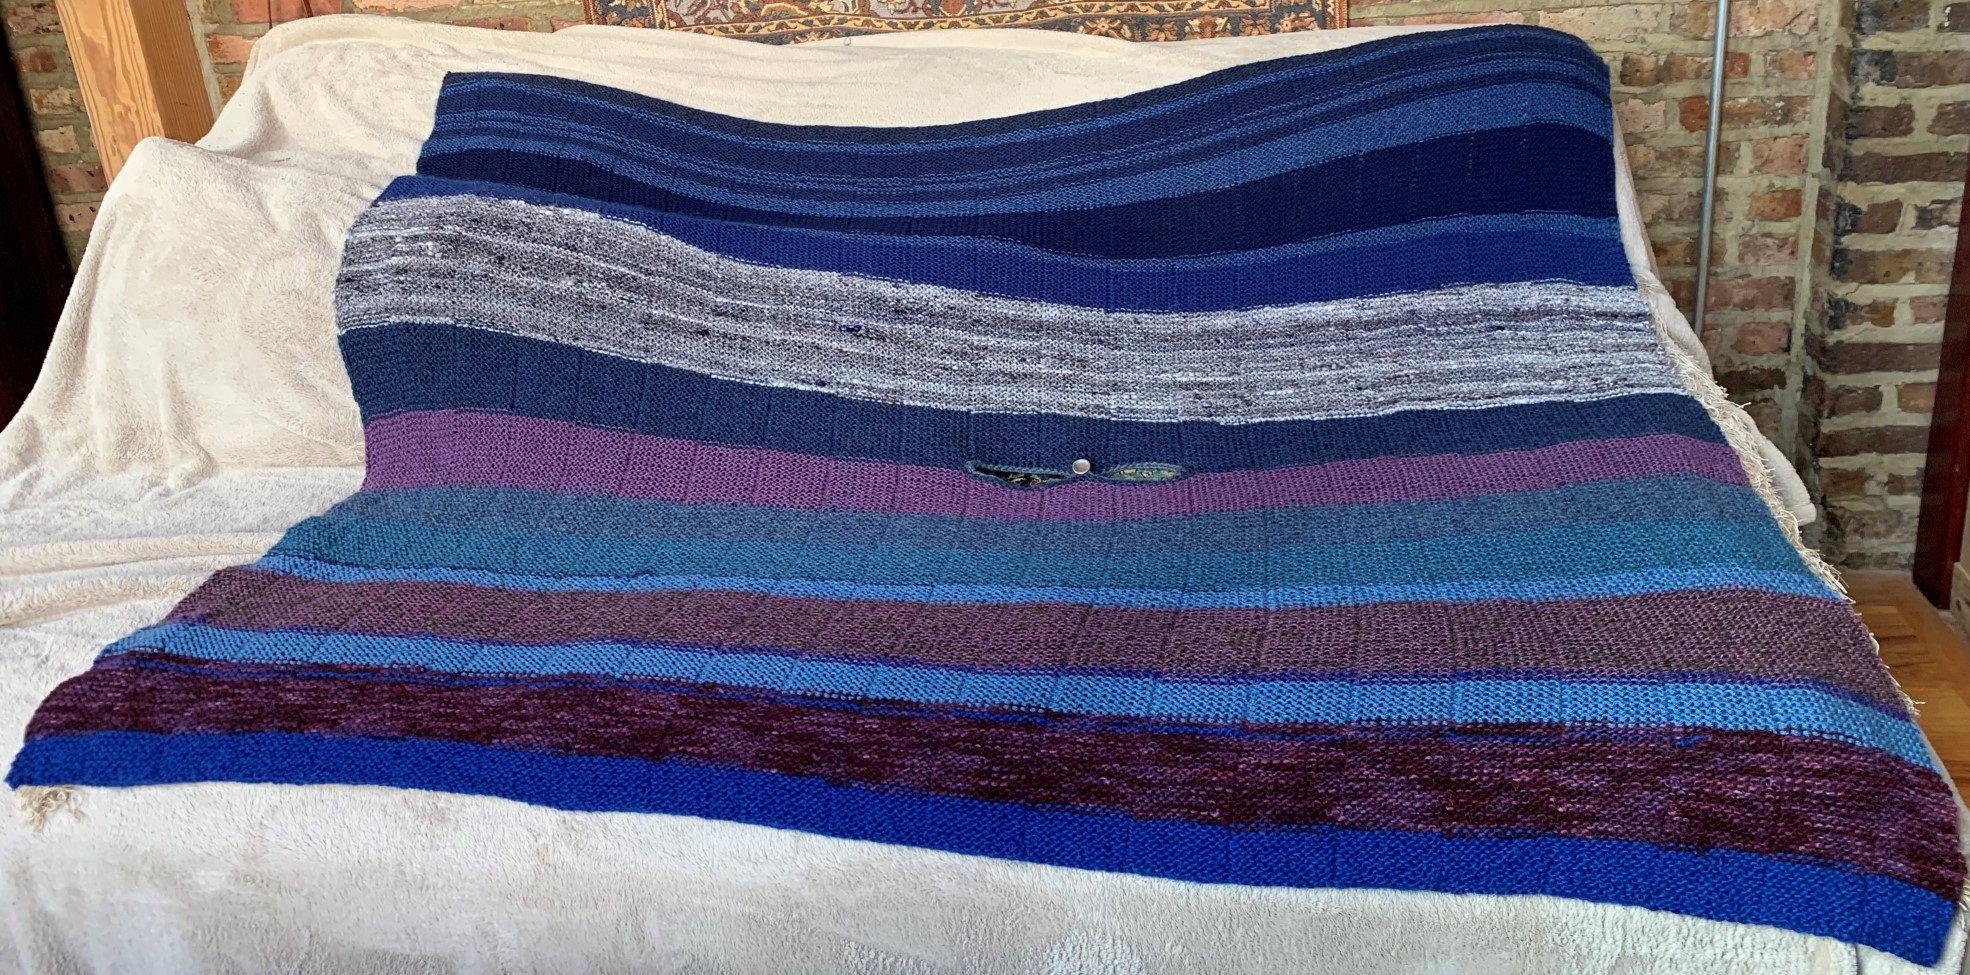
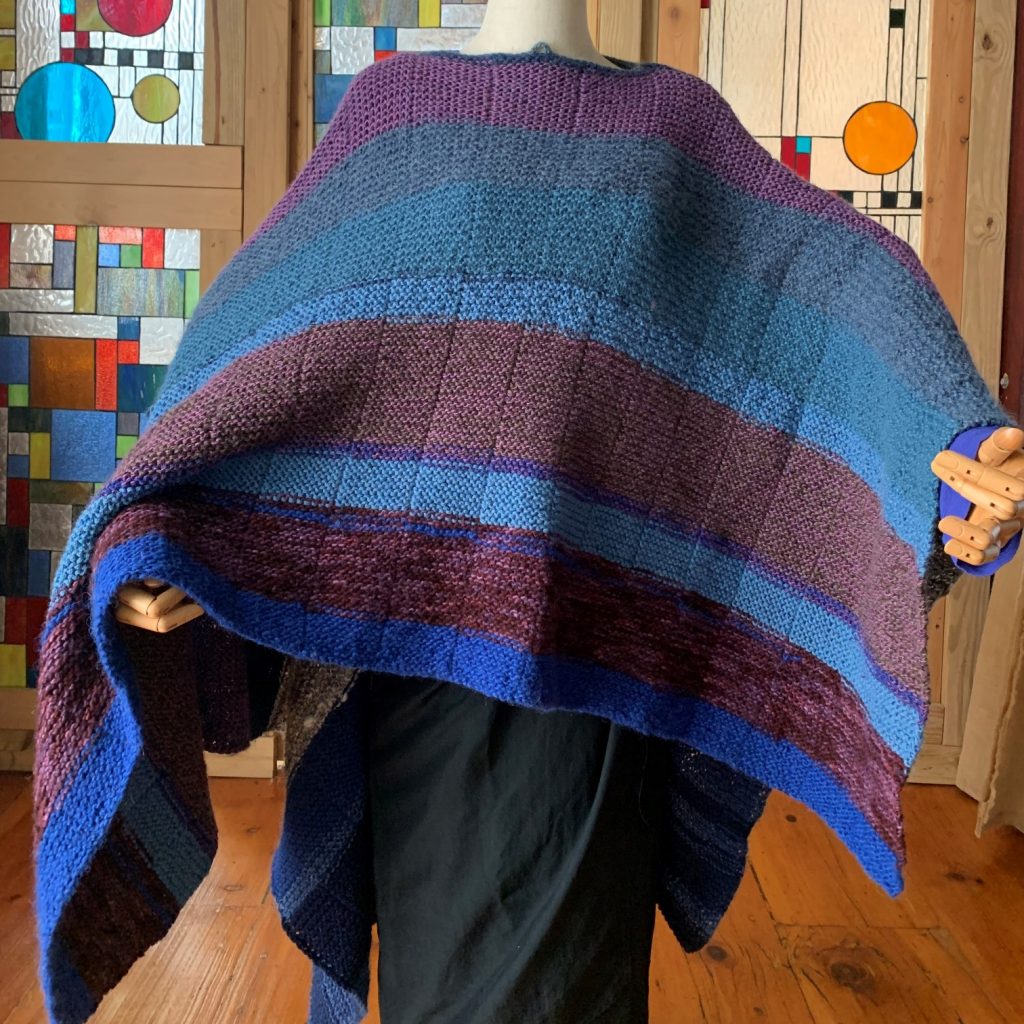
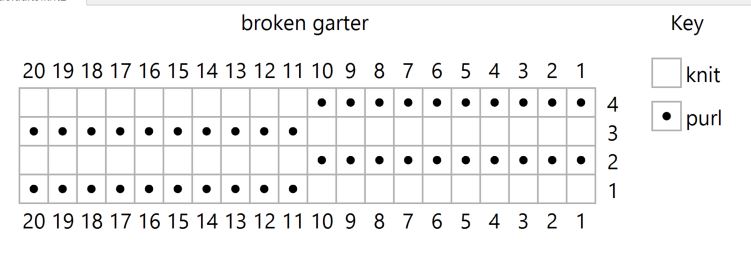
In terms of how to handle different color/volume/weight variations, I opted for a series of random stripes with one riff-ruff yarn after another. I transitioned from one to the next whenever a yarn ran out. I knew I wanted it to be reversible, so decided on a variation of garter stitches in this case. I also liked somewhat gradual color transitions in garter stitches. Because knitting the entire piece in simple garter stitches would be too monotonous, I decided on a broken garter stitch. It simply means interchanging knit and purl after a certain # of stitches (in this case every 10 stitches). It’s a very simple pattern, and yet added an interesting texture to the piece.
How to get started
I think the best way to figure out the yarn/color sequence is to line them up and see which color combinations you like most. Most people have natural affinity to certain types of hues (in my case, jewel colors), and you can go with more natural transition of ombre or contrasting colors. In this case, it was clear I cannot carry through one type of color palette throughout for the size of blanket. So I sort of grouped blue/gray hues on one side and blue/brown/pink hues on the other side. Because not all yarns were on the same/similar weight, some parts are in two yarns mixed together. Writing this way makes it sound more planned than it actually was. In reality it was quite random, especially because I was knitting this a little bit at a time in spare time.
From blanked to oversized poncho
It didn’t start out as poncho, and about one-third of the way, I decided to create a “hole” in the middle so that I could wear it as a poncho if I wanted to. There likely are more sophisticated ways of creating an opening for a piece like this. Here all I did was, when I reached the length I wanted, to BO the number of stitches for the width of opening, and in knitting the next row, at the same spot, to CO (via backward loop) the same # of stitches and carried on. The opening here happens to be in the middle, but you can certainly change the location depending on how you would wat to wear it.
Then, because I did not want to have a big hole when I used as a blanket, I added a button and a loop to loosely close the opening.

Skinny one-row scarf
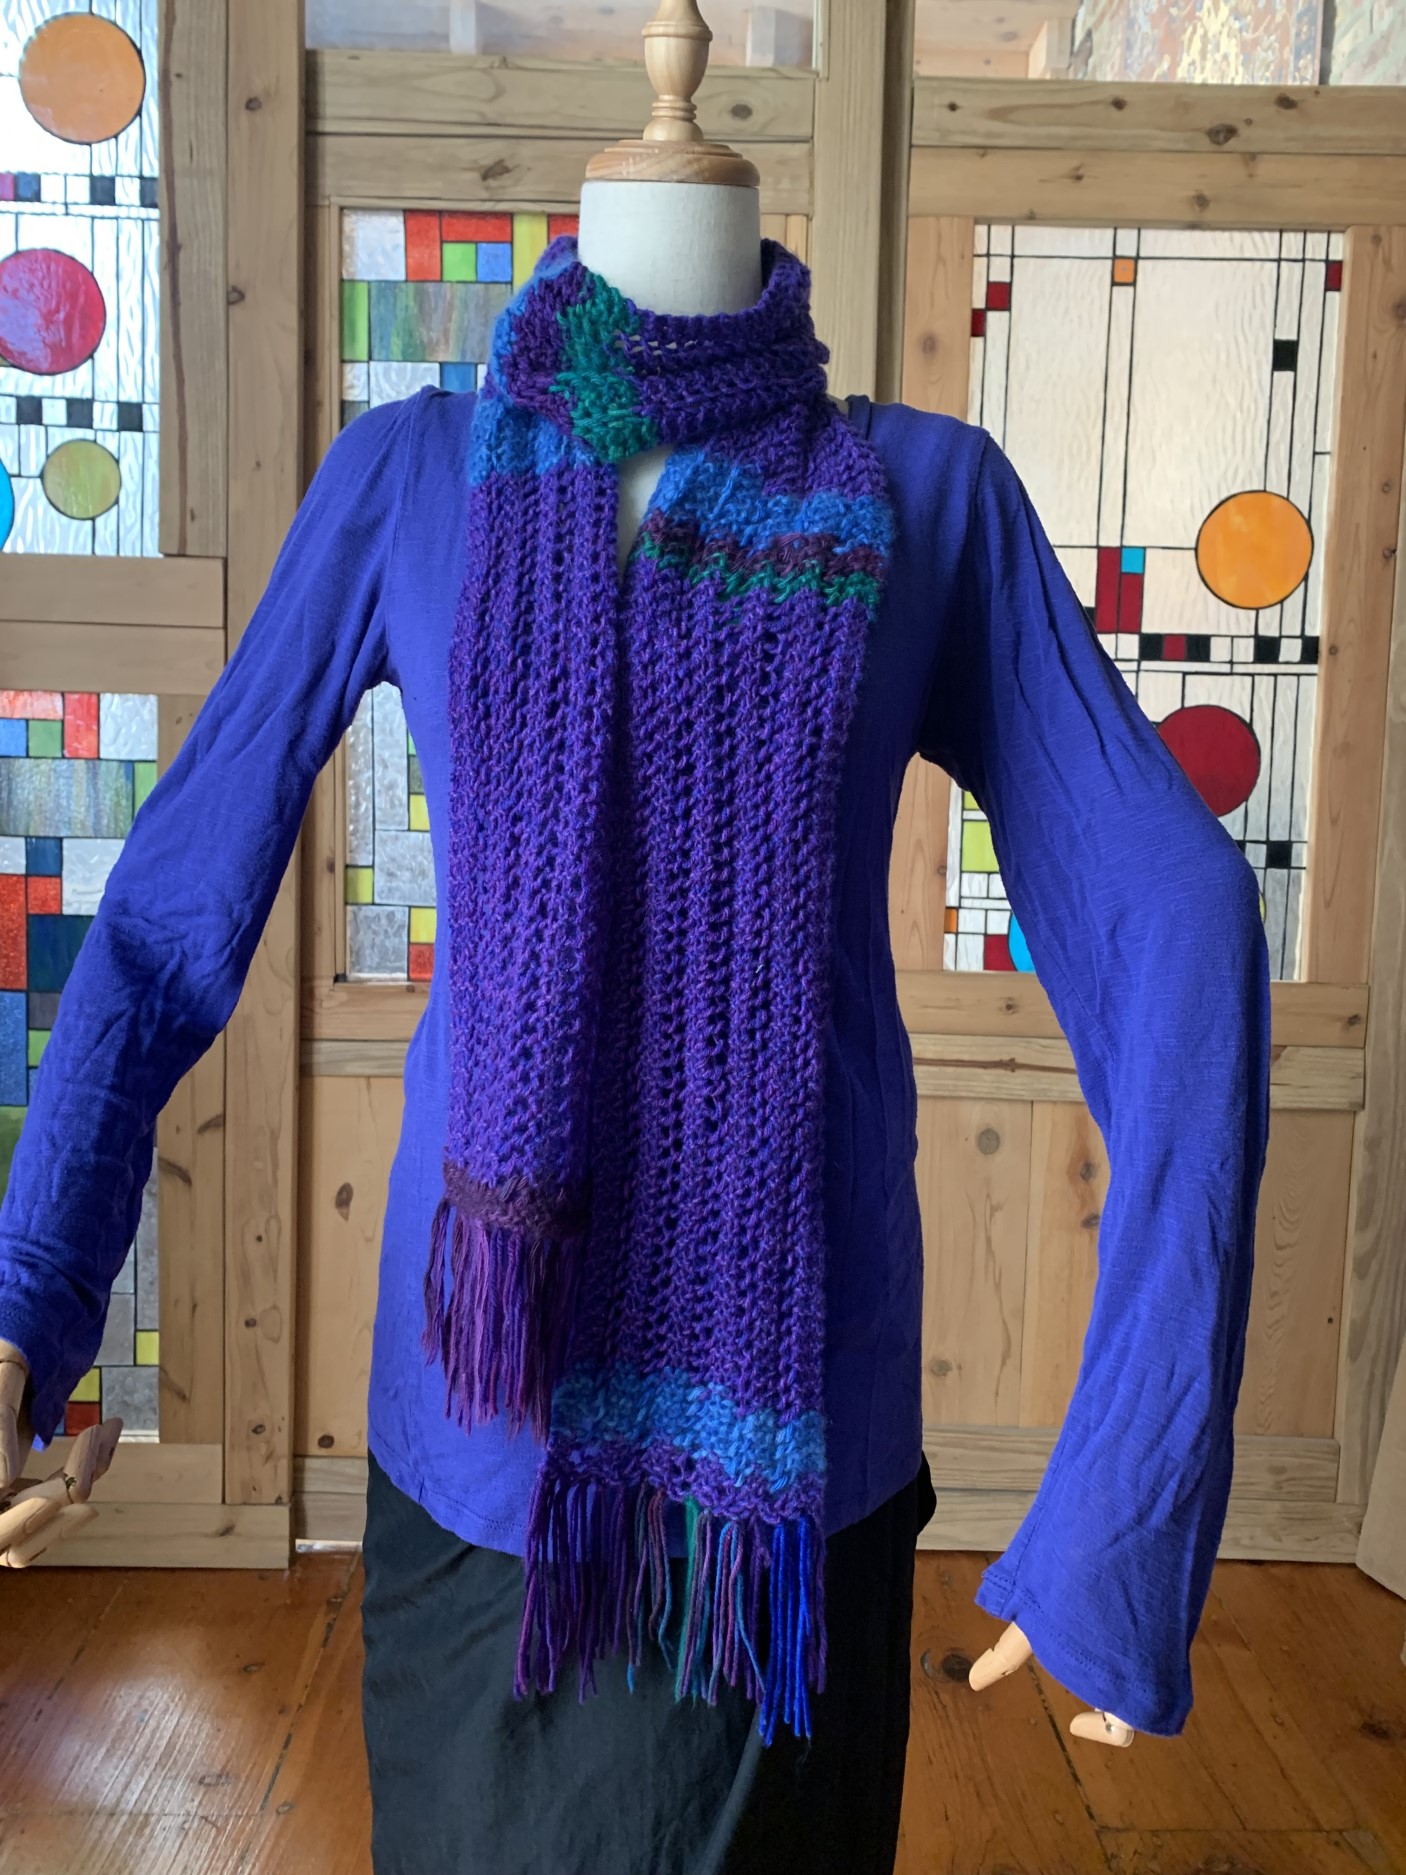
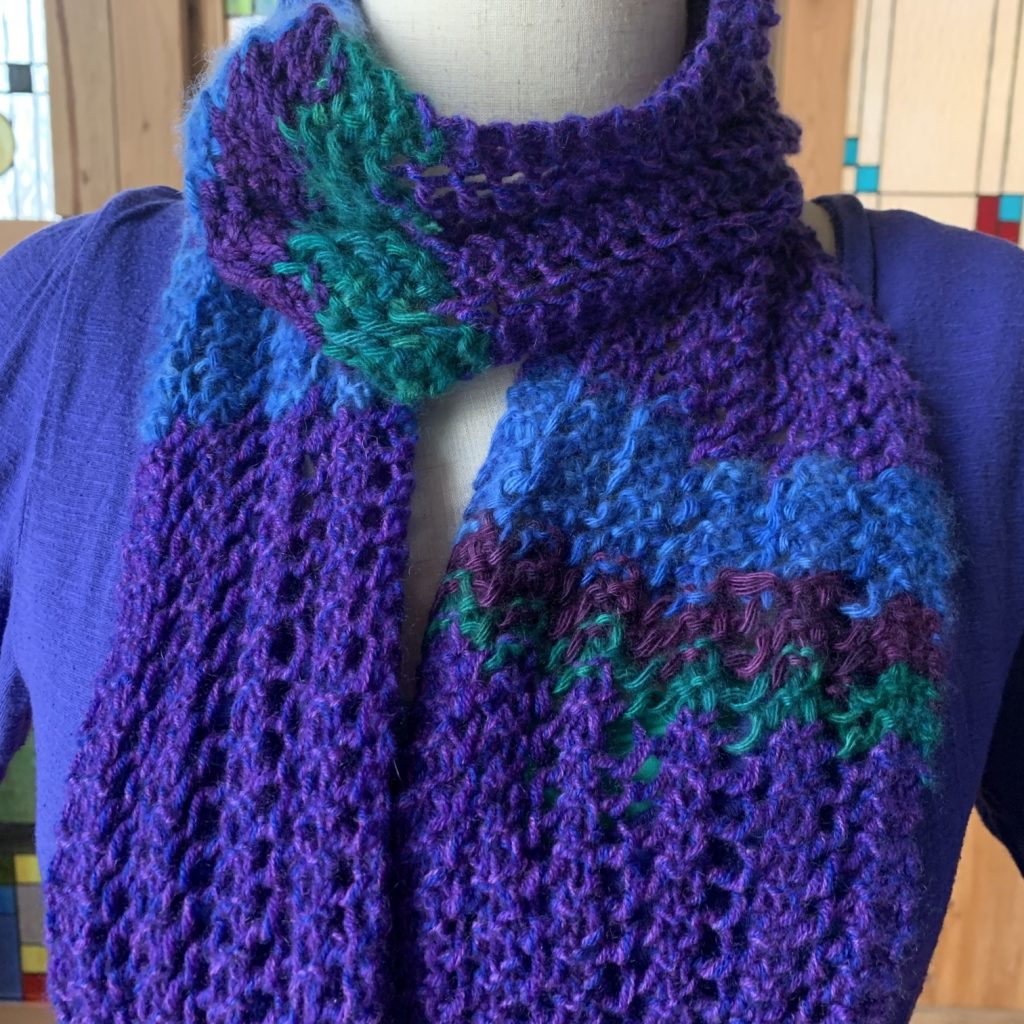
Apart from the large blanket poncho piece, there’s a much speedier way to use up small amounts of left-over yarns in a skinny one-row scarf. I had a one ball (50g) of the yarn I’d ordered as a sample and ended up not liking for the project at the time. Even though I liked the texture & color of the yarn, it sat at the bottom of the basket for a long time. Then I had 3 different kinds of multiple riff-ruff yarns in the similar texture & weight from other projects, and decided to bring them together. When you have a variety of small volume of yarns to work with, a skinny one-row scarf can be a good solution. It’s light and airy, so can be worn three seasons, and it can make a nice gift. The pattern is the same as what I used in the “easy breezy hooded lace tunic” and I owe the original pattern idea to Turvid’s Give Me a Purl blog. You can just mix in other colors whenever you want and finish it up when you run out of the yarn. I opted for fringes, and this piece works without them as well. I’m not a proper knitter and hate weaving the ends, so I just tied yarns very tight and snipped the ends very short.
Instructions – blanket poncho
Yarn – a collections of left-over yarns. In this case, mostly worsted, and some are sock yarns combined in two strands.
Needle – US#8 longest circular needle to make it easier. I used 48″
Size – really up to you! This one is 64 x 62
Gage – doesn’t really matter. For reference, this one is 13 x 24
Once you’ve lined up yarns, for 10-st broken garter pattern:
- CO loosely in multiples of 10 sts, in this case 210 sts.
- Start broken garter sts, i.e., [k10, p10] until the last 10 sts, then finish the row with k10.
- When one working yarn runs out, move on to next.
- Repeat the pattern until you reach the desired length.
- To make this as a poncho, first decide the size of neck opening. This one is about 9″ or 30 sts. Once you get to the row you want to create the opening (in this case, about halfway through of the total length, or around 31″), loosely BO the sts for opening and on the “return” or wrong side, at the same spot, CO the same # of sts. I used backward loop CO. Then continue knitting. In trimming the opening, I used a single crochet sts.
- Weave the ends, finish, and enjoy the warmth of big blanket and poncho!
Instructions – skinny one-row scarf
Yarn – a collections of left-over yarns. In this case, one almost full ball (50g) of cashmere worsted yarn + 3 different colors of cashmere worsted yarns in bits & pieces.
Needle – US#7
Size – 5.5″ x 70″ (without fringes); each fringe is about 4″ long.
Gage – doesn’t really matter. For reference, this one is 18 x 20
Once you’ve lined up yarns, start the 24-sts one-row pattern:
- CO loosely in multiples of 4 sts, in this case, 24.
- R1 & R2 – k throughout, i.e., one set of garter sts.
- Start pattern st on every row – k4, [yo, k2tog, k2] until the end of the row.
- When one working yarn runs out, mix in additional colors for stripes.
- Finish whenever your yarns ran out, and the piece reached the desired length.
- Enjoy soft and airy warmth around your neck!


Leave A Comment