Totally reversible and squishy 2-color brioche cardigan coat
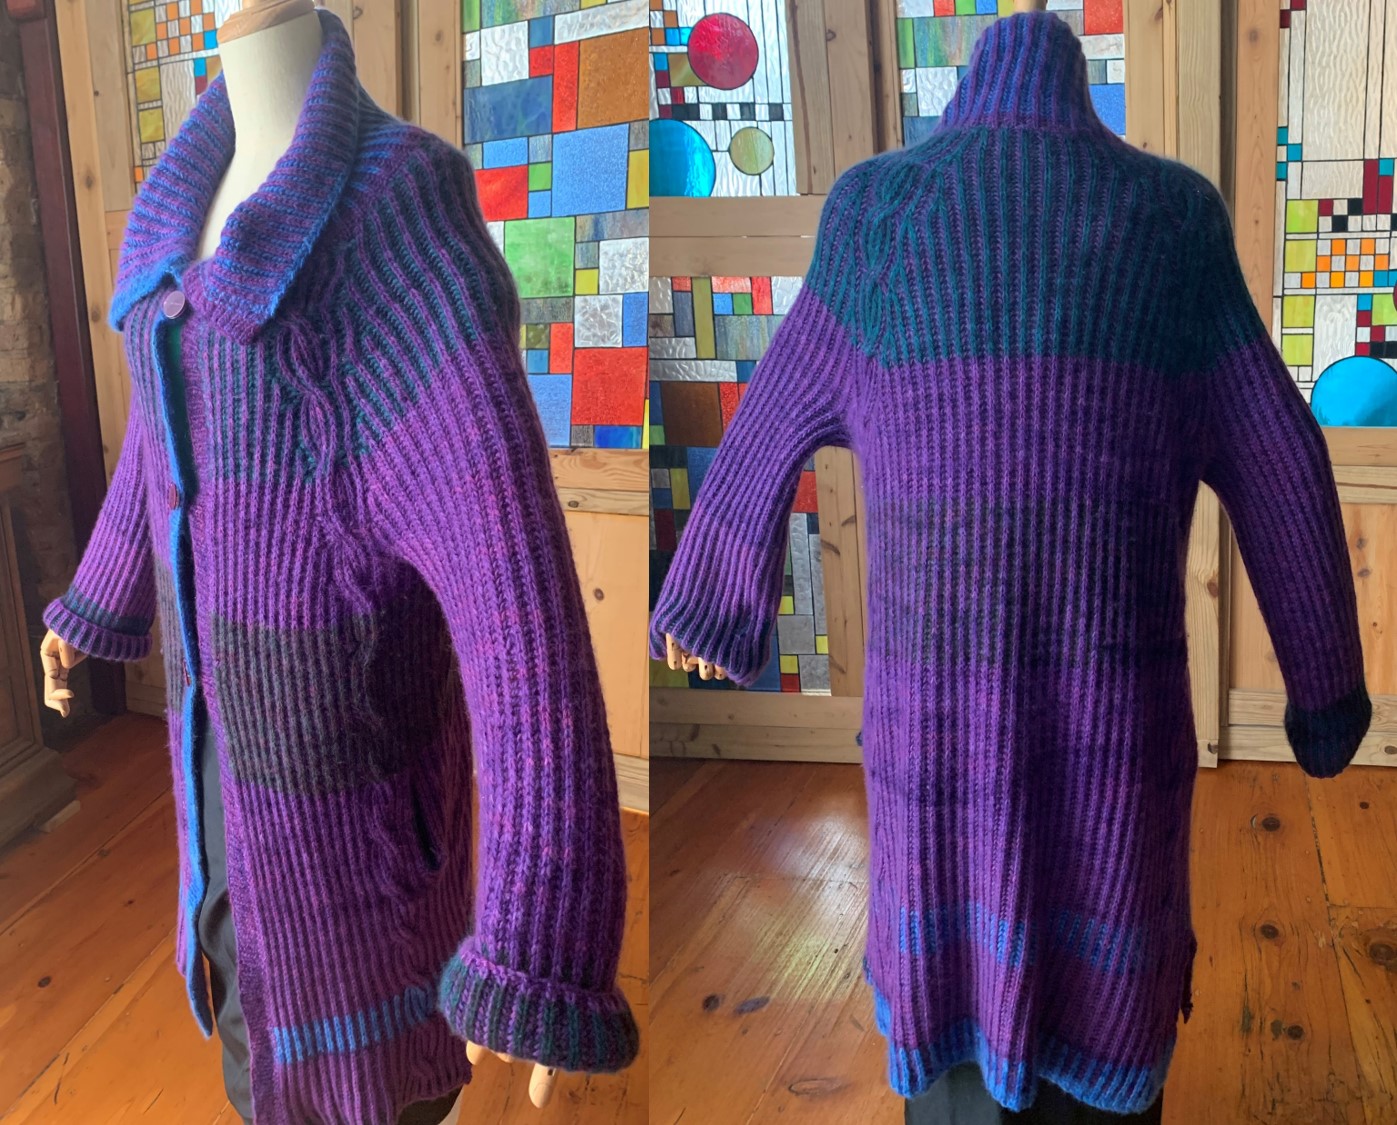
I’ve had softest worsted cashmere yarns (Artyarns Cashemere 5) in my favorite “Violetas” (a subtle tonal of plum to iris) forever and had wanted to knit something I’d want to wear all the time. They are one of my go-to lux yarns as you see in the knitting page. I also had one skein each of the same yarn in a few different colors (as sample yarns for a different project), and wanted to incorporate them in the project. As much as I like the Violetas color, I found, in large mass, it comes across over-saturated and overwhelming to the eye.
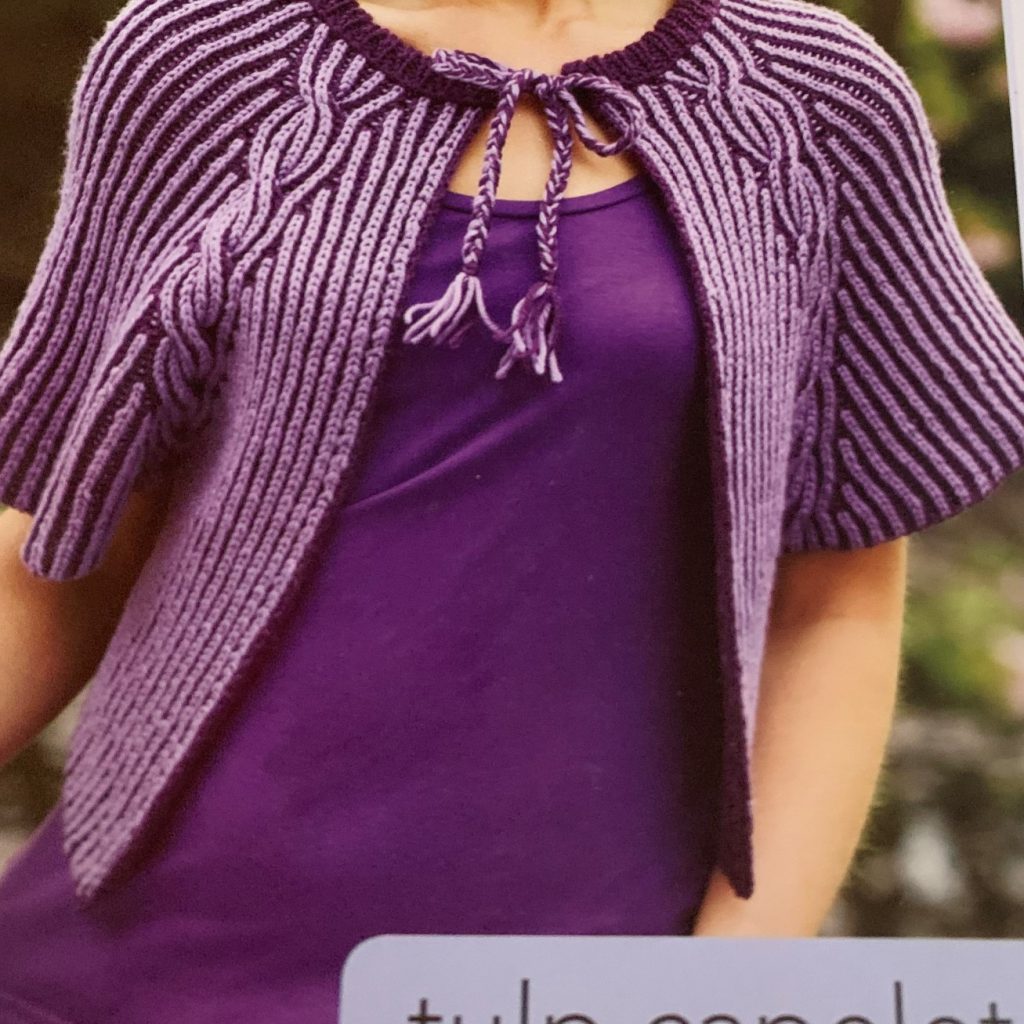
So, after a few back/forth, I decided to knit a stretchy and squishy oversized cardigan and incorporate additional colors as 2-color brioche stitch here and there. I had wanted to knit a brioche cardigan, and yet found it a bit monotonous and boring if it’s all in one color. I also wasn’t sure how to handle raglan seams/dividers in brioche stitches. Then I came across this “Tulp Capelet” pattern in great Nancy Marchant’s Knitting Brioche book and thought it can be adapted as a long cardigan. It also is in top-down raglan, so it was absolutely perfect. As usual, I wasn’t sure about the length my yarns would make it.
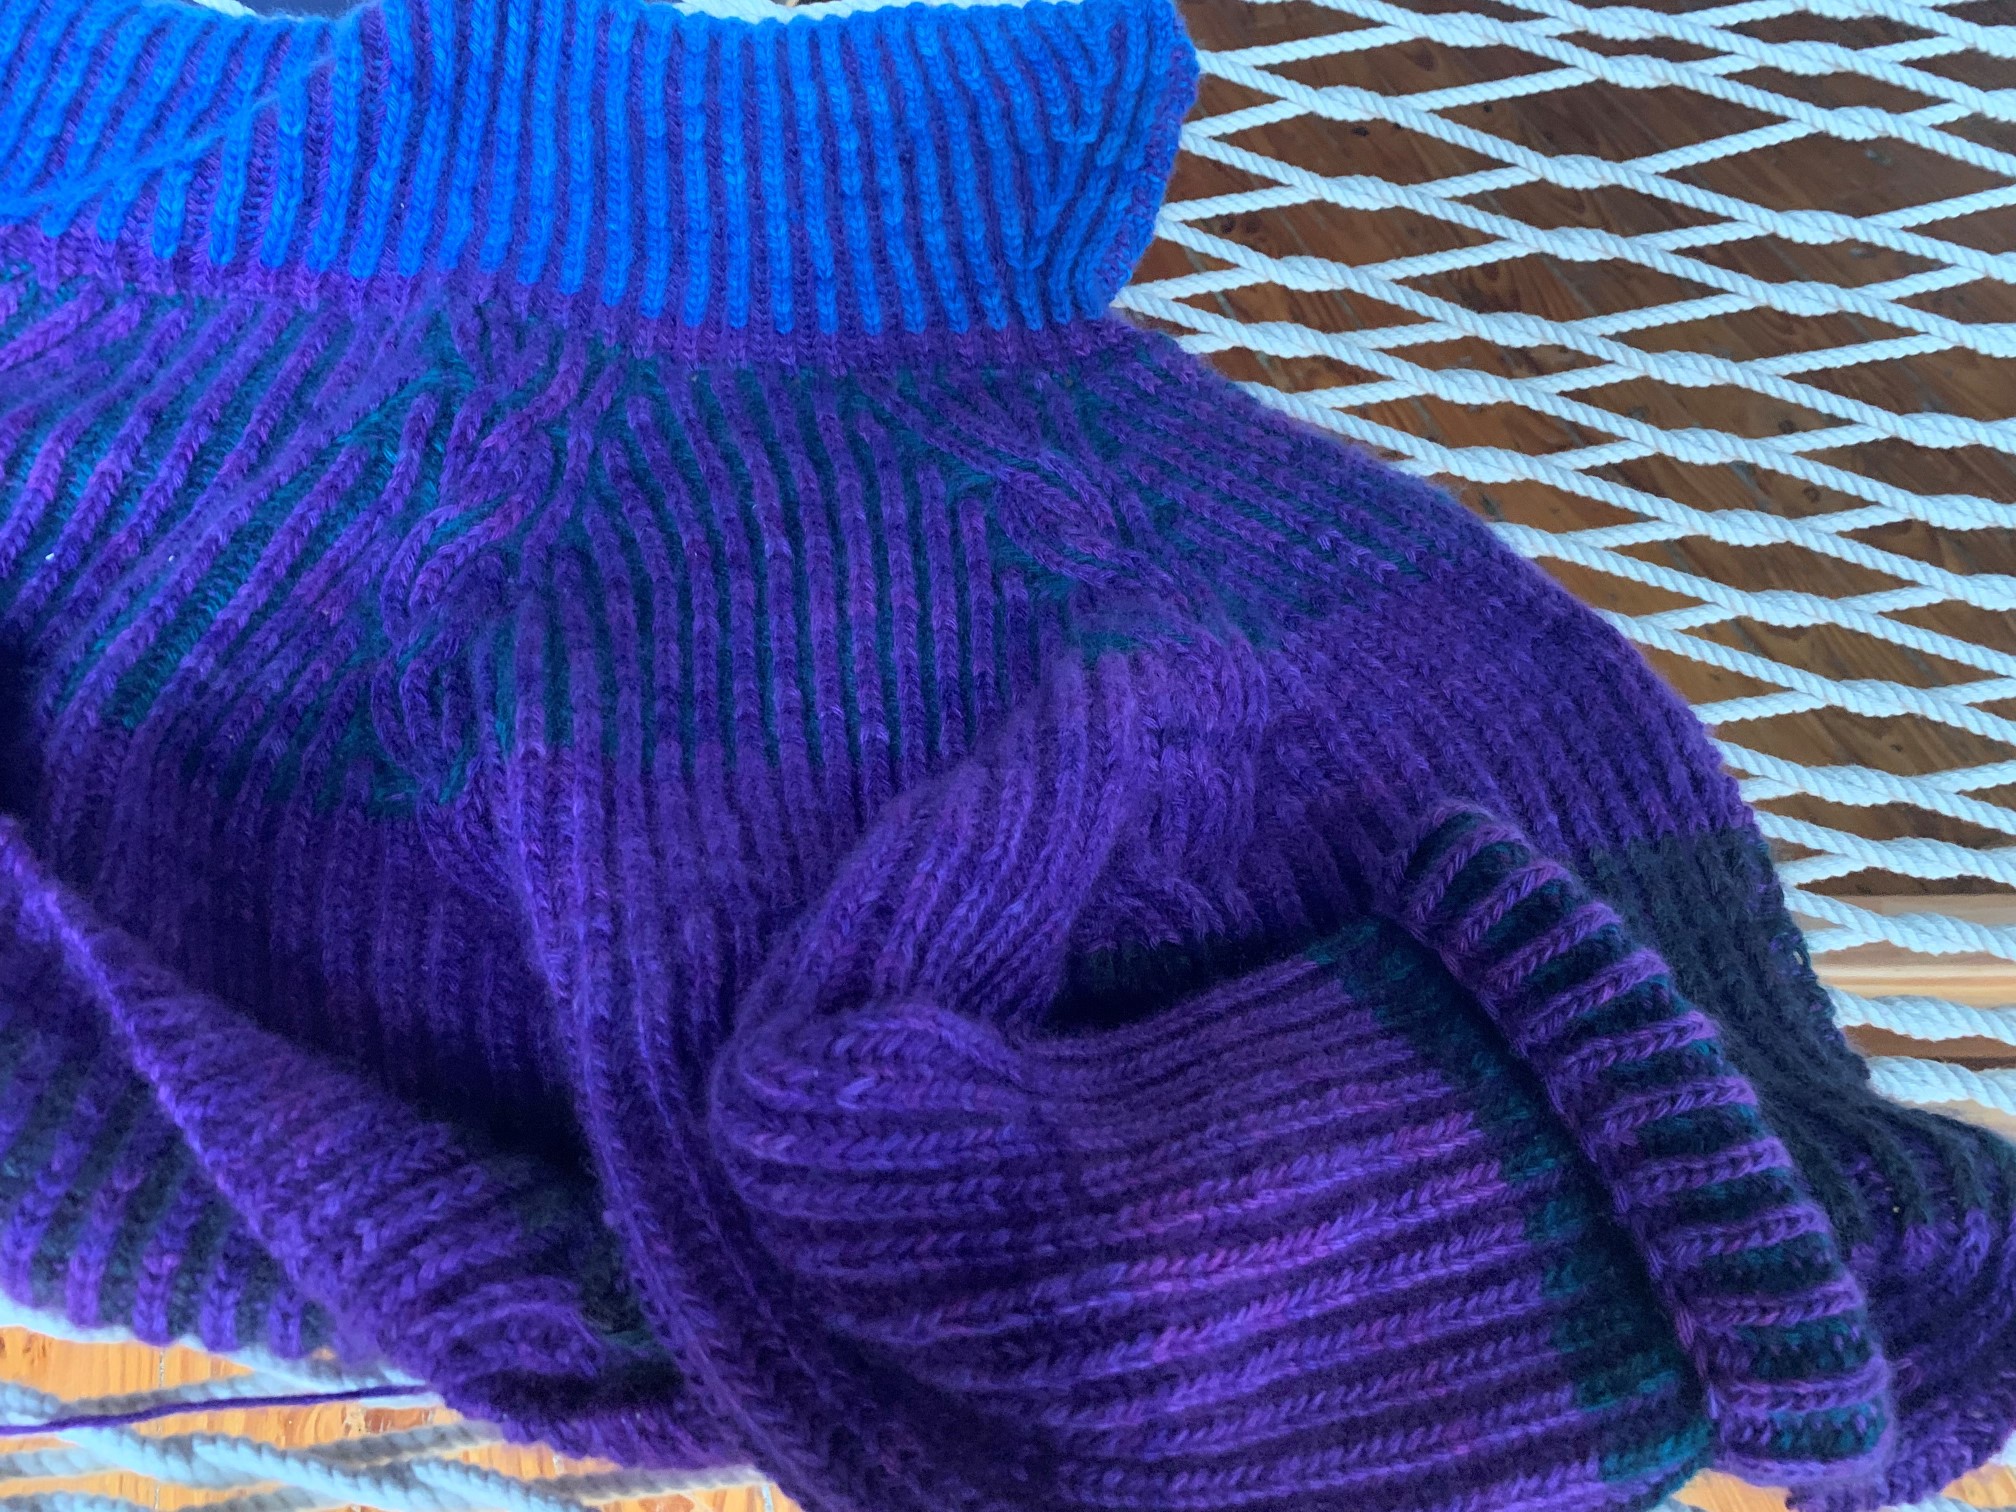
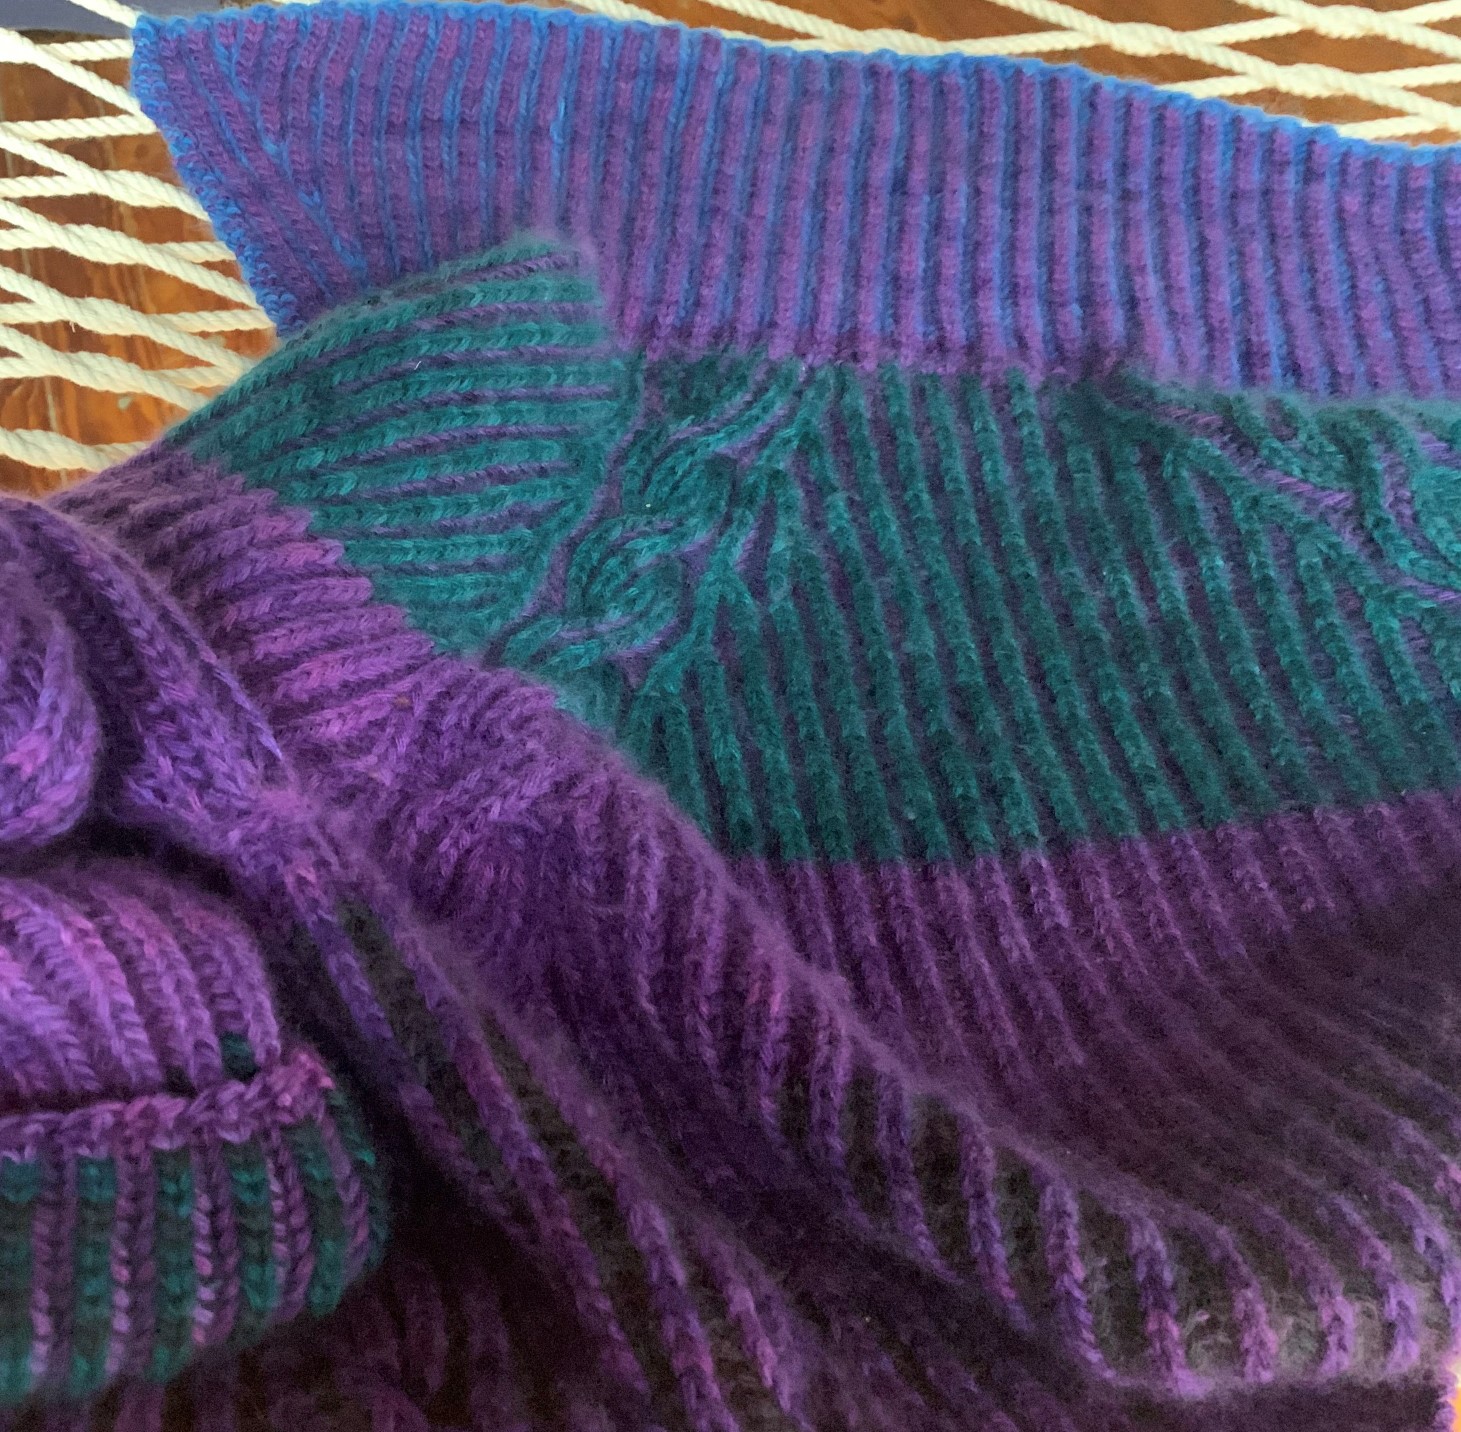
(2-color) brioche stitches are tricky and confusing
I’m not a skilled nor experienced knitter (intermediate at best), so I found two-color brioche stitches highly confusing. So a few suggestions:
- If you have not tried two-color brioche before, or even after you’ve created a few simple pieces, I found it’s helpful to have good pictorial instructions handy. There are many excellent tutorials on two-color brioche with accompanying videos. I found this from 10 rows a day with detailed, pictorial instructions in addition to a video very helpful. And of course, Nancy Marchant’s Brioche Stitch website is helpful for brioche overall.
- Before diving into a cardigan like this, if you haven’t yet, you may want to try something simple to knit using yarns at hand, like this scarf from Purl Soho. It’s easy to adjust the gage depending on the yarn weight and color varieties you are using.
- Because it’s difficult to fix mistakes on two-color brioche stitches, I recommend you confirm stitch count after every increase. That’s one of the reasons I included the chart below with stitch counts and knitting directions. Purl Soho also has a helpful tutorial on the basics for two-color brioche stitches, including how to fix mistakes.
What to keep in mind to make two-color brioche in flat less confusing (for me)
- In essence, it’s an act of bringing two different yarns together to create a harmonious piece of double-sided knitted surface.
- DS/LC followed by LS/DC are brp or p rows while LS/LC followed by DS/DC are brk or k rows.
- You can tell which color should be the working yarn by looking at solo yarn sts – the other color is your working yarn for the row.
- Slyo means simply picking up solo yarn sts by inserting a needle purlwise and wrapping/hugging them with other color/working yarn to make the sts from solo to double yarn and set up for brp or brk sts in the next row.
- If solo yarn sts are knit sts, then it’s a brp row; if they are purl sts, then it’s a brk row.
- You turn at the end of the row when the two yarns come together and switch to another working yarn. Conversely, if your row ends with a single working yarn, slide to the other side of the needle for the next row.
Mixing two-color and one-color brioche sts
Depending on the lengths of yarns you have, you make the entire cardigan one-color, two-color, or like in this piece, mix in secondary colors and go back & forth between two-color and one-color brioche sts. In that case, I kept working with two yarns even during the one-color brioche part. This allowed me to easily mix in & out the secondary color(s) as well as occasionally switch primary and secondary colors, not to mention minimizing confusion, which happened to me a lot!
Practicing brioche cables and options for straight (not cable) raglan seams
While I liked the look of brioche cables as raglan seams/dividers, the technique is prone to generate mistakes and it will definitely slow you down. So, before using the “real” yarns, I tried out the neck and beginning part of the yoke up to the 2nd cables using waste yarns twice while making numerous mistakes and unravelling/repeating sitches along the way. I’m not a cautious knitter, and usually dive into it and fix mistakes as I go along, so it’s highly unusual for me, but in this case, it was necessary and prove to be very helpful.
Or, if you’d like, you can just use regular straight seams, perhaps 1 or 2 lines of brioche columns on either side. If you would like more details, this free pattern from Yarnspirations may help. I could not find other free patterns, so this one is a sweater pattern, but nonetheless, I think this is helpful, including giving you detailed instructions of 2-color brioche stitches.
I owe the foundational mechanics of this pattern to Nancy Marchant. From her Capelet pattern, I extended the body, added full length sleeves and a collar as well as button holes (3 for the body and 2 for the collar). I added small vertical pockets, and that’s completely optional. I happen to like side pockets, but they may be more trouble than useful.
Admittedly, it took quite a while to complete. Nonetheless, it was a great fun mixing in additional colors and experimenting with it. In some parts, the iolettas is a dominant color whereas in other parts, it’s a secondary color. I like how it’s somewhat random, but some might think it’s a bit goofy/funky. If you have enough of both color yarns and like more consistent/streamlined look, you can definitely make this as a full 2-color brioche piece.
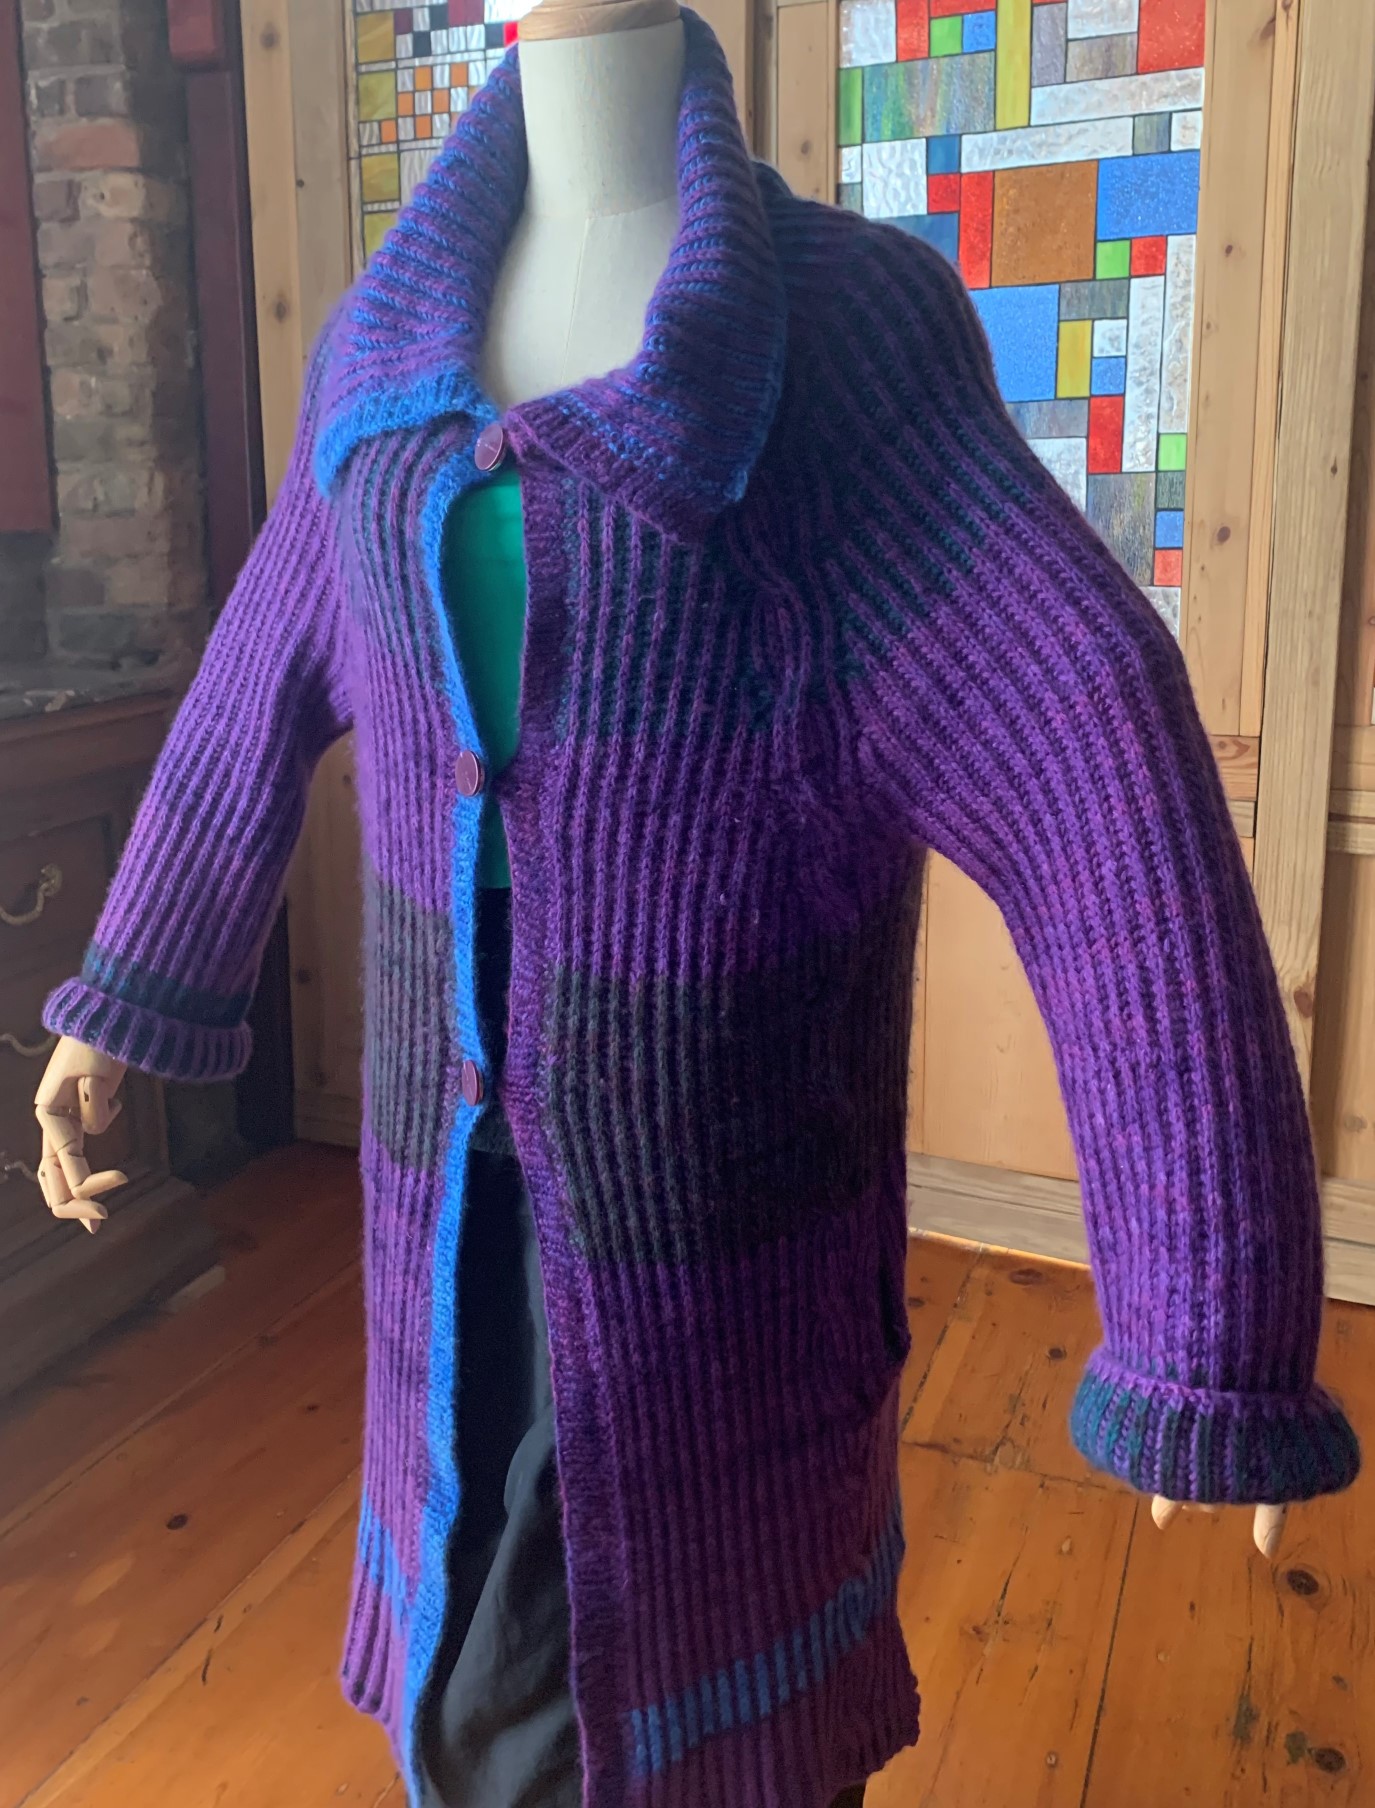
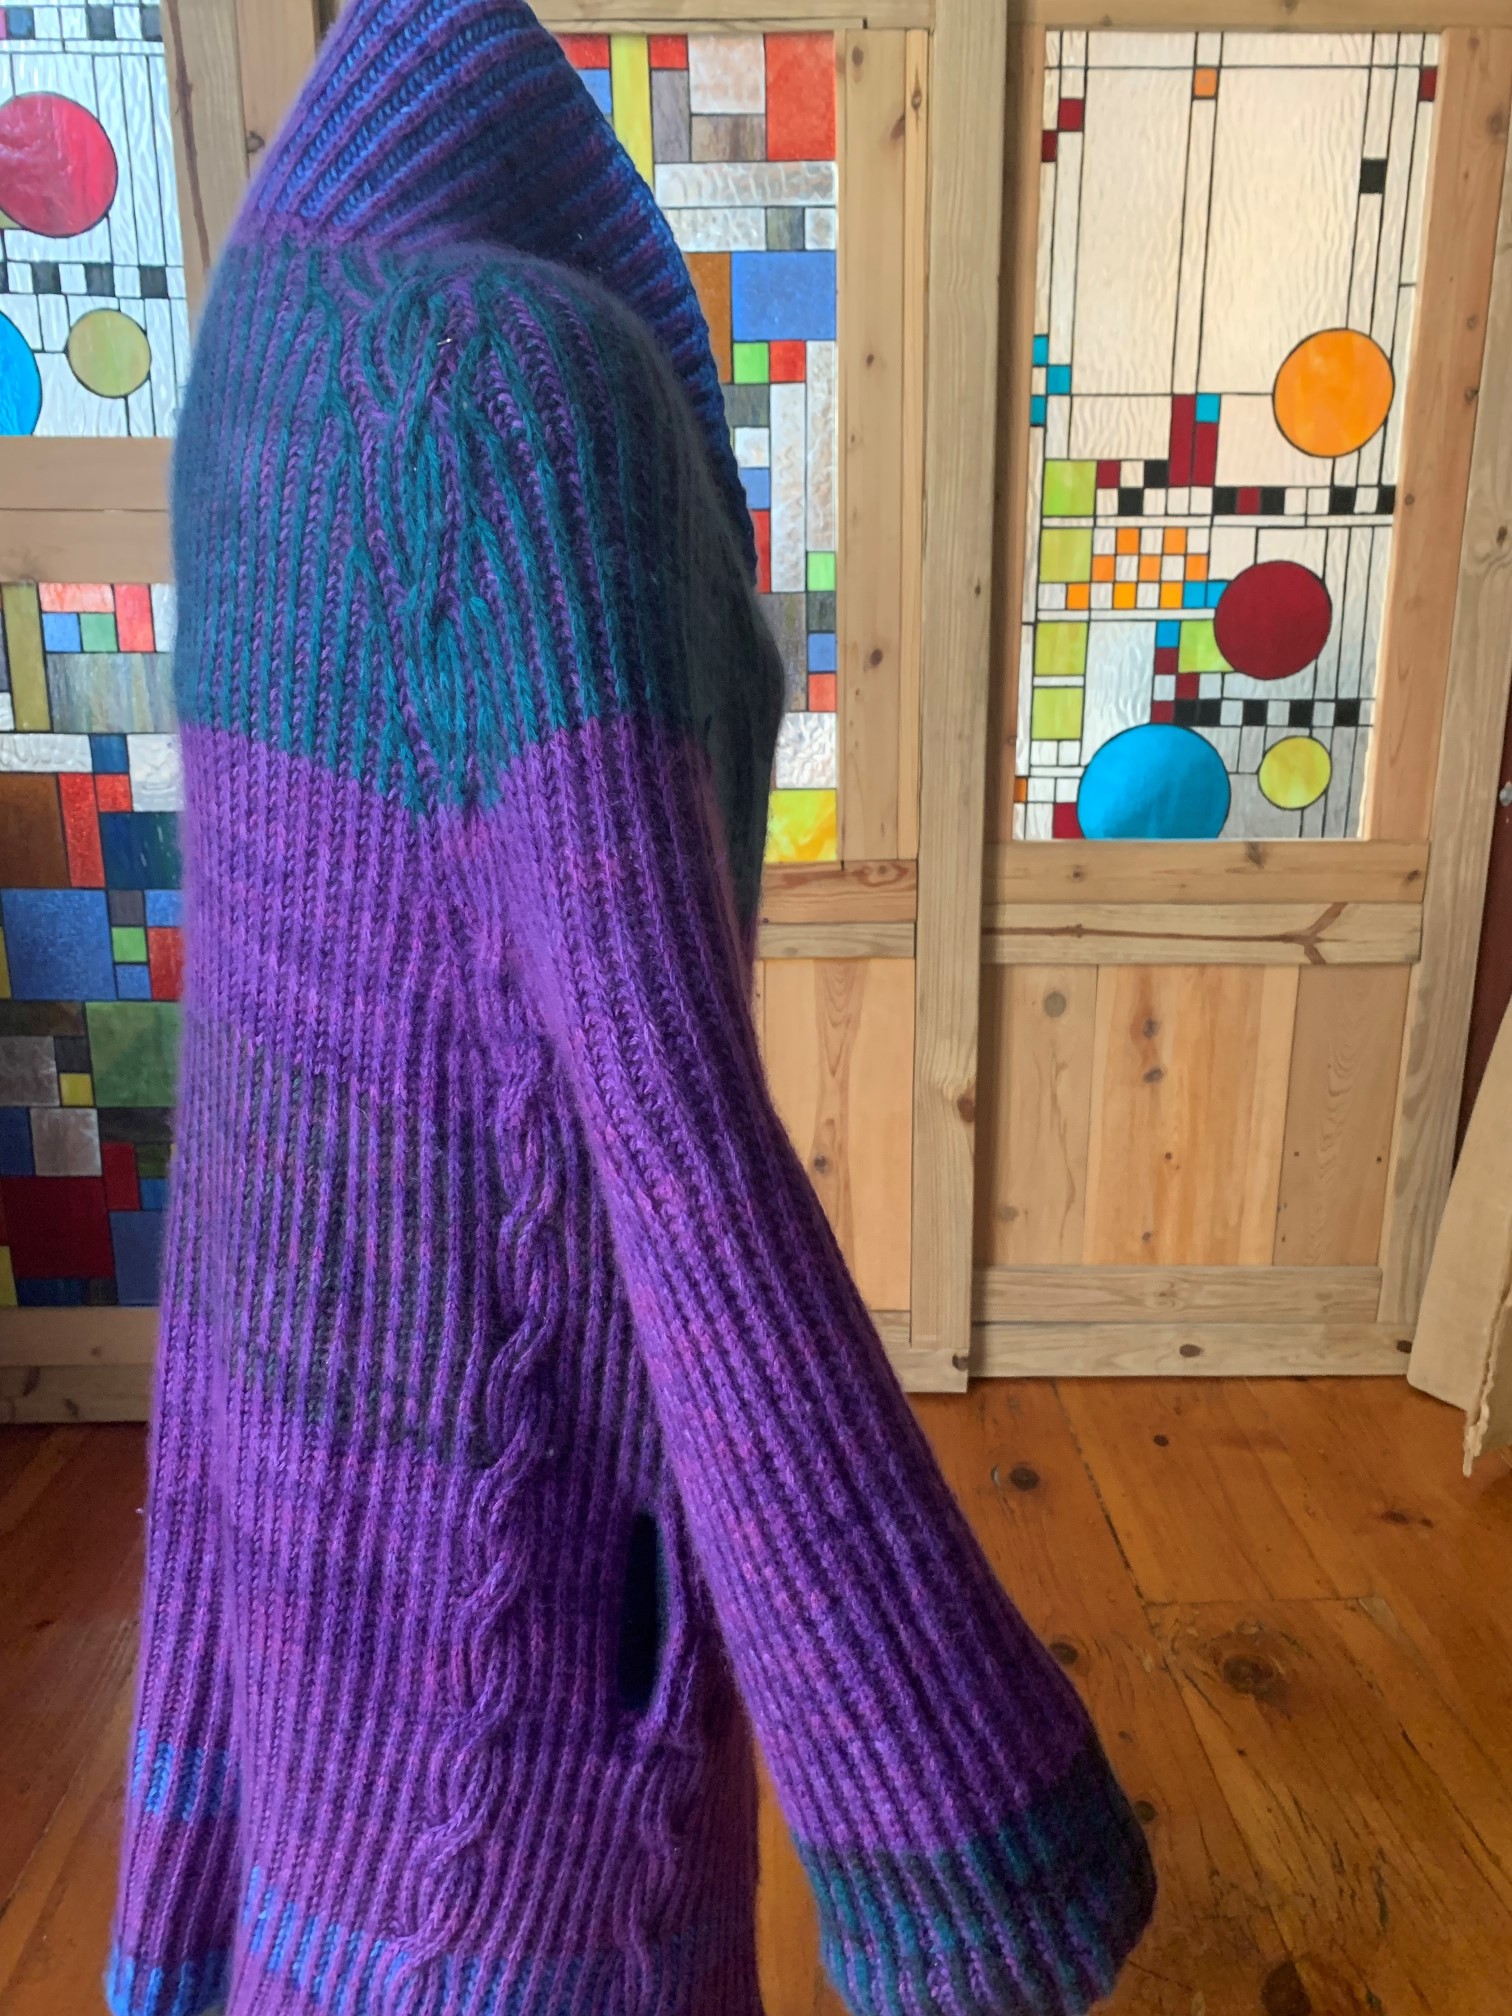
It’s designed to be loosely closable on the front – truth be told, it only has three buttons because that’s all I was able to muster up from a jacket I no longer wear. You could, of course, add more buttons. If you use smaller buttons, you probably don’t even need button holes. The buttons are loose because I wanted them to be usable on both sides.
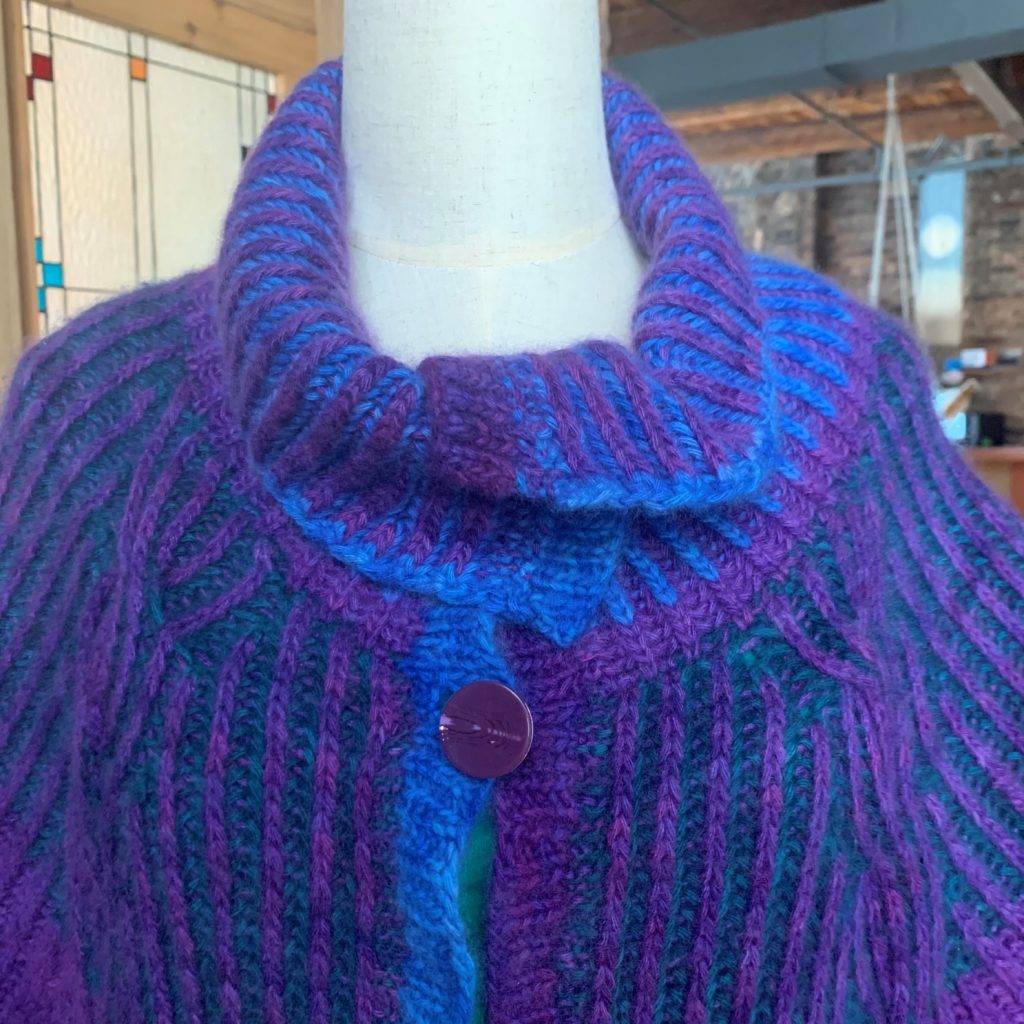
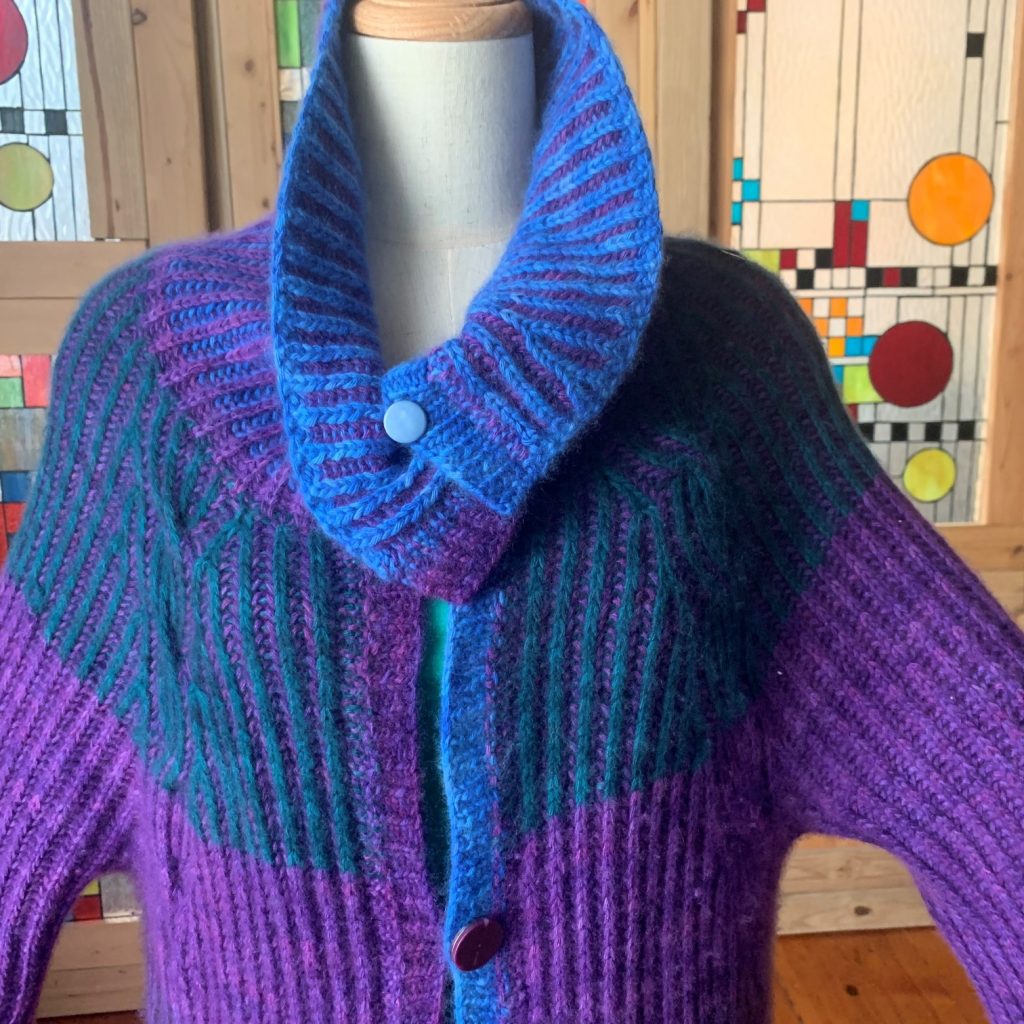
I also wanted to make the collar stand up a little when I want it, so added two smaller button holes & buttons.
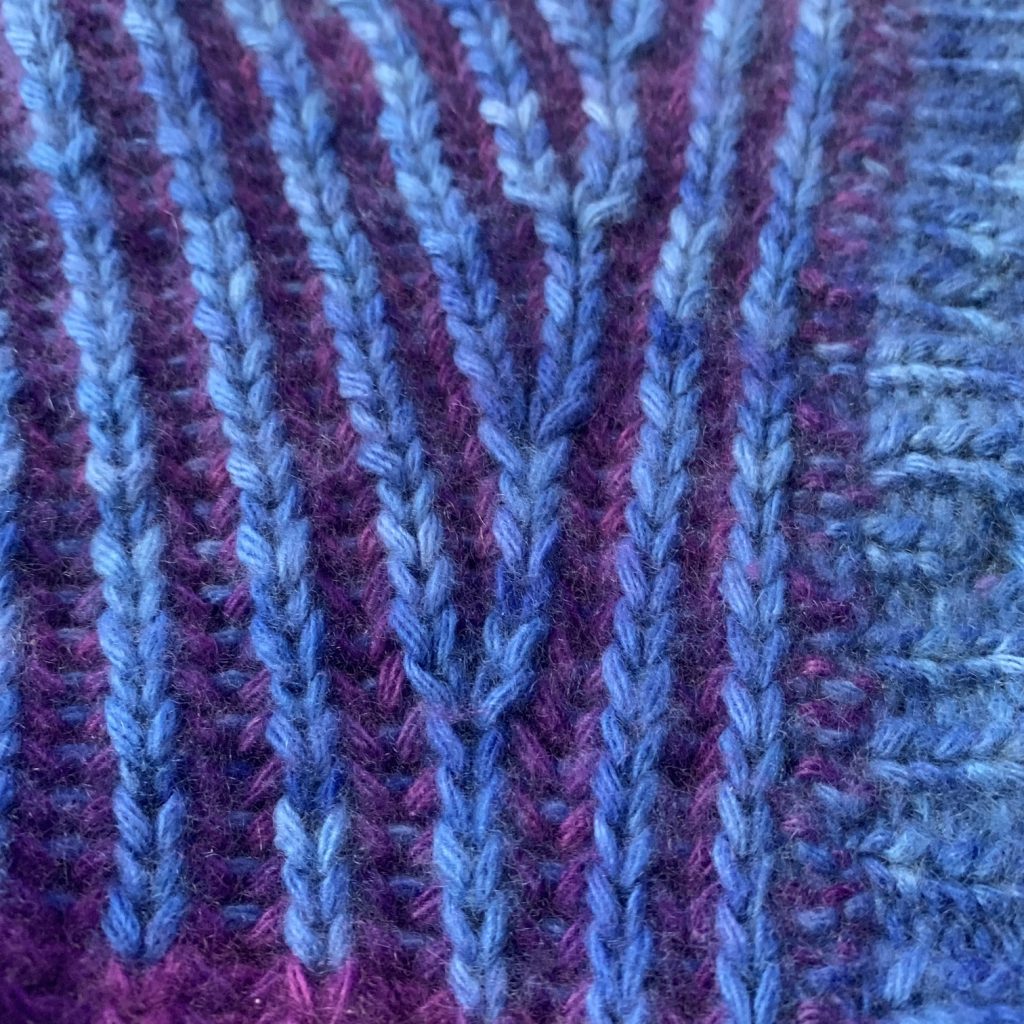
Instructions:
This piece is knit top down in brioche stitches, starting with raglan neck and yoke. Depending on your preference/yarn volume, you can keep the piece short or long. Once you’ve reached to the point of diving the body and sleeves, you can stop whenever you wish.
In terms of two-color or single color brioche, and what 2ndary color(s) you mix in is completely up to you. If you’d like details on how I did it, please feel free to contact me. I started out with two-color brioche, mixing the main color (Violetas) and Emeralds, then one-color using the main color, then 2-color with Emerald Purple, etc.
Explaining the 2-color brioche schematics in full details can be quite cumbersome and lengthy, so I opted for brief explanations by row below.
Brioche cables (C9R and C9L) – because of the number of sts and yarn volume you will be twisting, it’s easy to drop sts/yarn in C9R/L. I recommend you go slow and review front and back sides each time. I also realized that I sometimes swapped C9R and C9L after a few rows. I’m fine with mix-up, but that’s another reason to go slow and check.
Yarn
This is meant to be quite forgiving in terms of sizing. For a loose Small or tight Large piece, depending on how long you want the piece to be, you’d need about 1,800 yrds of worsted yarn. This example uses Artyans Cashmere 5 (50g/102 yrds): 14 skeins of H5 (Violetas) as the base/main lolor; 2 skeins of H35 (Wild Blue Yonder) for the collar and trim, 1 skein each of H23 (Emeralds for the Yoke) and E17 (Emerald Purple for spot stripe and pocket linings).
Materials and Gauge
For brioche, I opted for a smaller size needle. US #6 (4 mm) 36″ (for body) and 16” (for arms) circular needle.
cable needle (CN)
stitch markers (SM) and stitch holders or waste yarn.
Gauge is approx. 15 sts x 22 RS knit column rows (i.e., 44 working rows) in brioche stitch. With 2-color brioche, you are basically knitting one row twice.
Size and Construction
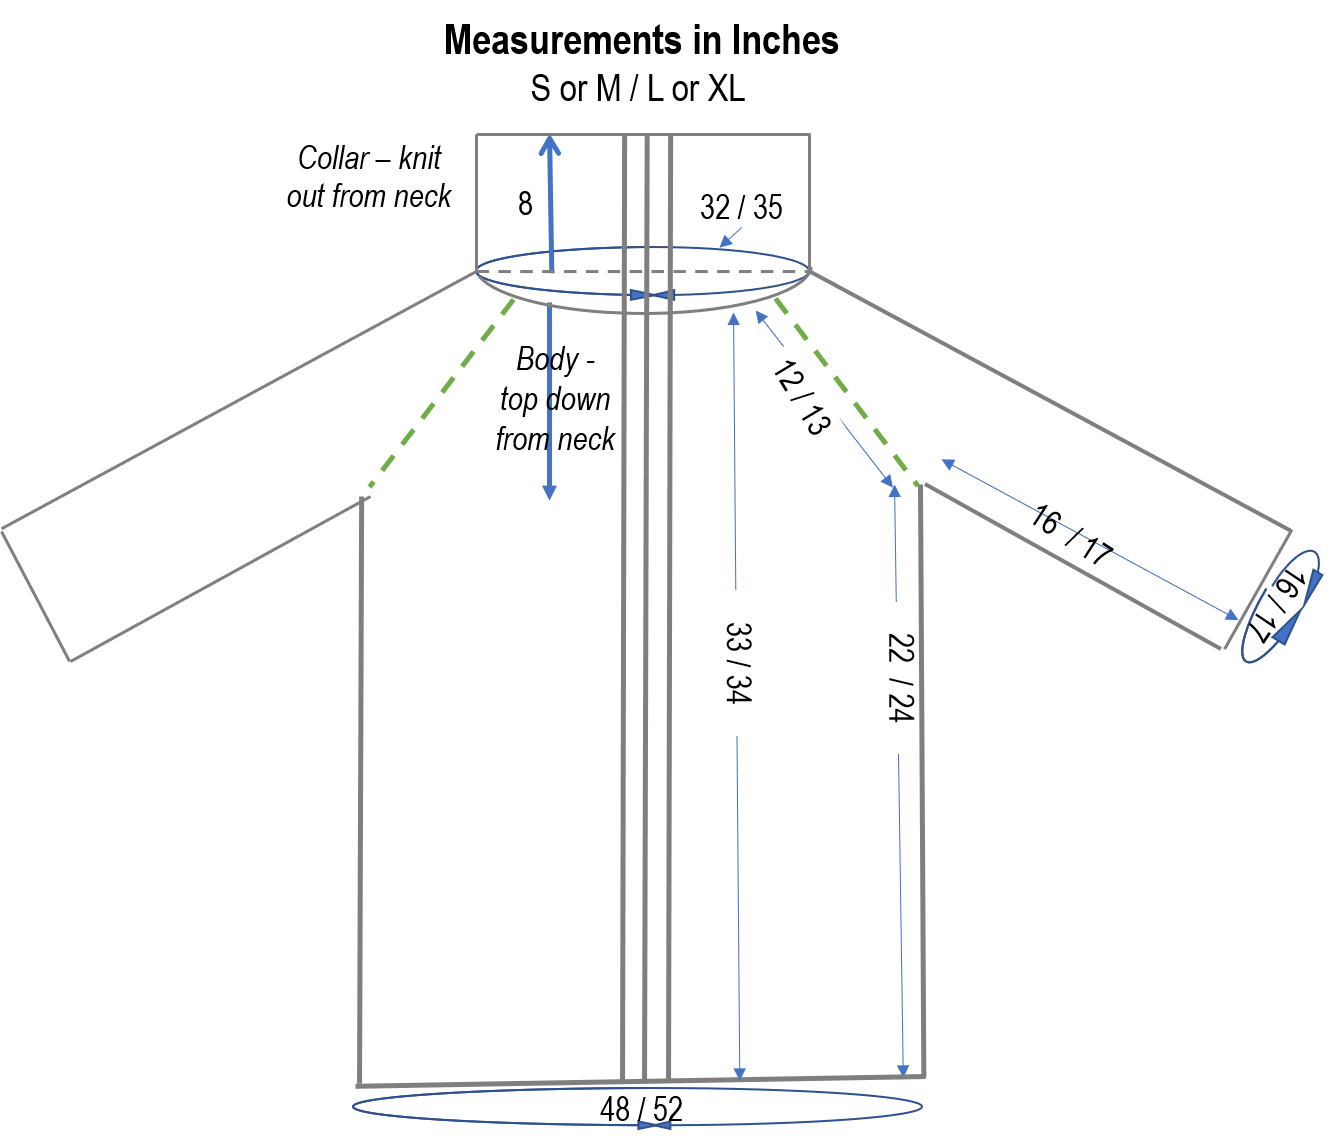
Approx. 48″ or 52″ width x 34″ or 35″ length in relaxed S/M or L/XL.
Knit flat top-down in raglan. Collar and front trims are added at the end.
Abbreviations
RS – “right side; WS – “wrong” side
k – knit; p – purl
CO – cast on; BO – bind off
SU – set up row
sts – stitches; SM – stitch marker
CN – cable needle
yf – yarn forward under the needle
DC – “dark” or main color
LC – “light” or secondary color
DS – side DC is more dominant
LS – side LS is more dominant
brk – brioche knit; brp – brioche purl
sl1 – slip 1
yf sl1yo – yarn to front, slip 1, yarn over
sl1yof – slip 1, yarn over, yarn to front
C9R (cable 9 right) – yf sl1yo, slip 4 sts to CN and hold to back; [brk1, yf sl1yo] twice; from CN, [brk1, yfslyo] twice
C9L (cable 9 left) – yf sl1yo, slip 4 sts to CN and hold to front; [brk1, yf sl1yo] twice; from CN, [brk1, yfslyo] twice
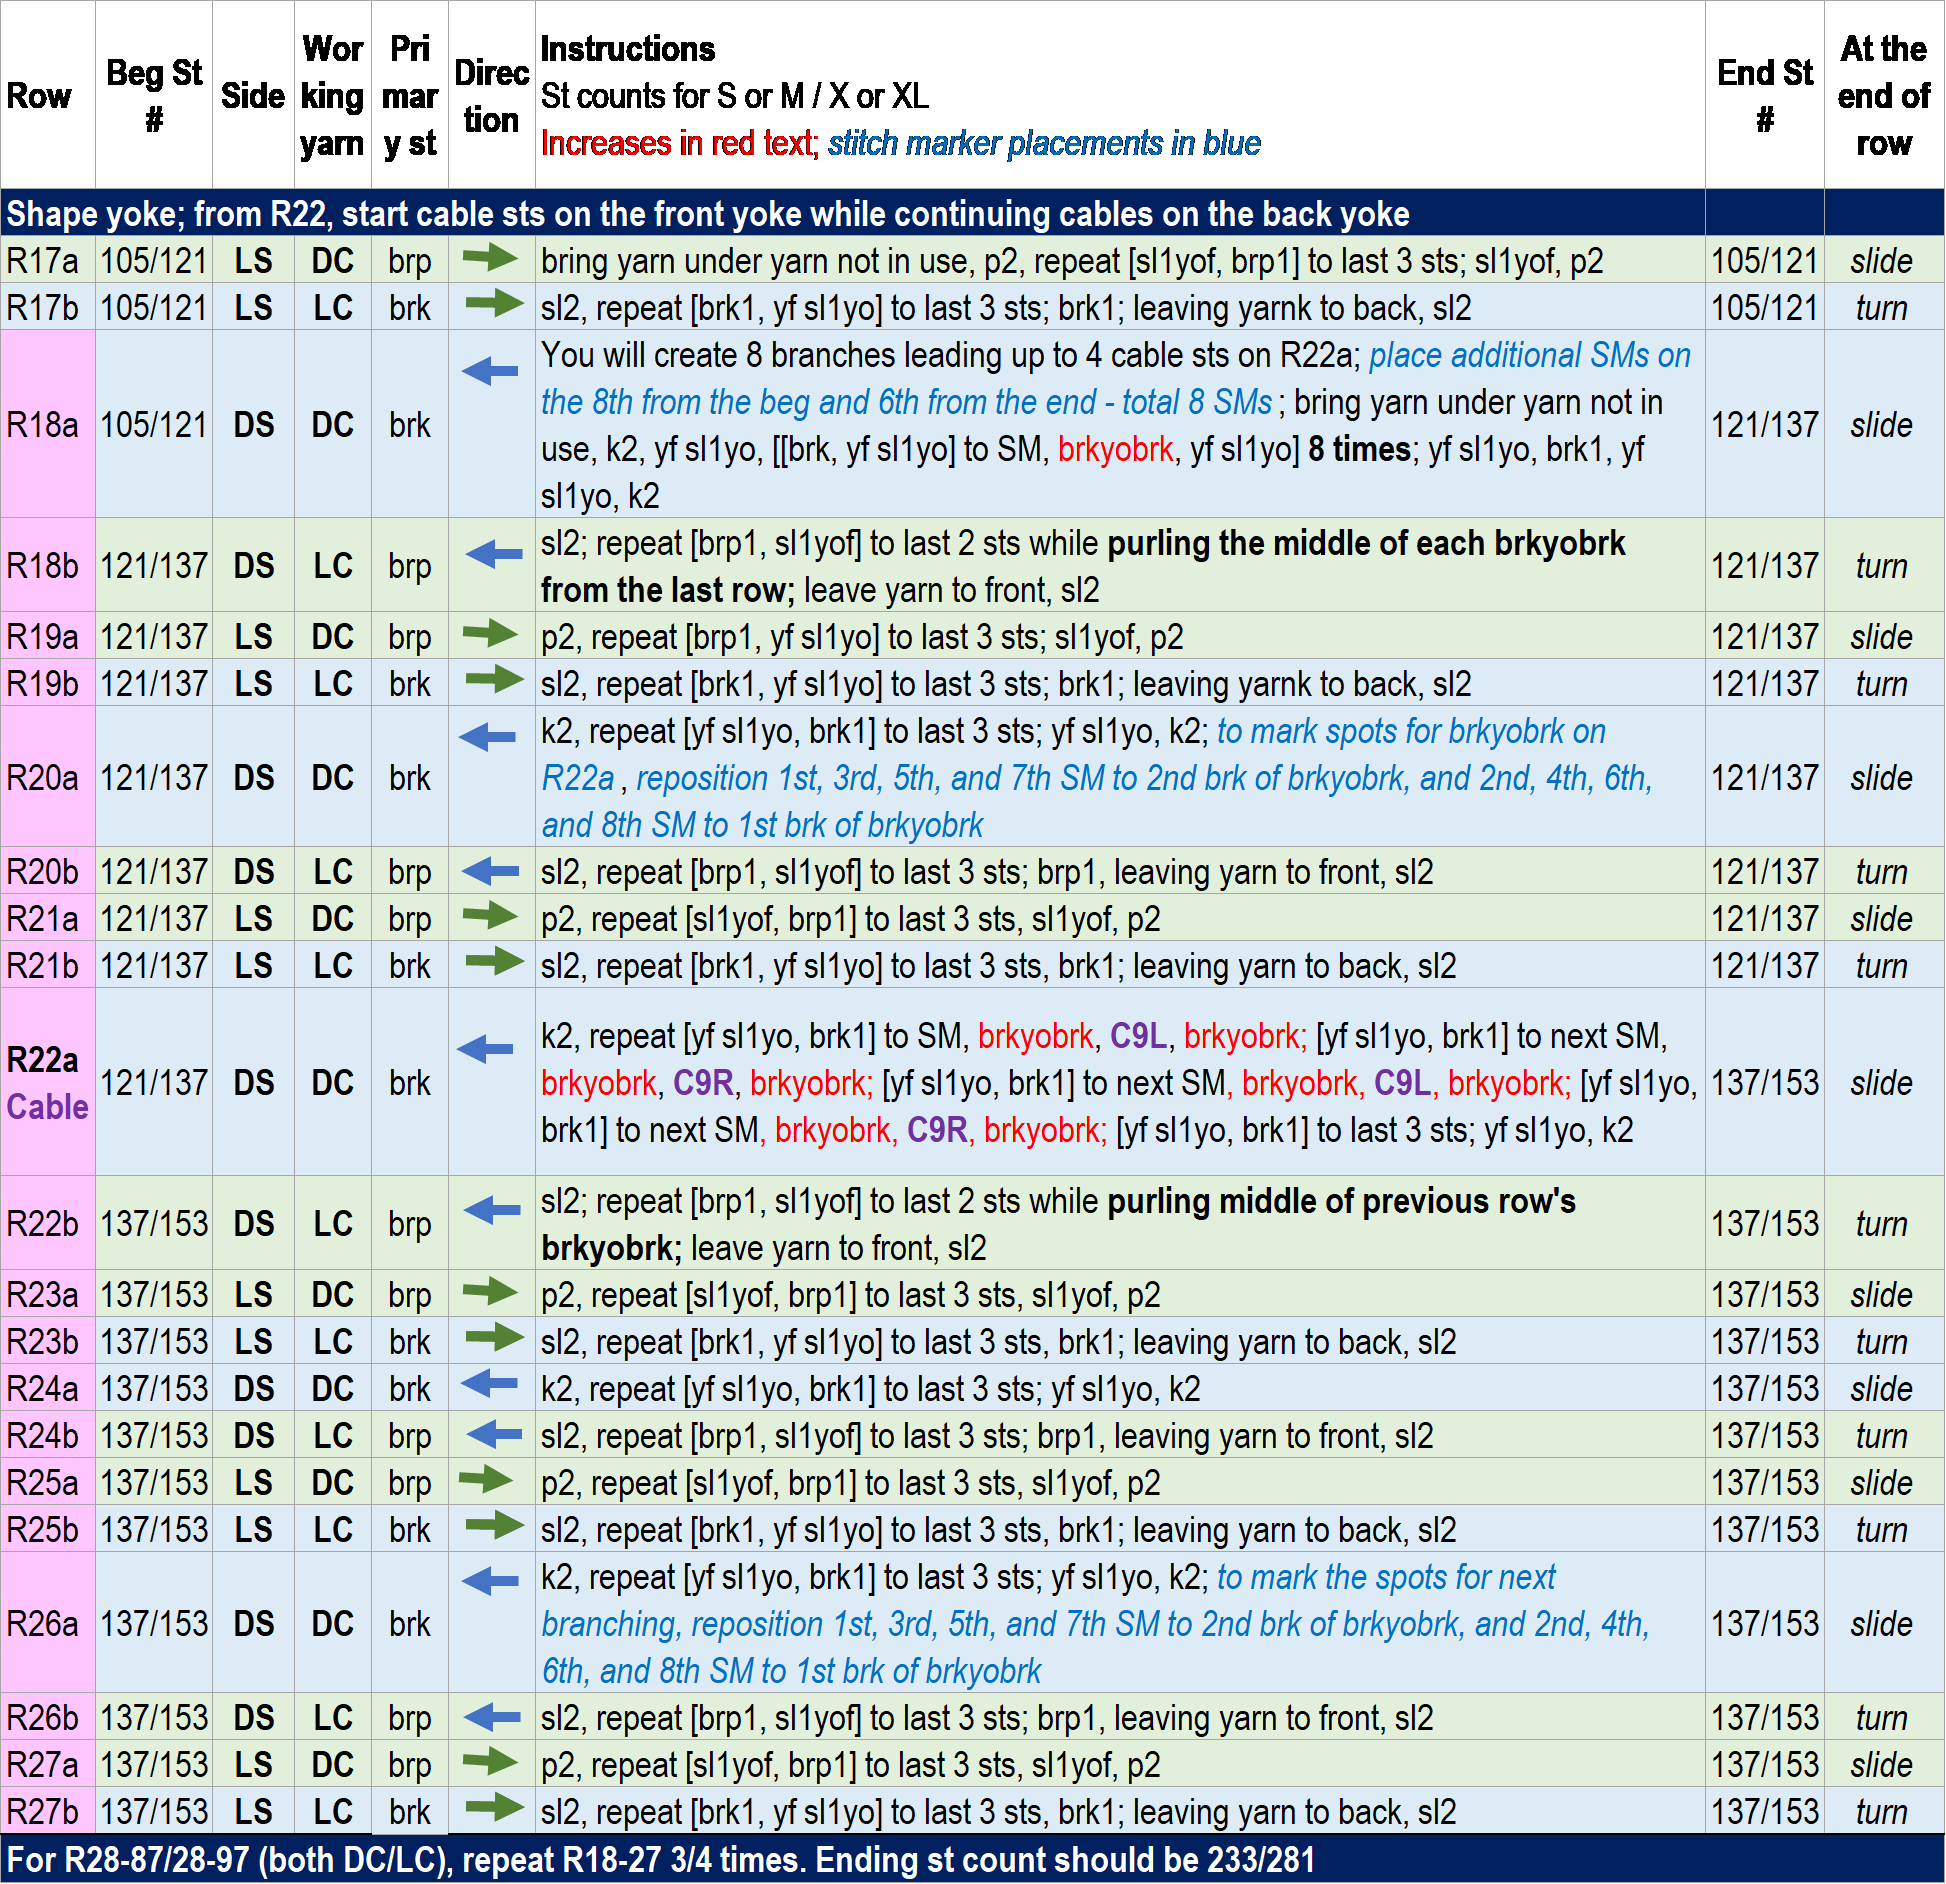
Kitting instructions by row through the end of raglan
I’ve made numerous mistakes and had to unravel and re-do this piece along the way, and that’s why I wanted to share instructions by row with st counts. Hope this will make it easier for you.
To review knitting notes and frequently used abbreviations:
- Increases always happen on brk rows.
- When switching yarns after turning, bring the working yarn under the yarn not in use so that they are criss-crossing at the edge.
- sl1yof – for brp or purl rows, slip one, yarn over, yarn to front
- yf sl1yo – for brk or knit rows, yarn forward under the needle, slip one, yarn over
- brkyobrk (or k1yok1) – to increase by 2sts where a brioche column branches out, from one st, brk + yo + brk. In the next row, you will “process” by sl1yo + p + sl1yo.
- C9R – right leaning cable, i.e., yf sl1yo; slip 4 sts to cable needle and hold to back; [brk1, yf sl1yo] twice; from cn, [brk1, yf sl1yo].
- C9L – left leaning cable, i.e., yf sl1yo; slip 4 sts to cable needle and hold to front; [brk1, yf sl1yo] twice; from cn, [brk1, yf sl1yo]
After CO, you will start by building up the back while extending the neckline via COs on LS/DC and DS/DC rows. You will first create “branches” via brkyobrk on R2a, then R8a, and R12a (this is also a cable row). Henceforth, branches happen on every 6th row followed by branch/cable combo on every 10th row. The front yoke will join in branching on R18a, and then branch/cable combo on R22a, etc.
The pictures show work-in-progress (with different set of yarns) up to R27b (LS/LC) at the top and the flip side with SMs
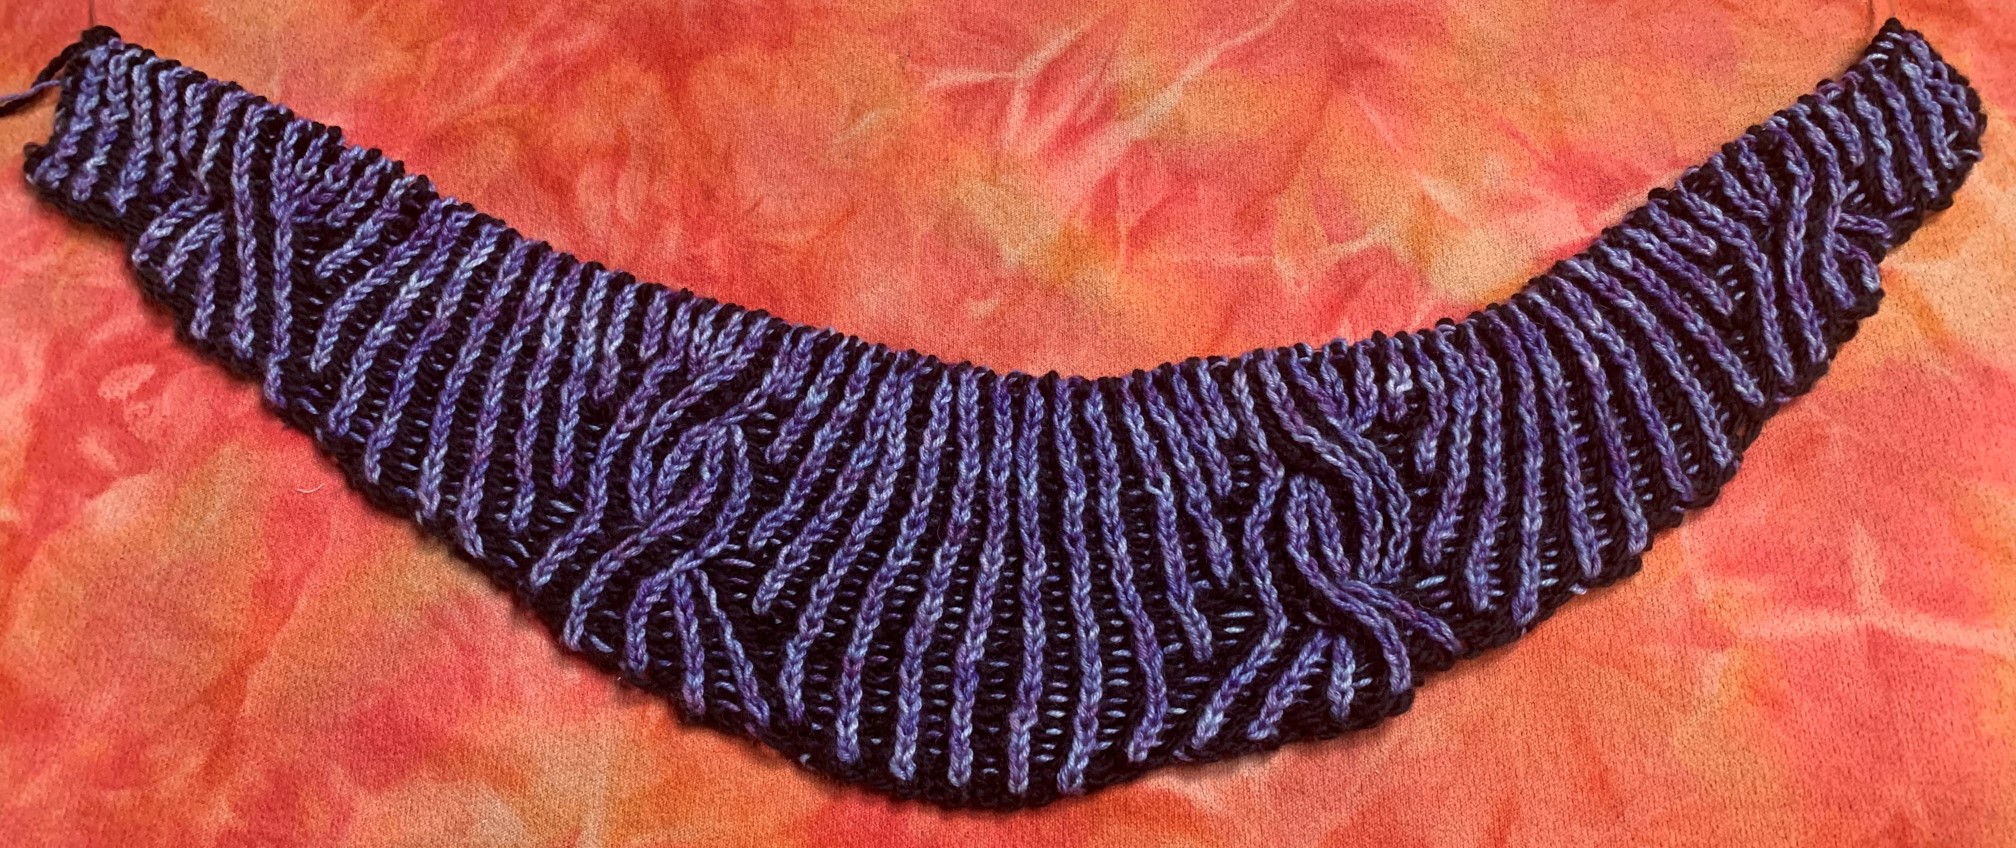
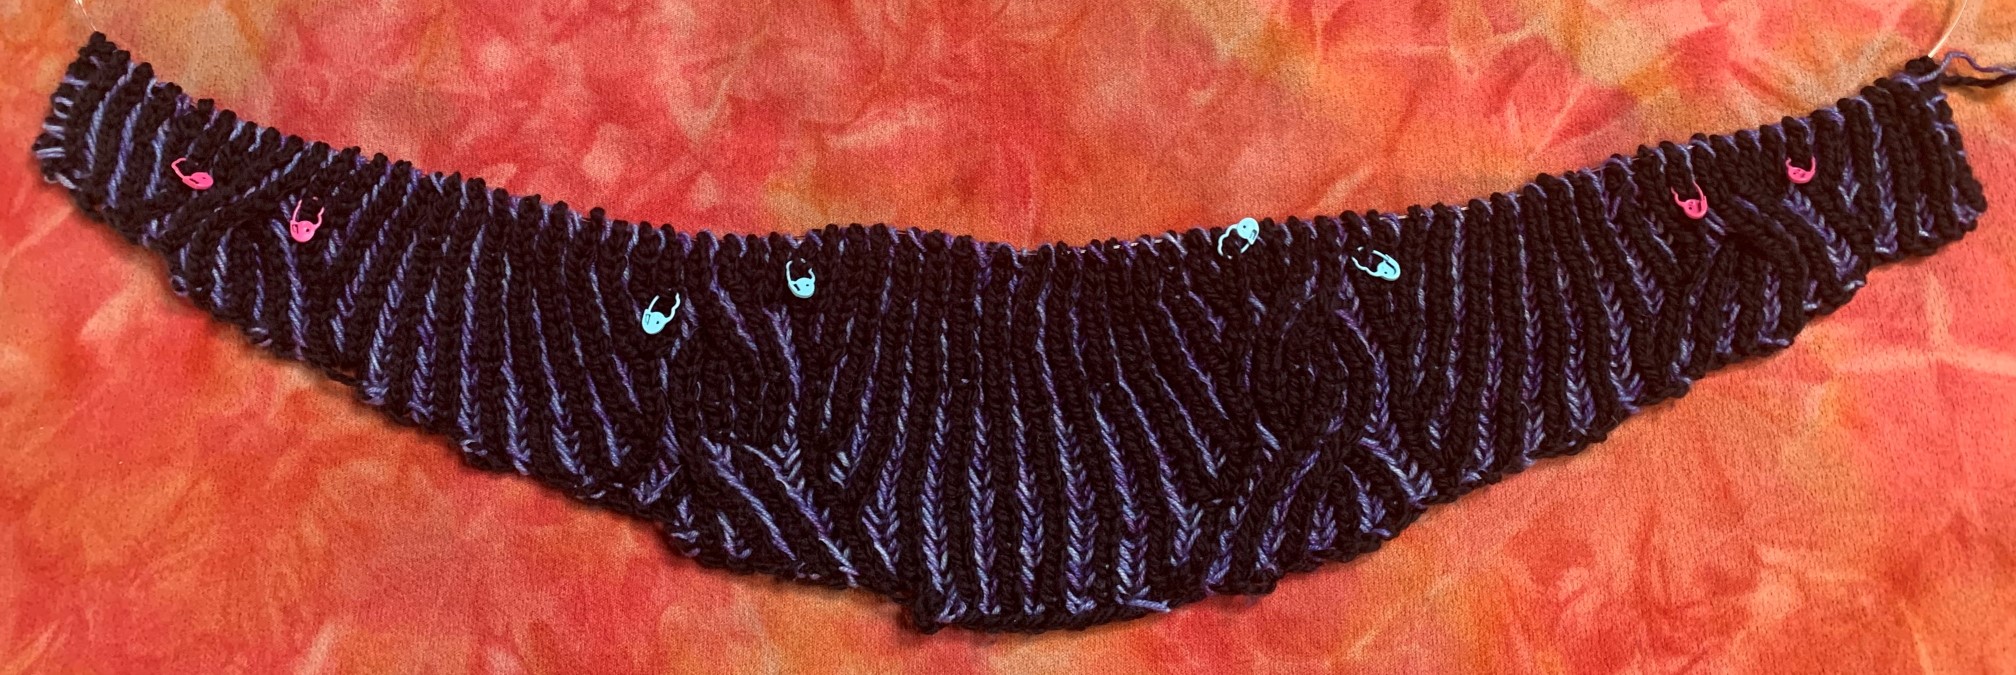
CO & shaping back neck
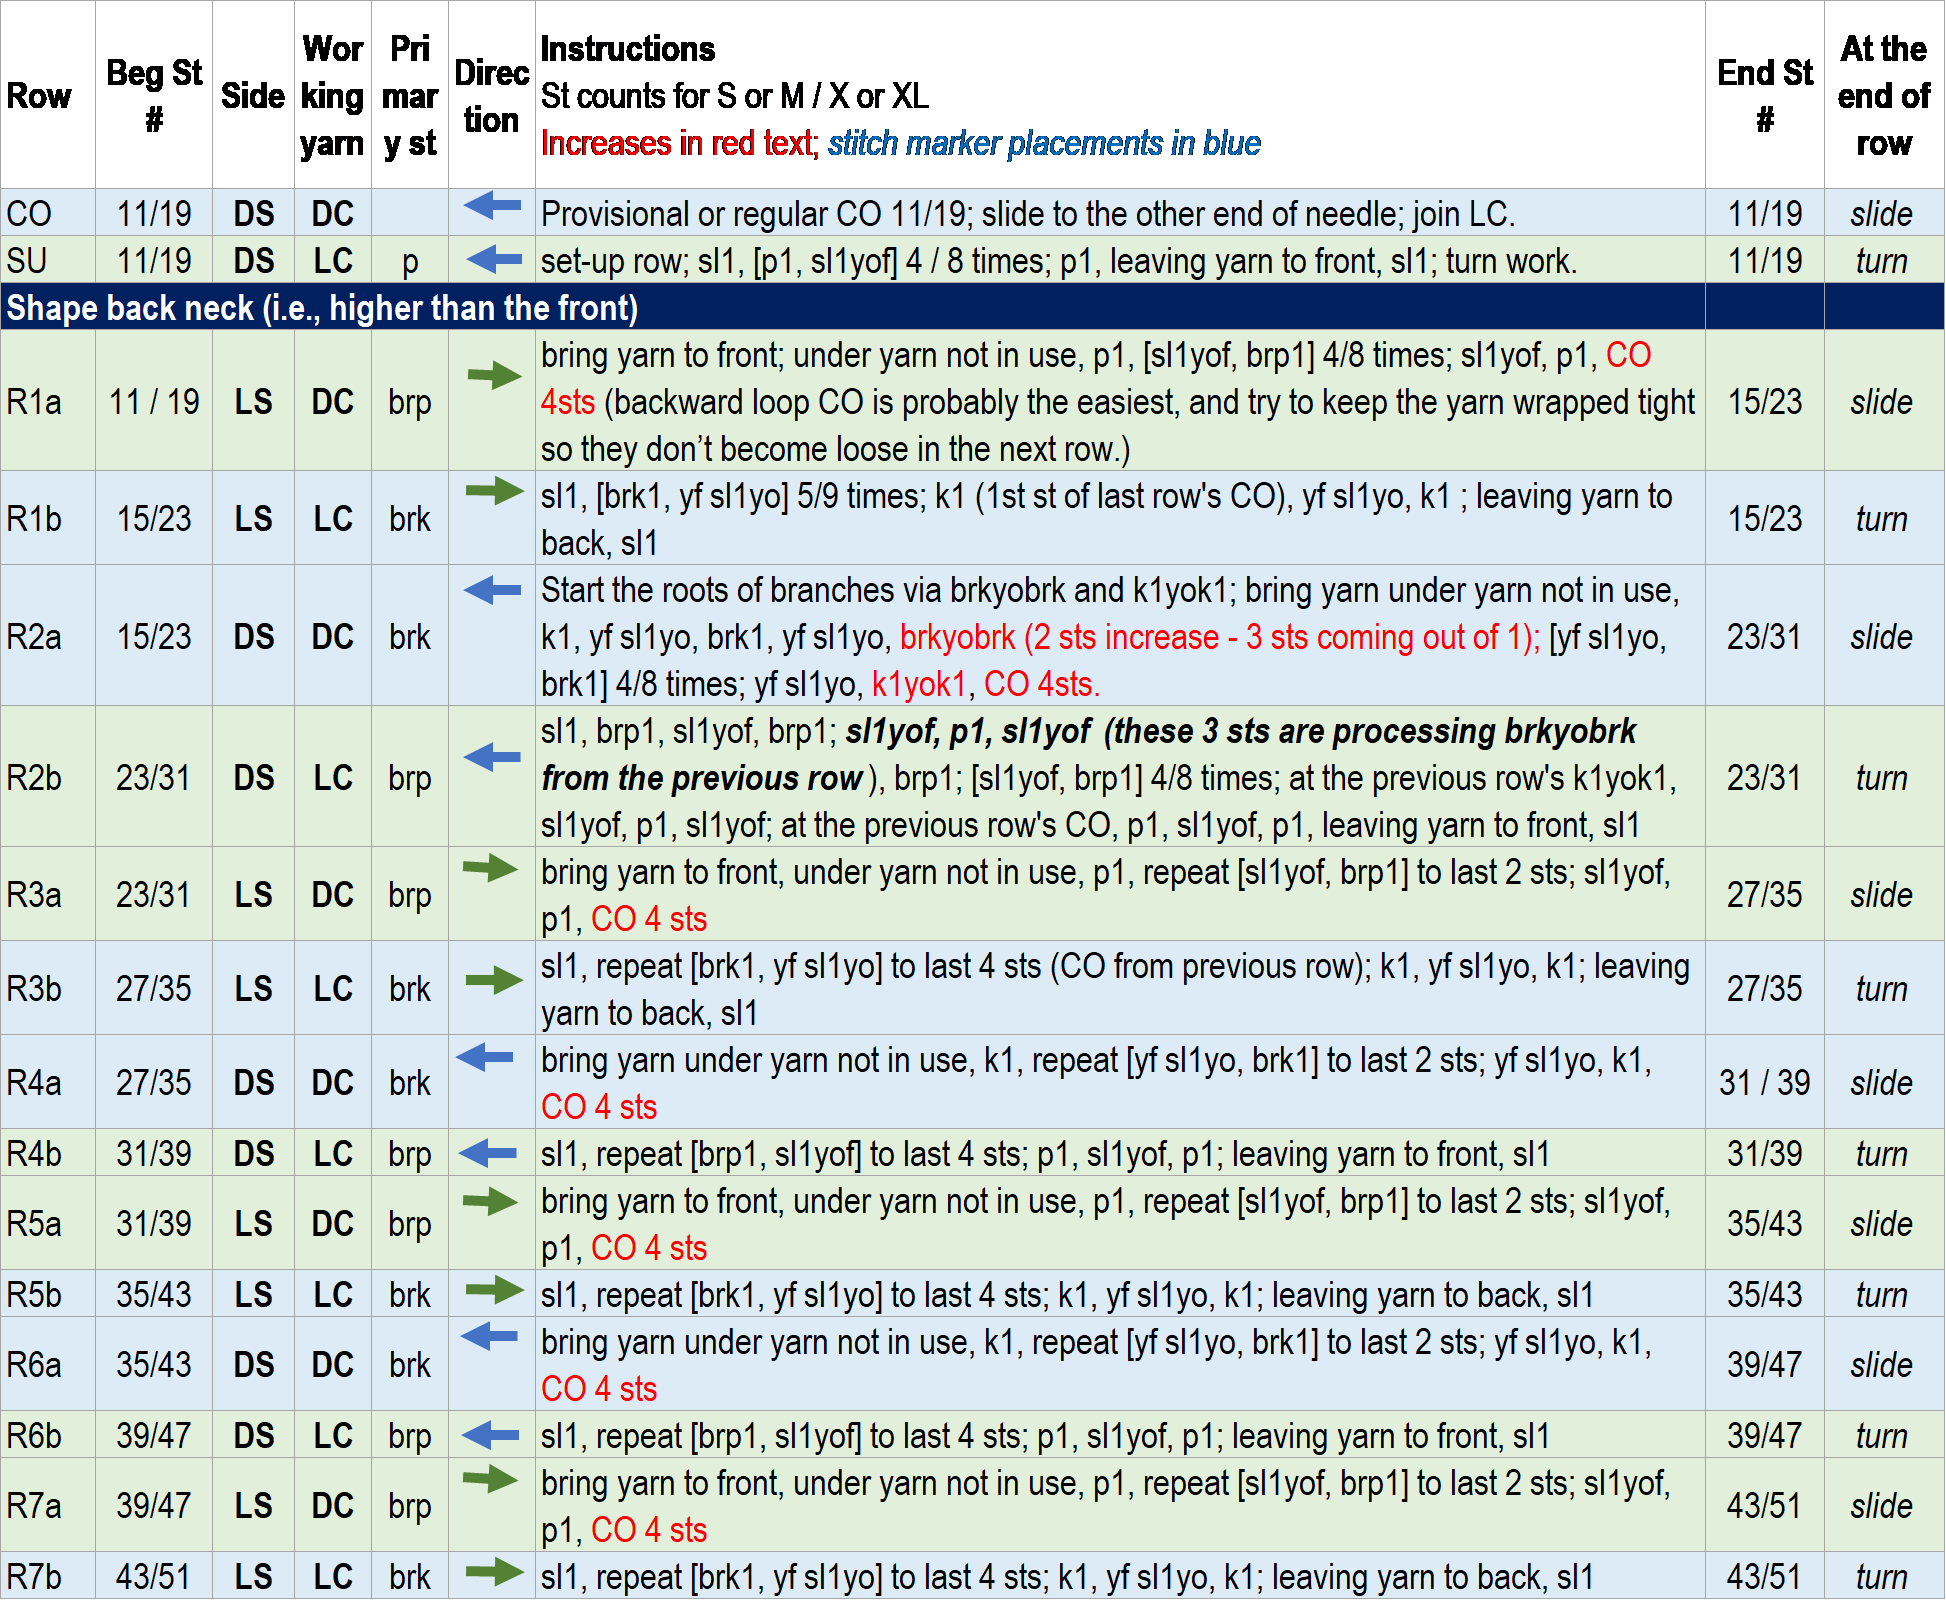
Shape neck and yoke while extending front neckline

Shape yoke and complete the raglan portion
Divide body and sleeves
At R87/97, measure the raglan seam lengths to make sure they are roomy enough for you, about 12″ for S/M and 13″-14″ for X/SL. If they are, start the dividing process. If not, keep knitting without increasing sts until you reach the desired lengths. In that case, the cable sts may become one or two rows longer, and I think it’s fine particularly because it’s close to the underarm.
The total st count should be 233/281.
From now on, this pattern carries through cable sts on the sides of body, one each on front and two on the back. If you prefer, you can stop cable and continue to knit in regular brioche sts.
- Separate sts for sleeves into sts holders or waste yarn – removing SMs along the way:
- Right front – work 35/42 sts (or through one column after 1st cable), yf sl1yo,
- Right sleeve – slip next 42/50 sts to st holder or a waste yarn
- Right underarm – CO 8 sts
- Back body – work 79/97 sts (or lone column before the 2nd cable through one column after the 3rd cable), yf sl1yo
- Left sleeve – slip 42/50 sts to st holder or a waste yarn
- Left underarm – CO 8 sts
- Left front – work 35/42 sts (or through one column after 4th cable)
- The total st count for the body including COs should be 165/197
Continue knitting body
Repeat 10 LC/DC row cable pattern until the piece reaches the desired pattern. Or, as long as your yarn lasts! Once I get closer to the length I want, I often suspend the body part and complete sleeves to gauge how much yarns I have to work with. I did the same in this case. And, I also finished the collar after the sleeves before getting back to the body. I just wasn’t sure how long I can go with the body.
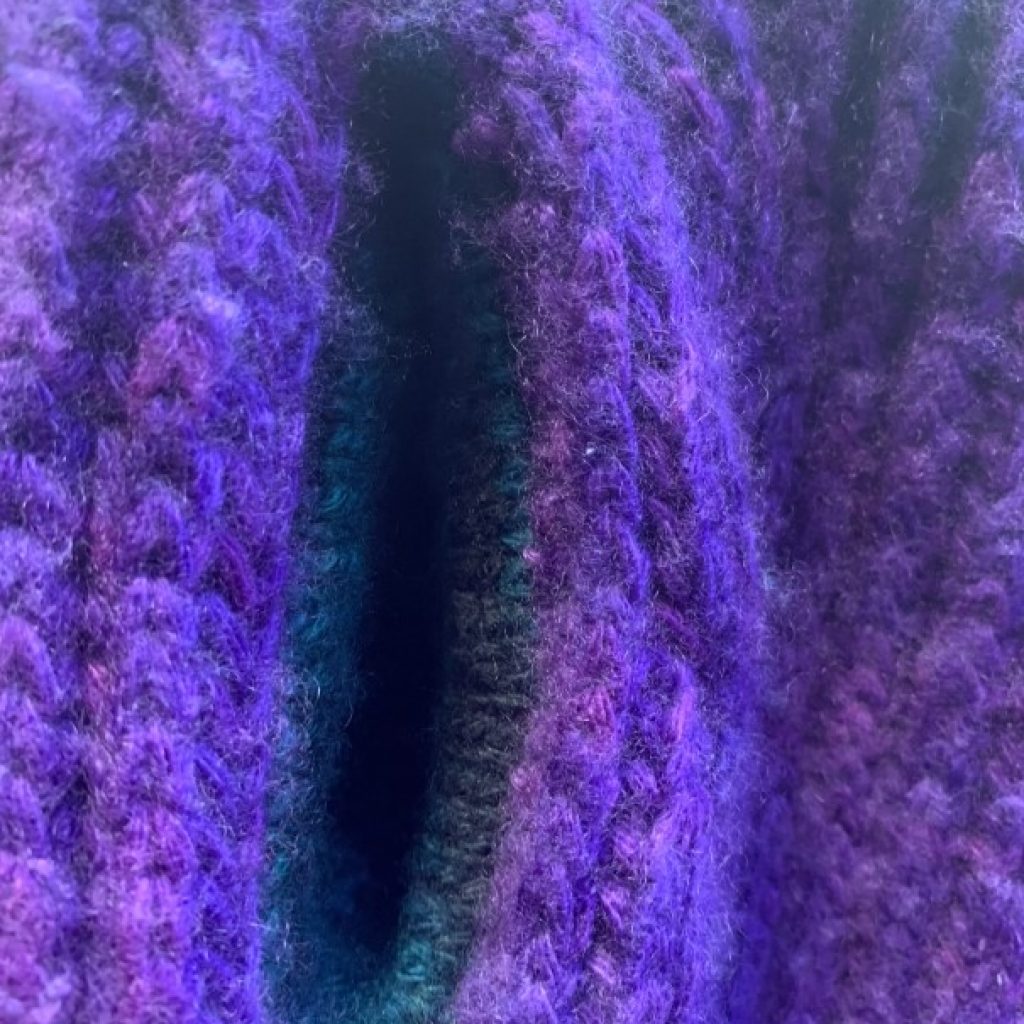
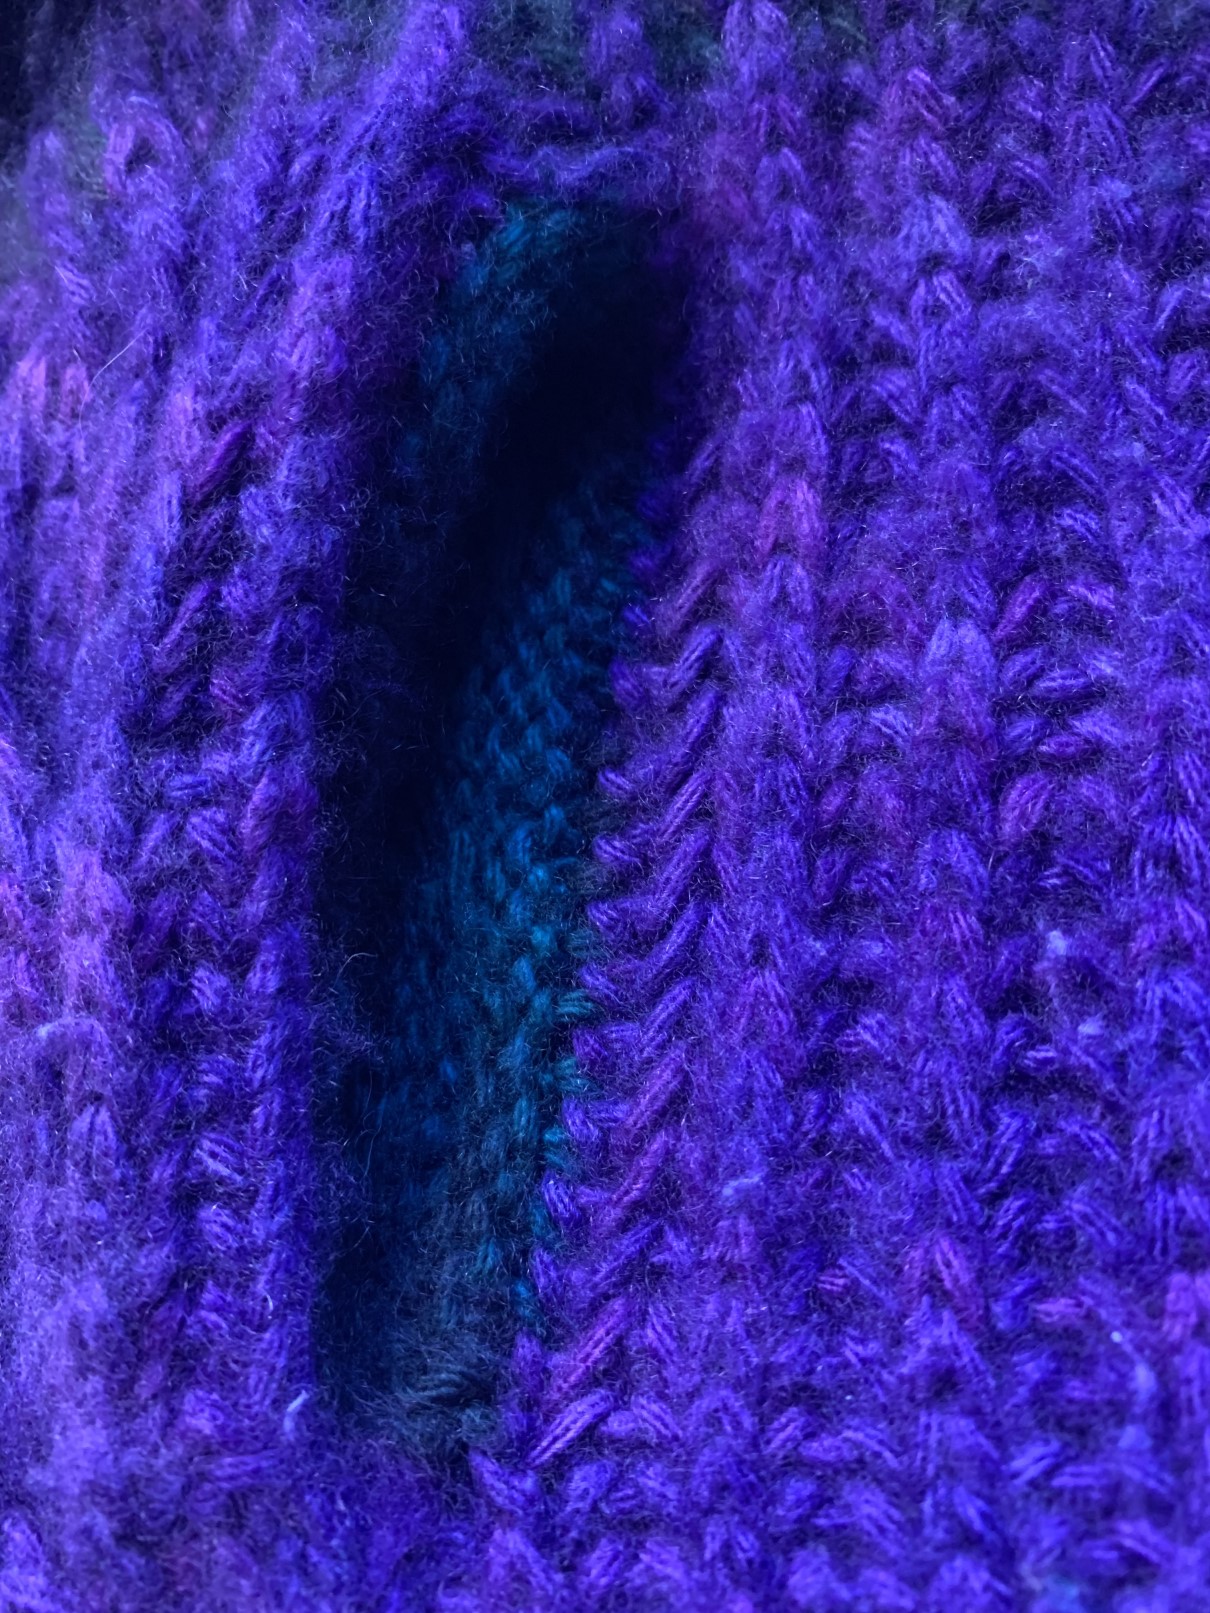
Optional side slit pockets
Pockets can come in many different ways, and for this, because I didn’t want to interrupt vertical brioche sts, and wanted to make them reversible, i.e., can be flipped inside-out depending on which side you are wearing, I went with side slit pockets. And, because of flipping, I did not add flaps or linings to the outside of pockets.
If you choose to incorporate side slit pockets, separate front and back bodies where you want your pocket to start and knit separately until the bottom of pocket. In this case, I started about 7″ below the underarm and ended after 4-1/2″. The slits are set right after 2nd column from cable for Right Front, and right before 2nd column from cable for Left Front. After you reached the desired pocket lengths, join right & left fronts and back and continue to knit to the bottom.
For the pocket lining, I chose to knit flat, so you’d pick up sts, typically about 3 sts for every 4 rows, and knit flat 2x the pocket depth you want. This one is about 4″. Then you fold it in half and attach sew the end to the other side of opening, and sew both sides. These don’t look very polished, but it is reversible and do the job!
Optional side slits
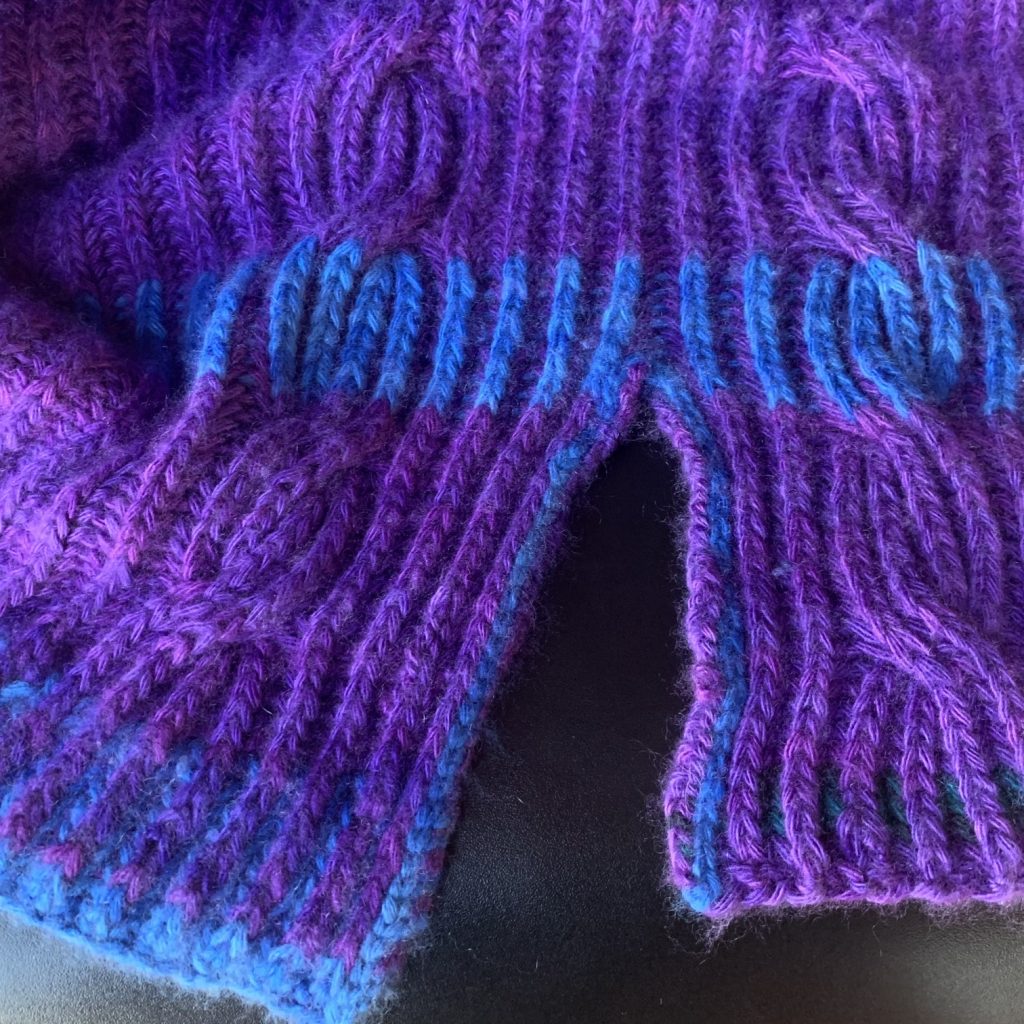
I almost always end up adding side slits to my pieces, be it cardigan, tunic, or sweater, just because I like the look and also its utility. In this case, I created about 5″ split on both sides. And while I usually make the back slightly longer, in the case, the length ended up about the same because turned out I did not have enough yarn left, as usual.
BO very loosely once the piece reach the desired length.
Add sleeves (can be done after the collar and the trim)
Transfer all the sts from st holder or waste yarn to the shorter (16″) #6 circular needle, and pick up 8 underarm sts. The total sts for one sleeve should be 50/58. Continue to knit in brioche sts in the round. In this piece, most of the sts are in one-color brioche until the cuff area, which is in 2-color. Once the sleeves reach desired length, in this case, 16″/17″, loosely BO.
Brioche in the round
There are some differences in knitting brioche in the round vs flat. And, once again, 10 rows a day provides a super helpful tutorial. Purl Soho as usual provide helpful instructions for 2-color brioche, and I followed their pattern for a cowl.
For the sleeves in this piece, it starts with you continuing the pattern set in the sts you picked up from the Yoke:
- For one-color brioche part – you will repeat [brk1, yf sl1yo] followed by [sl1yof, brp1] throughout
- For two-color brioche part – the main difference for two-color is that you don’t need to deal with “slide” or “turn” and you will be switching DC (primary color) and LC (secondary color) and simply keep knitting in the round.
- Join LC.
- LC row – Repeat [sl1yof, p1] to the end.
- DC row – With LC at front, repeat [brk1, sl1yo] to the end.
- Repeat LC and DC rows.
Knit collar
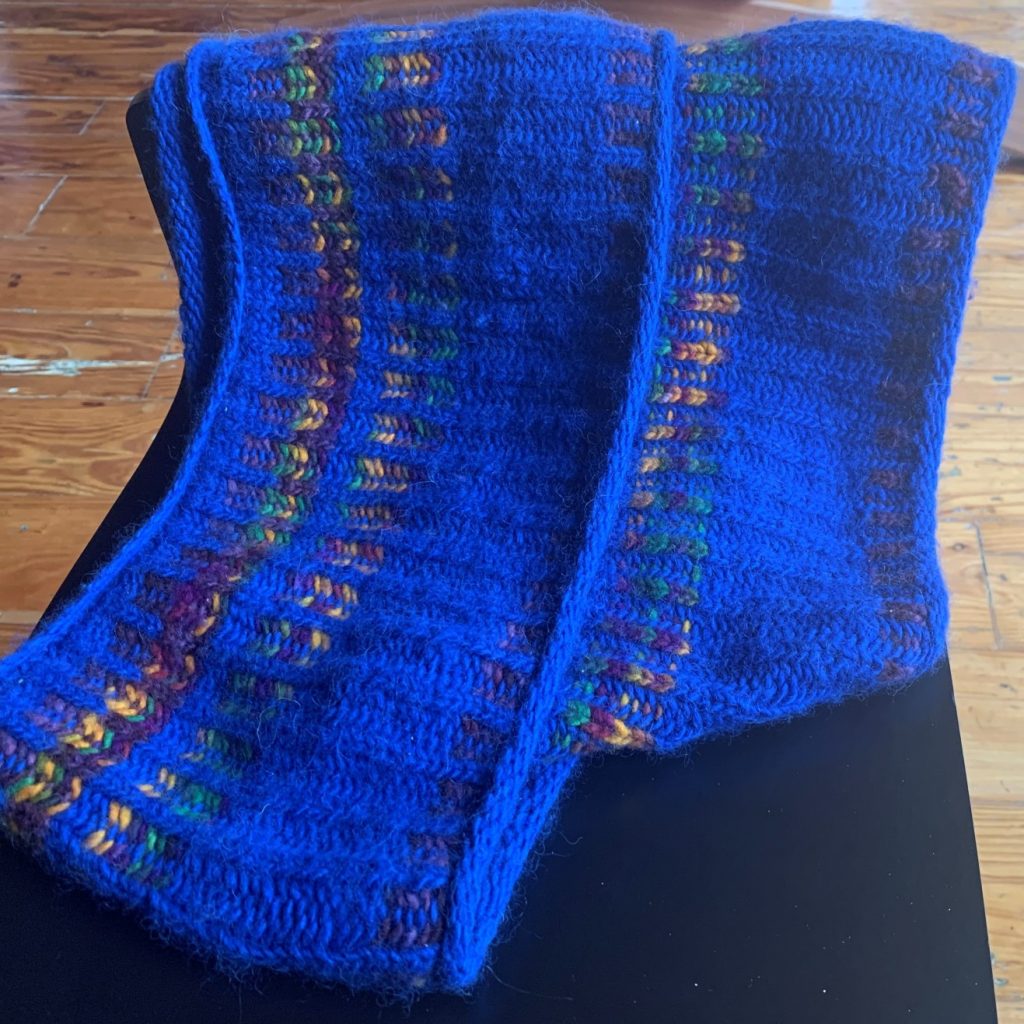
With DS facing, using DC, pick up all the sts from the neckline, i.e., 105/121 sts. Slide to the other end of needle and join LC. Continue to knit in 2-color brioche sts until it reaches the desired length, this case about 8″. You can knit straight up and it will make a robust, voluminous collar. In this case, I wanted to one side fanning out slightly, so added brkyobrk increase only on one side for 5 times. See the photos above. BO loosely.
Knit trims
After you’ve finished the collar, you can complete the piece by picking up stitches from front body edges and knitting the trim. I chose 1 x 1 ribs for this, and can easily be 2 x 2 or 2 x 1, depending on your preference. I could have kept going to create a wider trim, and it’s completely up to you.
In knitting the trim horizontally from vertical brioche rows, you would want to pick up more sts than usual ratio (3 sts to 4 rows), and after experimenting a few times, I found picking up one st per brioche row (i.e., 1 st per 2 working rows) work the best.
Optional buttons and button holes
In this case, I wanted the buttons to work on both sides, so the buttons are attached at the end, which makes the closing loose. Because I really dislike weaving ends, I decided to “knit in” buttons as I BO the edge.
BO loosely and weave in ends to finish!


Leave A Comment