Easy, flowy cardigan to wear in many ways
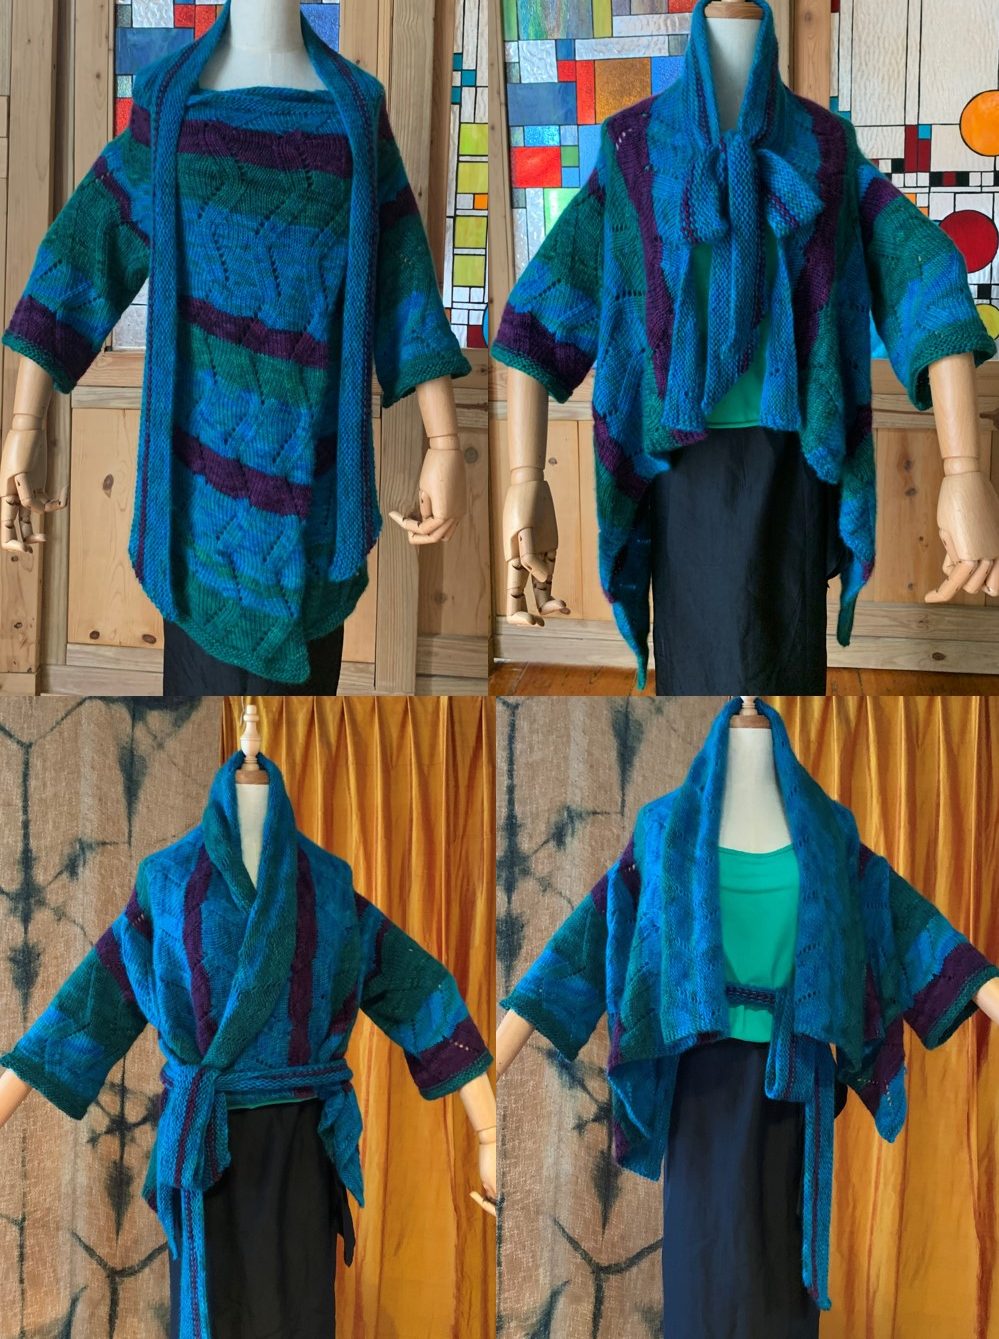
Simple pattern can create your unique style
If you want to knit a unique piece with a super simple pattern, this could be your option. Waterfall cardigan pattern is very tempting because it’s super simple (rectangular with two armholes + sleeves) and versatile. Following a few unsuccessful attempts, I decided to give it a final try with a subtle lace pattern to inject some airiness which was lacking in previous patterns.
Easy lace repeats
After creating a few swatches using various lace stitches I picked up from very helpful Purl Soho and DROPS Design (they have fabulous stitch libraries including one for lace patterns), decided on a simple lace repeats that also gives the yarn to show off its natural beauty and softness with knit/purl repeats. The pattern (below) is multiples of 12 stitches and 32 or 16 rows.
Having fun with stripes
I also wanted to use up several skeins each of three different colors of the same worsted yarn, so decided to work in a slightly random stripe pattern. Single color, color block, bold or fine stripe, full lace, solid knit/purl – this pattern can work in any combinations. This example has 3/4 length sleeves only because that was what I could eek out after creating a tie/belt. You can keep going and stop at any sleeve length you’d like.
A simple tie can add a unique element
Here’s the fun part – after trying it out when the body was done (with armholes), I saw the cardigan looked a bit too drab and lazy, so decided to attach a tie like you see in bow blouses. Because I wanted the tie to be reversible and soft, I used a size larger needle in garter. And then, I realized that if I flip it upside down, it can be worn as a cropped/belted top with a robust collar. You can play with the tie/belt and create multiple looks as you wish.
I also added two tiny blue buttons (it pays to save those buttons that come with your clothes) and added them on both ends/inside & outside to hook front ends to wear closed.
NOTE: I knit this piece in Small, and I did my best to extrapolate stitch/row counts for M/X/XL.
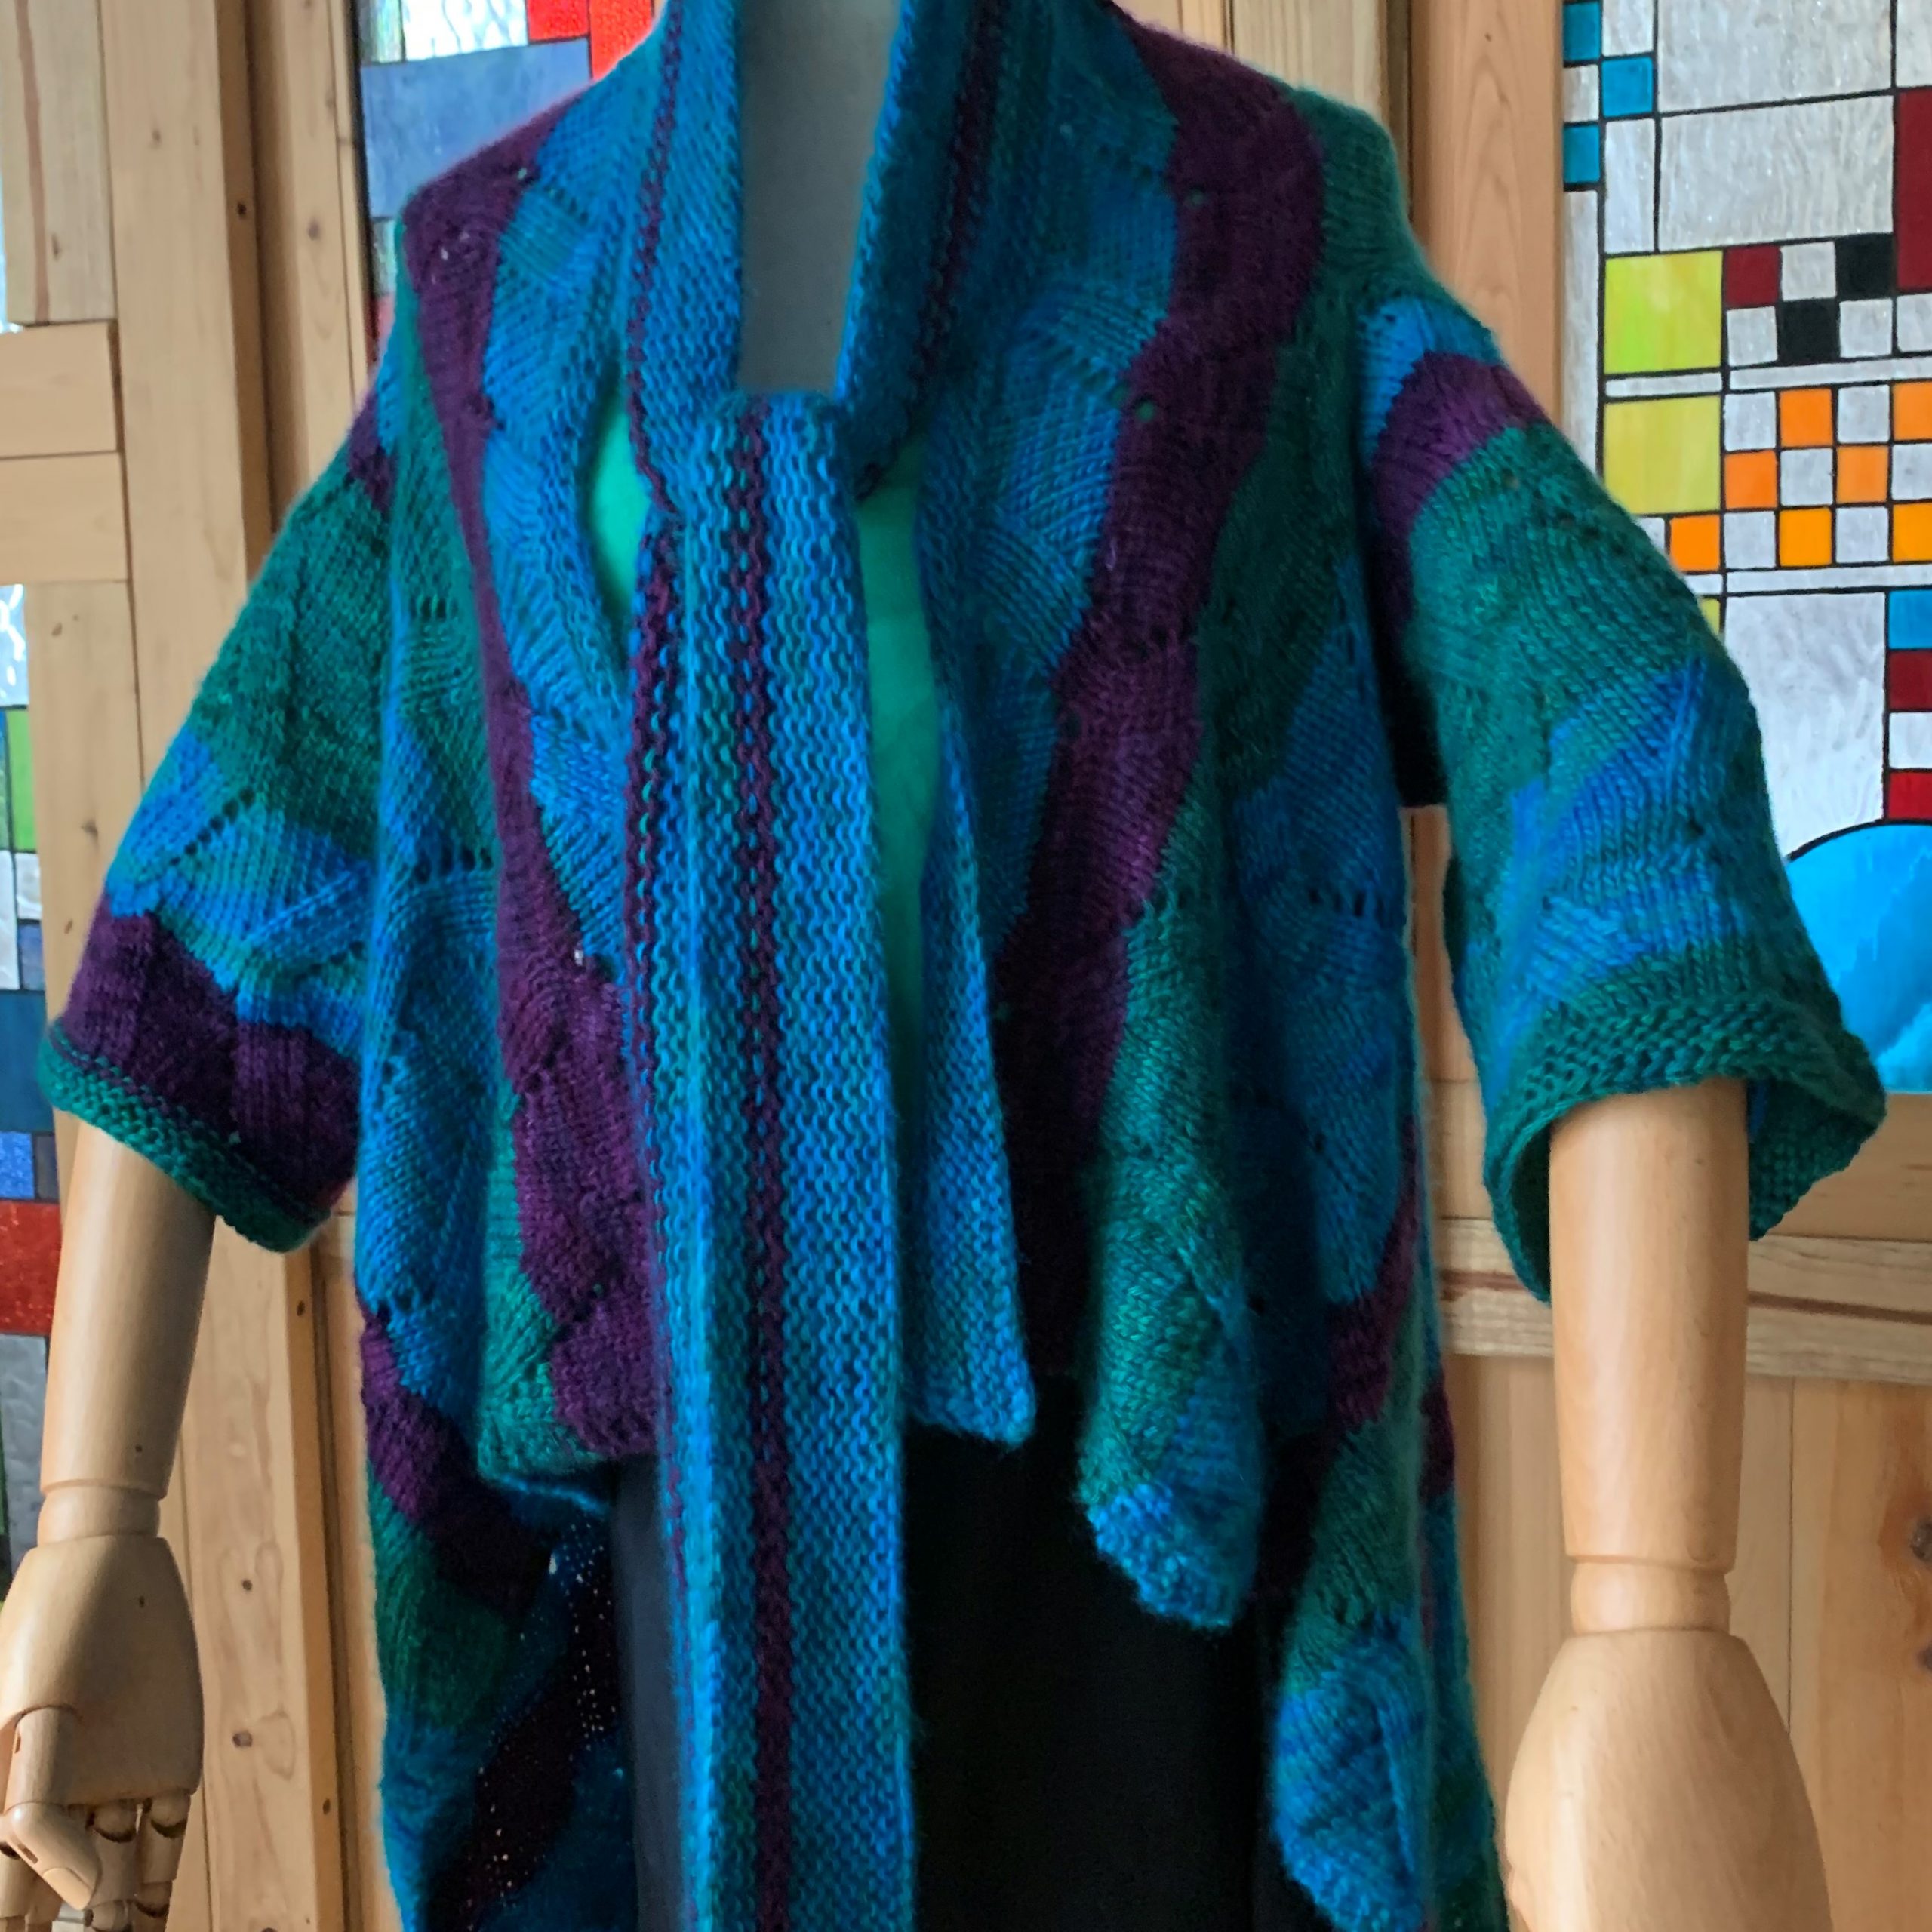
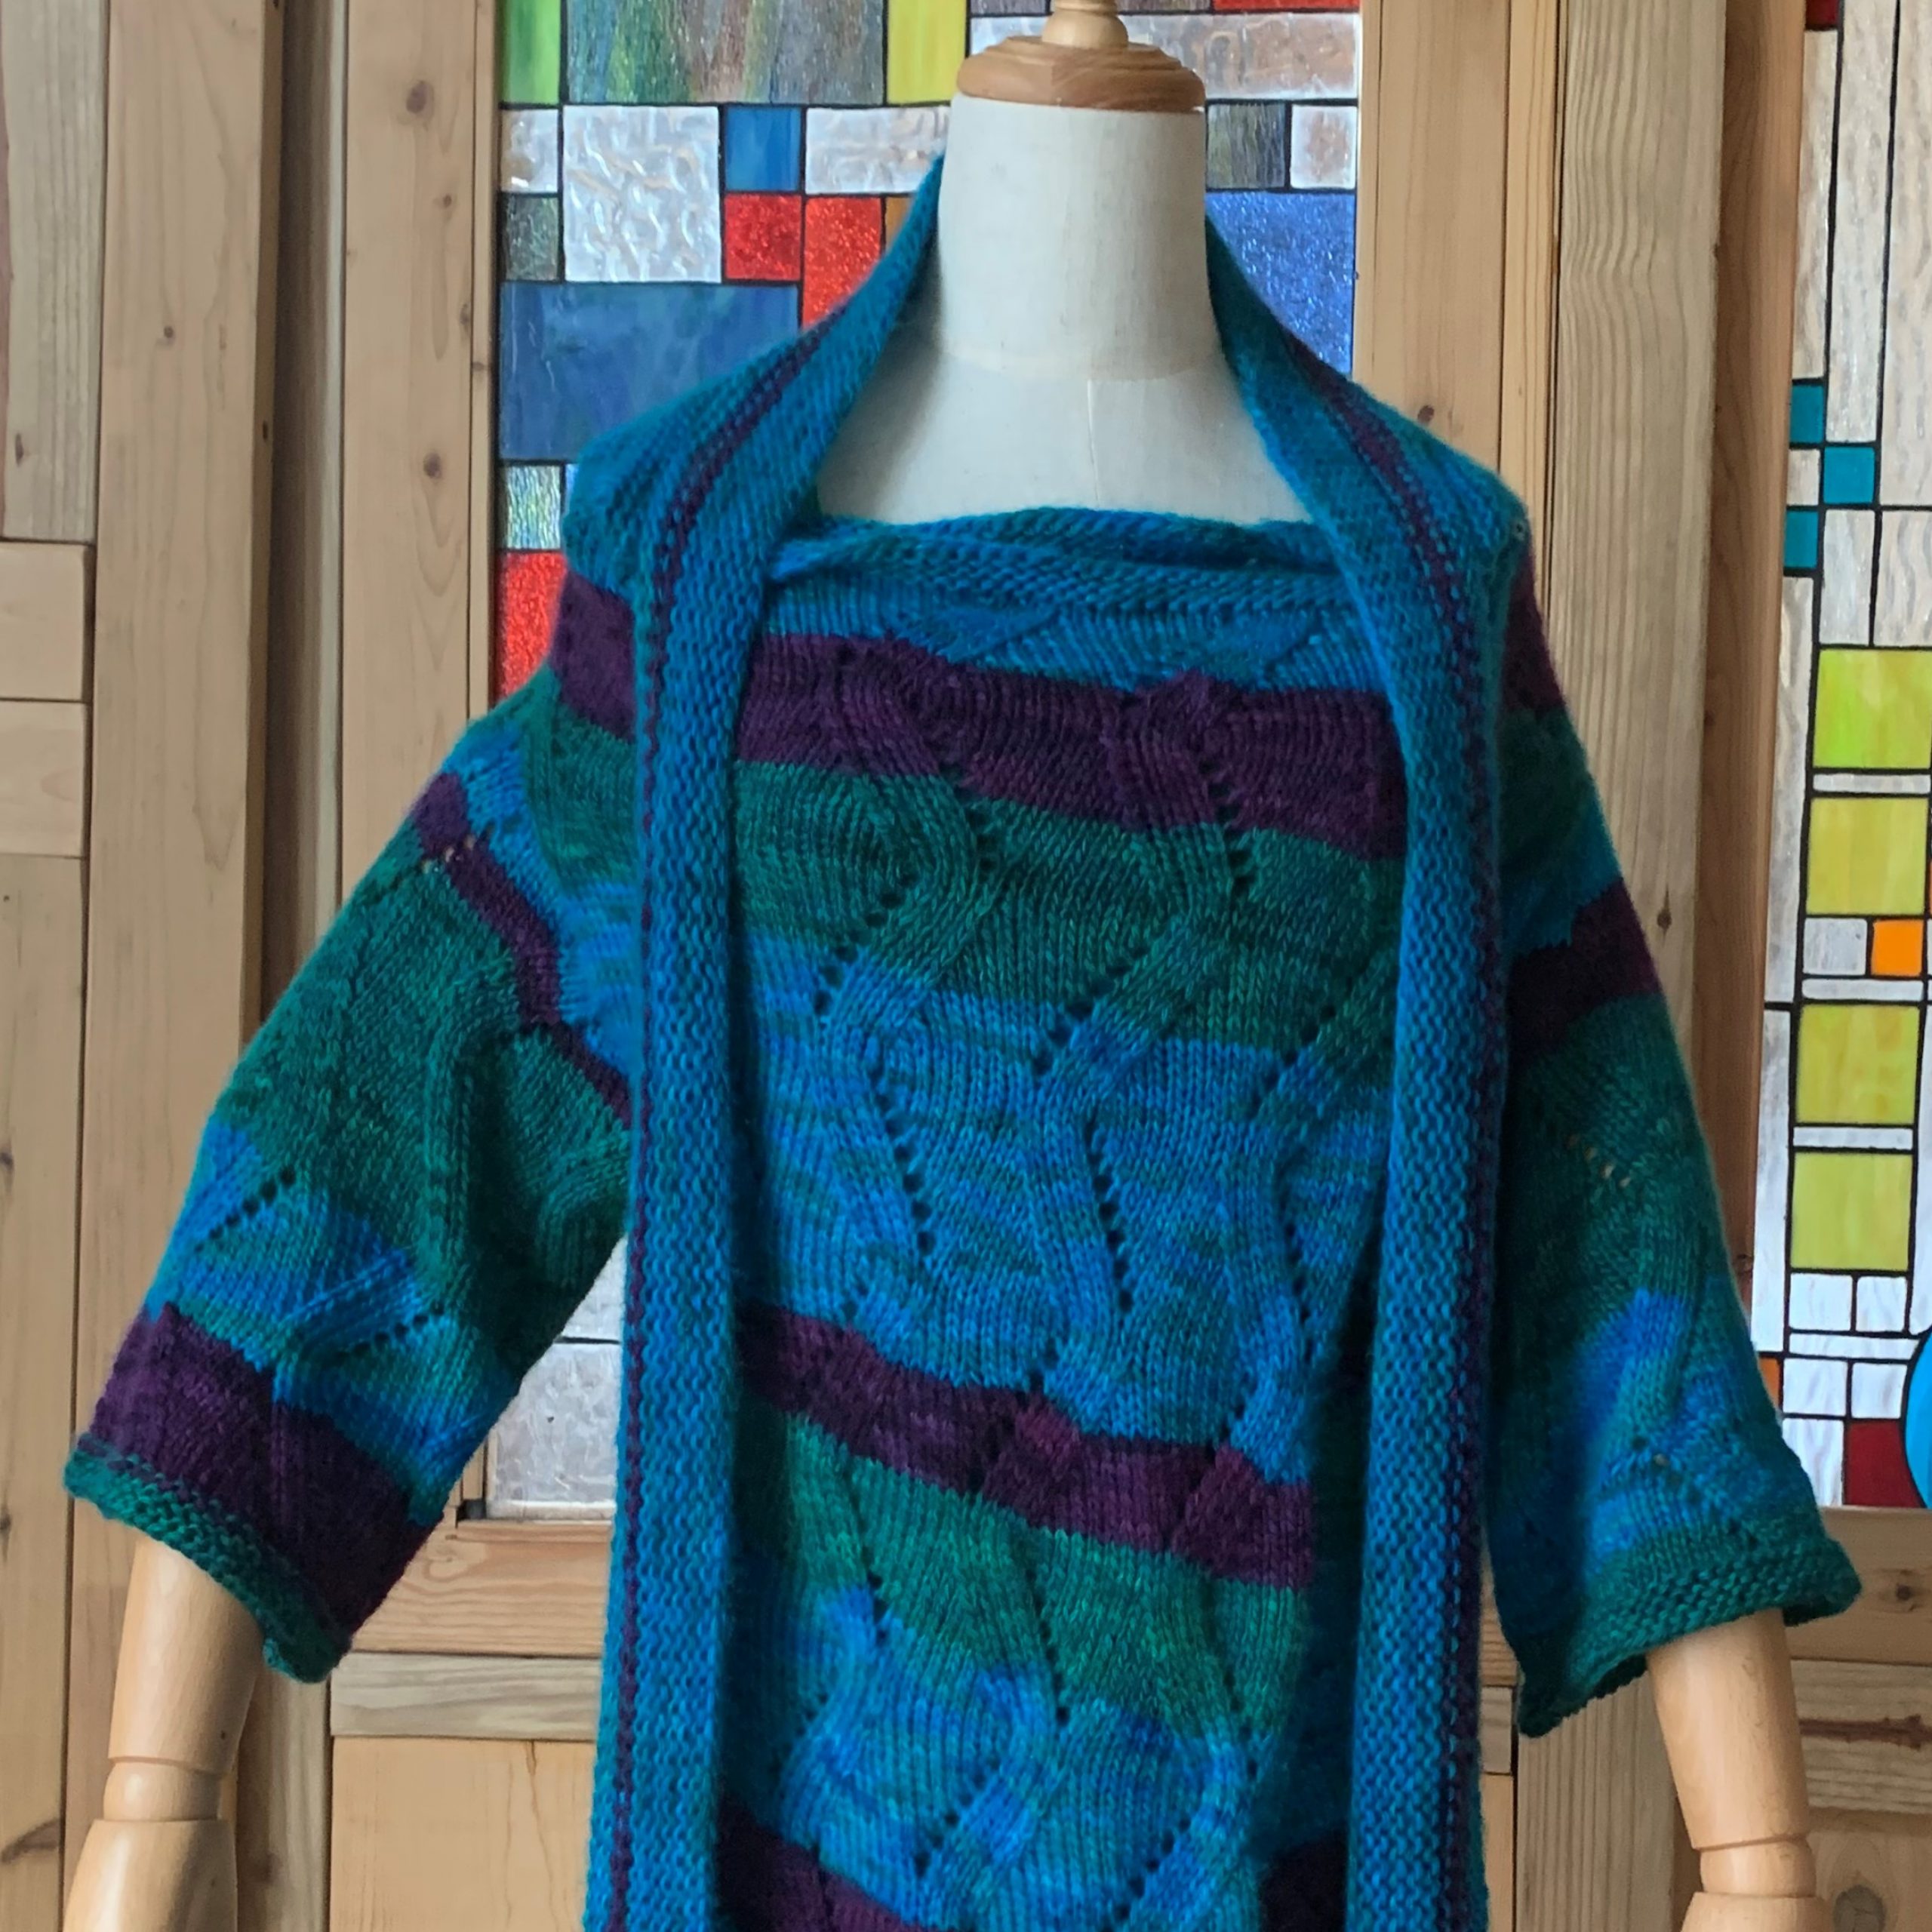
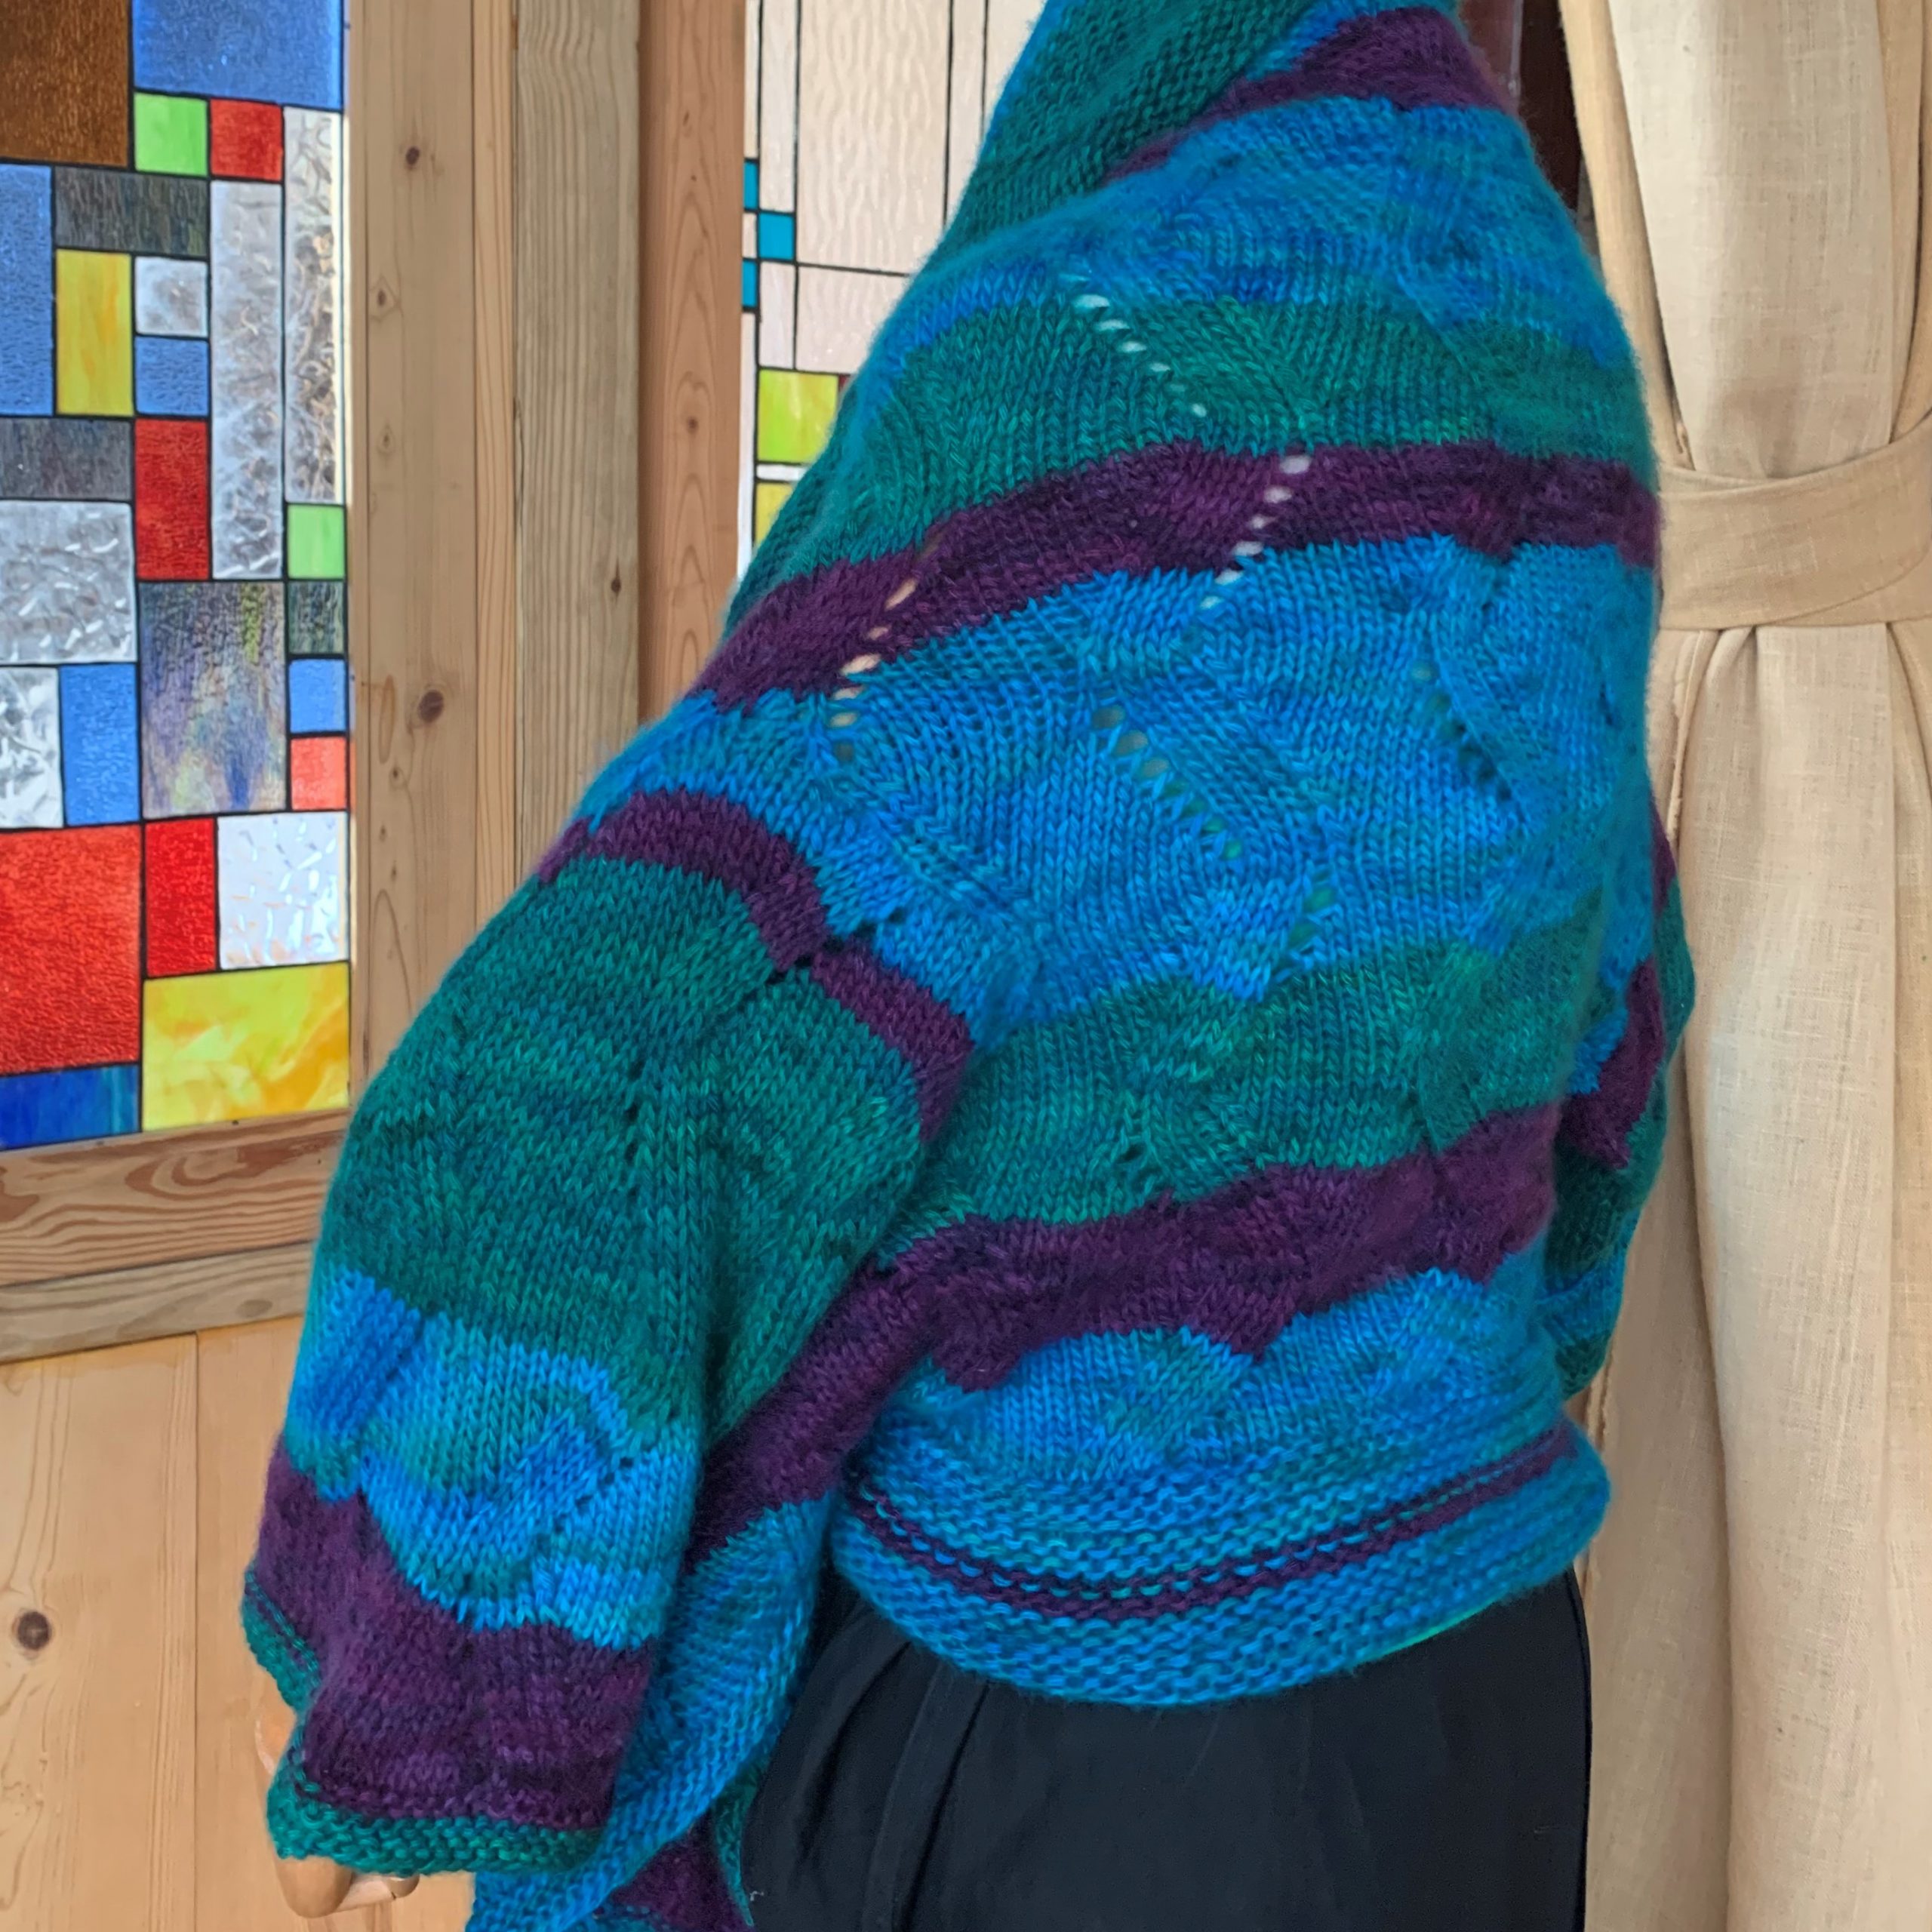
Diagrams and Instructions

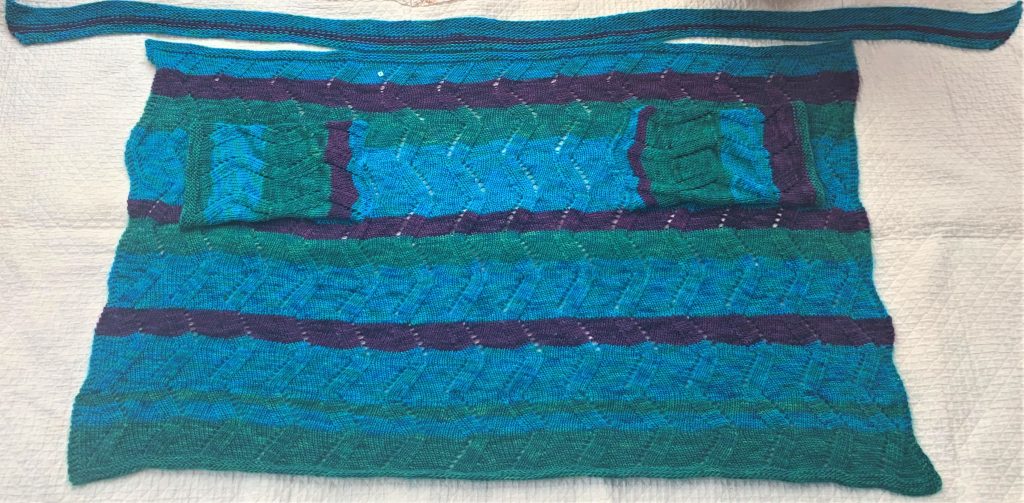
- Yarn: For S/M/L/XL, approx. 1,250/ 1,400/1,600/1850 yrds of worsted yarn. This example in small uses Artyans Cashmere 5 (50g/102 yrds): 6.6 skeins of H26 (Tahiti), 3.6 skeins of H 13 (Emerald City), 2 skeins of H24 (Wild Berries)
- Needle: US #7 (4.5 mm) 36″ circular needle (for body bottom border). US #8 (5 mm) 36″ (for body) and 16” (for arms) circular needles. US #9 (5.5 mm) 36” or 48” circular needle (for tie).
- Gage: 14.5 sts x 22 rows in lace pattern
- Size: W 49/51/54/57 x L 33/34/36/38
- Construction: Body – knit flat bottom up horizontally until Armholes; knit Right Front, Back, Left Front separately to the top Armholes; join and knit until the top edge.
- Tie – knit flat horizontally and attach to top of Body
- Sleeves – knit in circular from Armholes
RS – “right” side (or front)
WS – “wrong” side (or back)
k – knit
p – purl
CO – cast on
BO – bind off
M1 – to increase one stitch, knit into a loop between two stitches
s2kpo – to decrease two stiches, slip 2 together, knit 1, pass slipped stitches over
Body until Armholes
- CO 174/186/198/214 loosely with #11 or larger needle.
- Switch to #7 and knit garter for 6 rows (3 ridges).
- RS: Switch to #8, knit 3 sts (for garter border) and start Pattern sts according to Diagram below – repeat 14 times for S, 15 for M, 16 for L, 17 for XL
- End every row with 3 sts garter
- Repeat Pattern sts until it measures 18/18/19/20″ in length
- Small and Medium: 3 x 32-row Pattern+ 8 rows = 104 rows
- Large: 3 x 32-row Pattern+ 14 rows = 110 rows
- Extra Large: 3 x 32-row Pattern+ 1 x half 16-row pattern + 4 rows = 116 rows
Separate Body along Armholes
- Separate body – 56/60/64/70 sts for Right Rront + 62/66/70/74 sts for Back + 56/60/64/70 sts for Left Front. Transfer sts for Back and Left Front in separate needles or stitch holders.
- Right Front:
- 1st RS – Continue in Pattern sts. Add M1 at the end to use for picking up sts later on for Sleeve:
- Small: 57 sts, i.e., 3 (garter) + 53 in Pattern (x4 + 5) + M1.
- Medium: 61 sts, i.e., 3 (garter) + 57 in Pattern (x4 + 9) + M1.
- Large: 65 sts, i.e., 3 (garter) + 60 in Pattern (x5) + M1.
- Extra Large: 71 sts, i.e., 3 (garter) + 66 in Pattern (x5 + 6) + M1.
- All WS – purl all sts until garter border (last 3 sts).
- Continue until it measures 8.5/9/9.5/10″ in length, i.e., 46/48/52/56 rows, ending with a WS row.
- Transfer all sts to another needle for a stitch holder.
- 1st RS – Continue in Pattern sts. Add M1 at the end to use for picking up sts later on for Sleeve:
- Back:
- 1st RS – Continue in Pattern sts. Add M1 at the beginning and the end for picking up sts later on for Seeve:
- Small: 64 sts, i.e., M1 + 62 in Pattern (7 sts to continue pattern from right front + 12 x 4 + 7) + M1.
- Medium: 68 sts, i.e., M1 + 66 in Pattern (3 sts to continue pattern from right front + 12 x 5 + 3) + M1.
- Large: 72 sts, i.e., M1 + 72 in Pattern (12 x 6) + M1.
- Extra Large: 76 sts, i.e., 74 in Pattern (6 sts to continue pattern from right front + 12 x 5 + 10) + M1.
- All WS – purl all sts.
- Continue until it measures 8.5/9/9.5/10″ in length, i.e., 46/48/52/56 rows, ending with a WS row.
- Transfer all sts to another needle or a stitch holder.
- 1st RS – Continue in Pattern sts. Add M1 at the beginning and the end for picking up sts later on for Seeve:
- Left front:
- 1st RS – Continue in pattern sts. Add M1 at the beginning to use for picking up sts later on for a sleeve:
- Small: 57 sts, i.e., M1 + 53 in Pattern (5 sts to continue pattern from the back + 12 x 4) + 3 (garter)
- Medium: 61 sts, i.e., M1 + 57 in Pattern (9 sts to continue pattern from the back + 12 x 4) + 3 (garter).
- Large: 65 sts, i.e., M1 + 60 in Pattern (x5) + 3 (garter).
- Extra Large: 71 sts, i.e., M1 + 66 in Pattern (6 to continue pattern from the back + 12 x 5) + 3 (garter).
- All WS – knit 3 (garter border) and purl all sts until end.
- Continue until it measures 8.5/9/9.5/10″ in length, i.e., 46/48/52/56 rows, ending with a WS row.
- 1st RS – Continue in pattern sts. Add M1 at the beginning to use for picking up sts later on for a sleeve:
Combine and complete Body
- Pick up all sts in one needle – including 4 M1’s for each row, should be 178/190/202/218 in total.
- 1st RS: Continue in Pattern stitch while combining M1 sts by s2kpo at the top of right and left Armholes (2 st decrease x 2) – you should end up with original st count, i.e., 174/186/198/214.
- WS: knit 3 for garter border, purl all sts until last 3 sts to knit garter border.
- Continue until it measures 5.5/6/6.5/7 in length, i.e., 32/34/36/38 rows, ending Pattern sts with a WS row. Complete body with 6-row garter sts border.
- BO loosely.
Knit Tie and attach to Body
- On Body, mark where to start and end attaching Tie – from each edge of top-left/top-right of Body, count 48/52/56/61 sts and place st markers. There should be 80/84/88/90 sts including marked sts.
- Tie is knit horizontally in garter with decrease of 1 st at the beginning of every row. It is then attached to body as part of BO process.
- Knit tie – CO loosely (with #12 or larger needle) 290/298/306/313 sts.
- R1 (WS) – knit
- All subsequent rows – knit every row (garter) while decreasing 1 st (SSK) at beginning of every row until Tie reaches approx. 3 inches in height – about 23 rows, i.e., 1 RS + 22 row with decrease.
- Ending st count should be 268/276/284/291.
- BO loosely for 94/96/98/100 sts.
- To attach Tie to Body, between 1st and 2nd st markers (80/84/88/90 sts), pick up one st each from Body when you BO each st of Tie.
- After 2nd st marker, continue to BO 94/96/98/100 sts.
Knit Sleeves
- With US#8 16″ circular needle, pick up 68/74/78/82 sts from bottom of each Armhole, about 3 sts per each 4 rows.
- Knit 1 row.
- For each subsequent row, k1n + Pattern sts + end with k1. NOTE: last Pattern of each sleeve will likely incomplete, and I think it looks just fine.
- Continue to knit until it reaches desired length and finish with 6 row garter. 3/4 sleeve is about 13/13.5/14/14.5″.
- BO loosely.
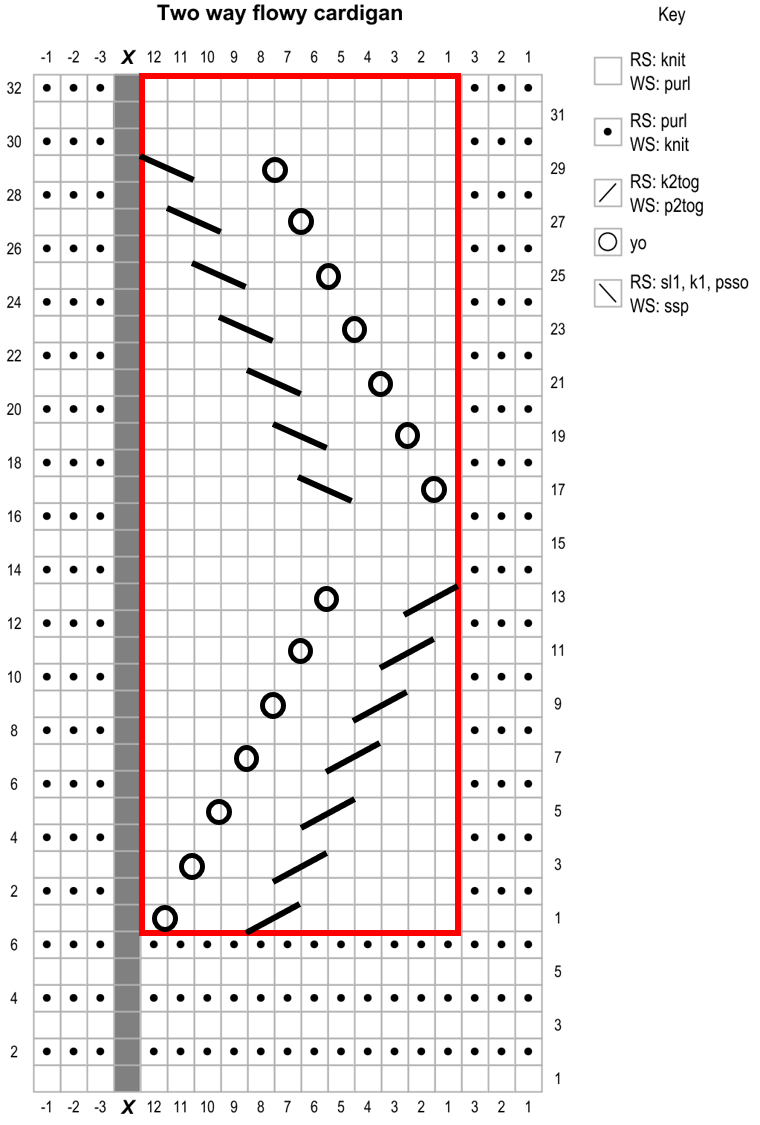
Pattern stitch – 12 stitches x 16 or 32 rows
- R1 (RS): k6, k2tg, k3, yo, k1
- R2 and all WS rows: k12
- R3: k5, k2tg, k3, yo, k2
- R5: k4, k2tg, k3, yo, k3
- R7: k3, k2tg, k3, yo, k4
- R9: k2, k2tg, k3, yo, k5
- R11: k1, k2tg, k3, yo, k6
- R13: k2tg, k3, yo, k7
- R15: k12
- R17: k1, yo, k3, skpo, k6
- R19: k2, yo, k3, skpo, k5
- R21: k3, yo, k3, skpo, k4
- R23: k4, yo, k3, skpo, k3
- R25: k5, yo, k3, skpo, k2
- R27: k6, yo, skpo, k1
- RS29: k7, yo, skpo


Leave A Comment