Ready for fall easy lace sleeve diagnonal top
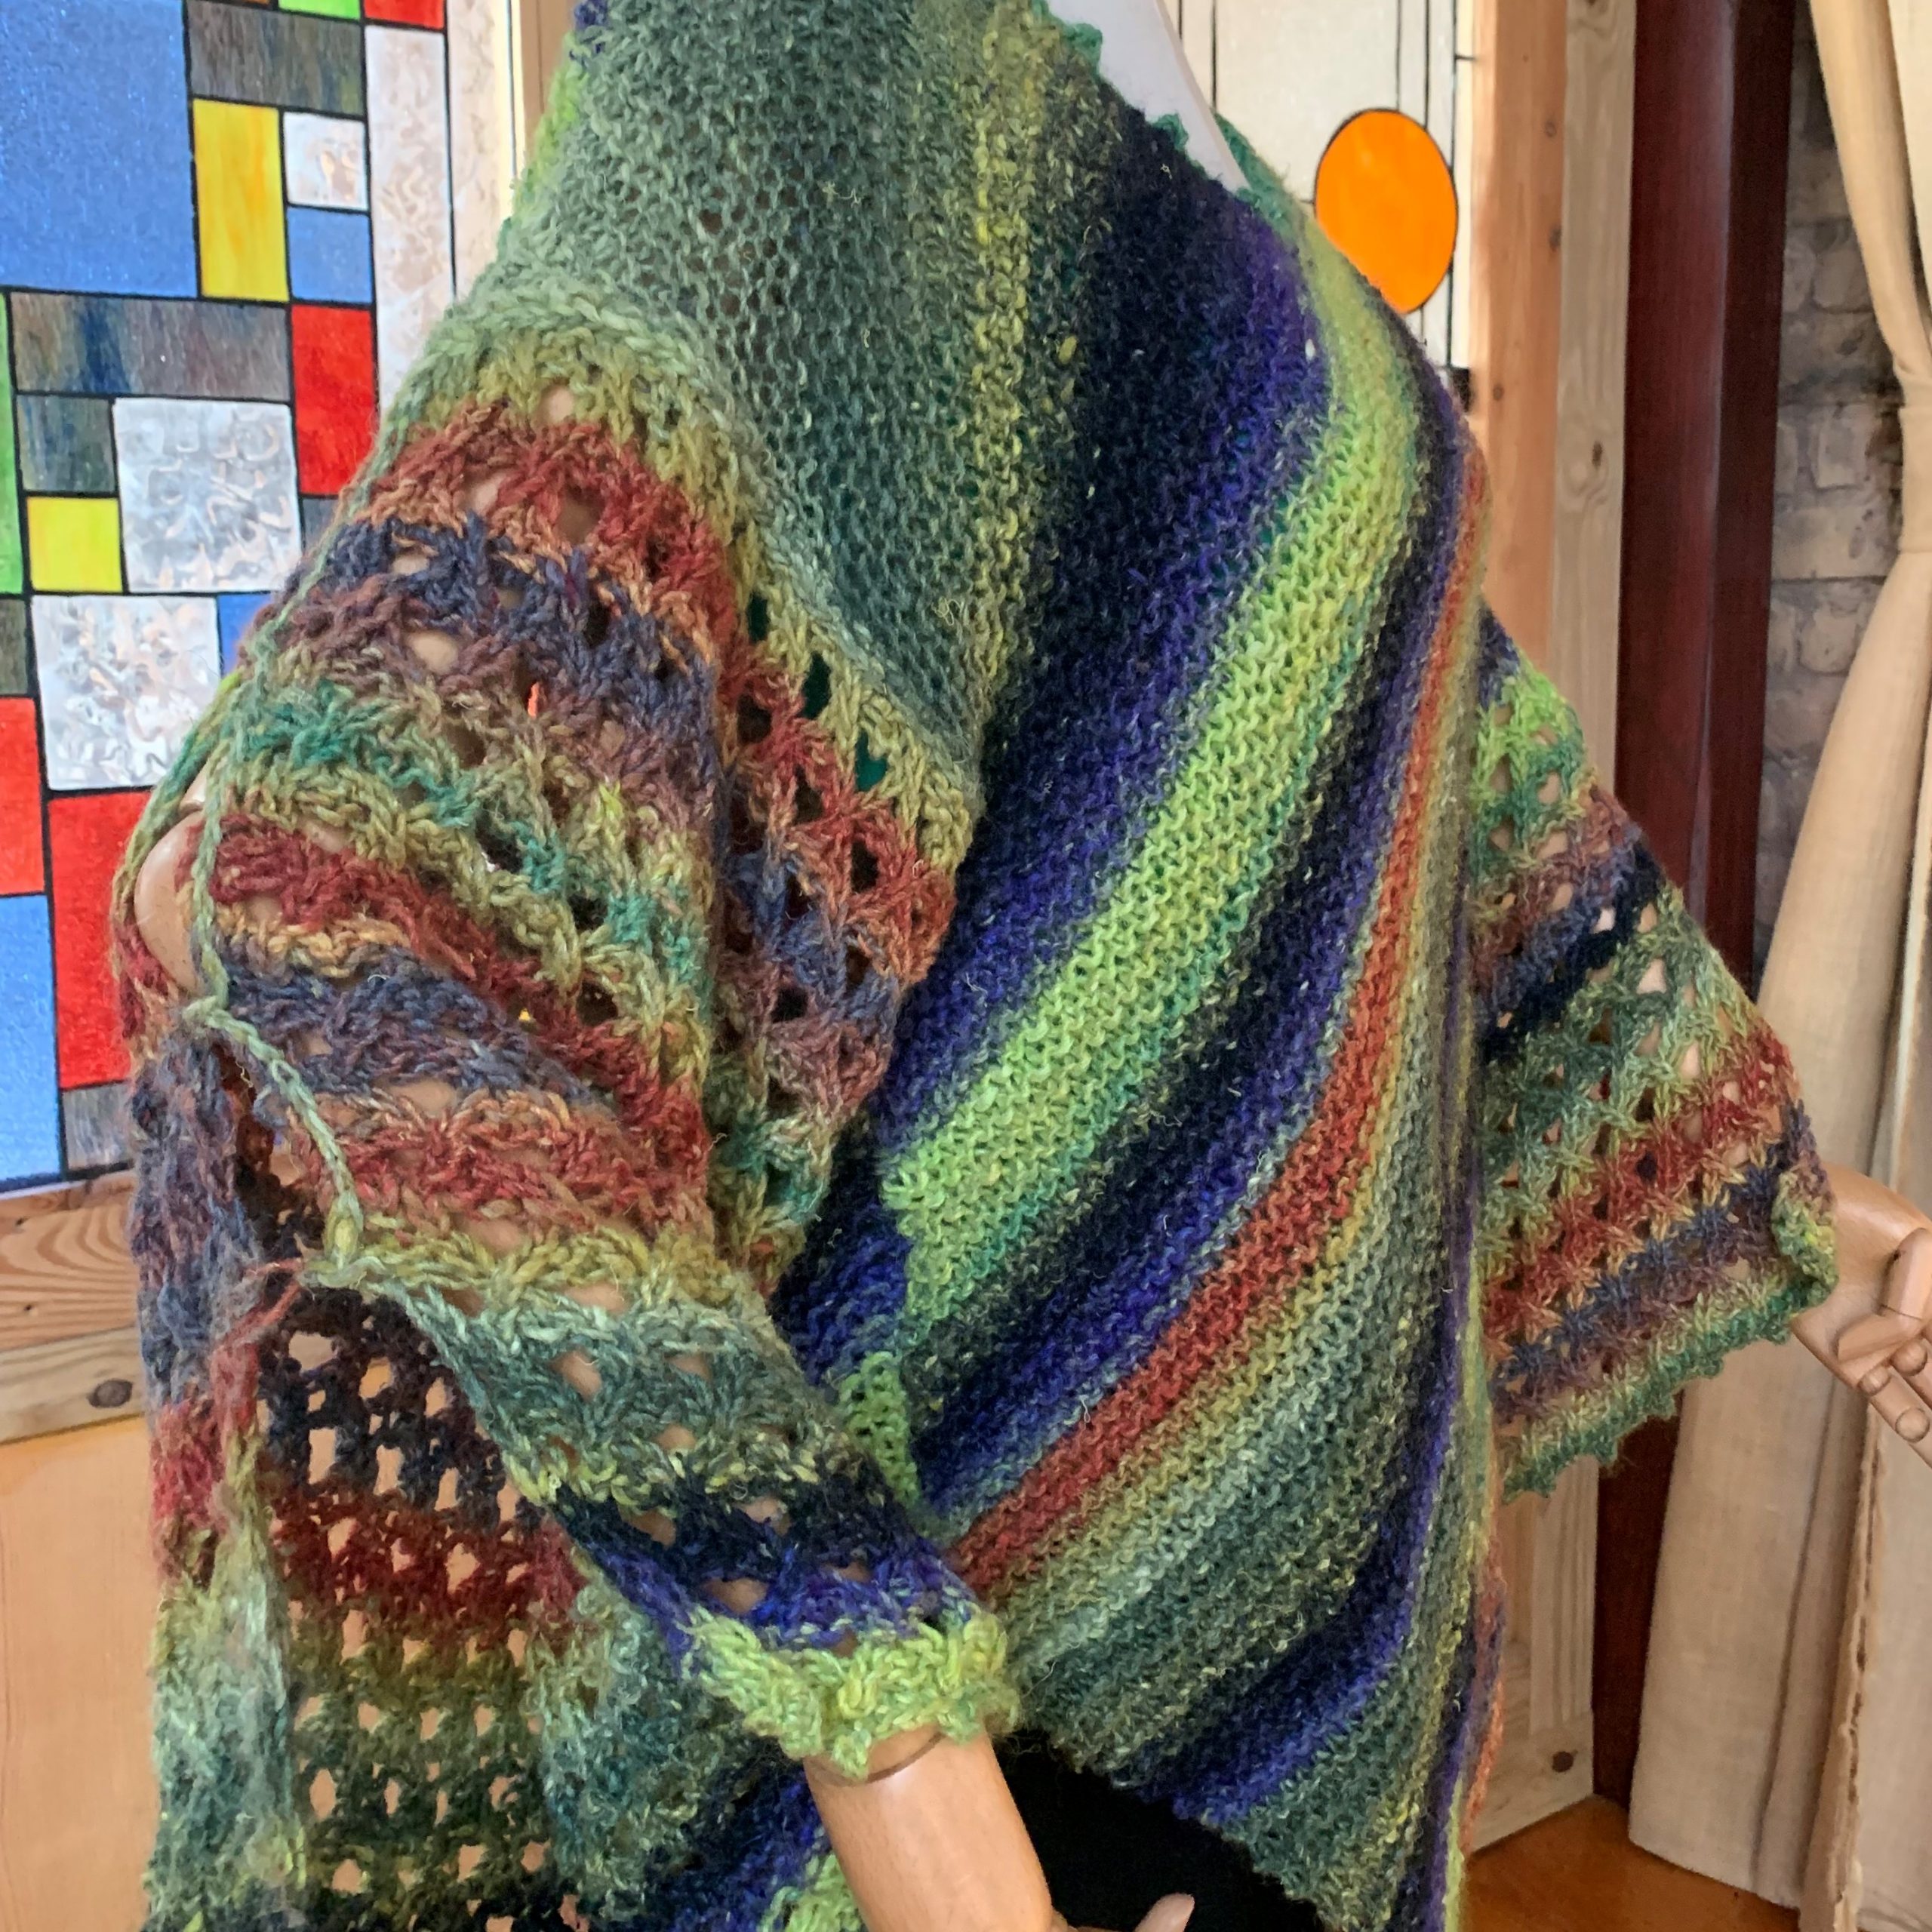
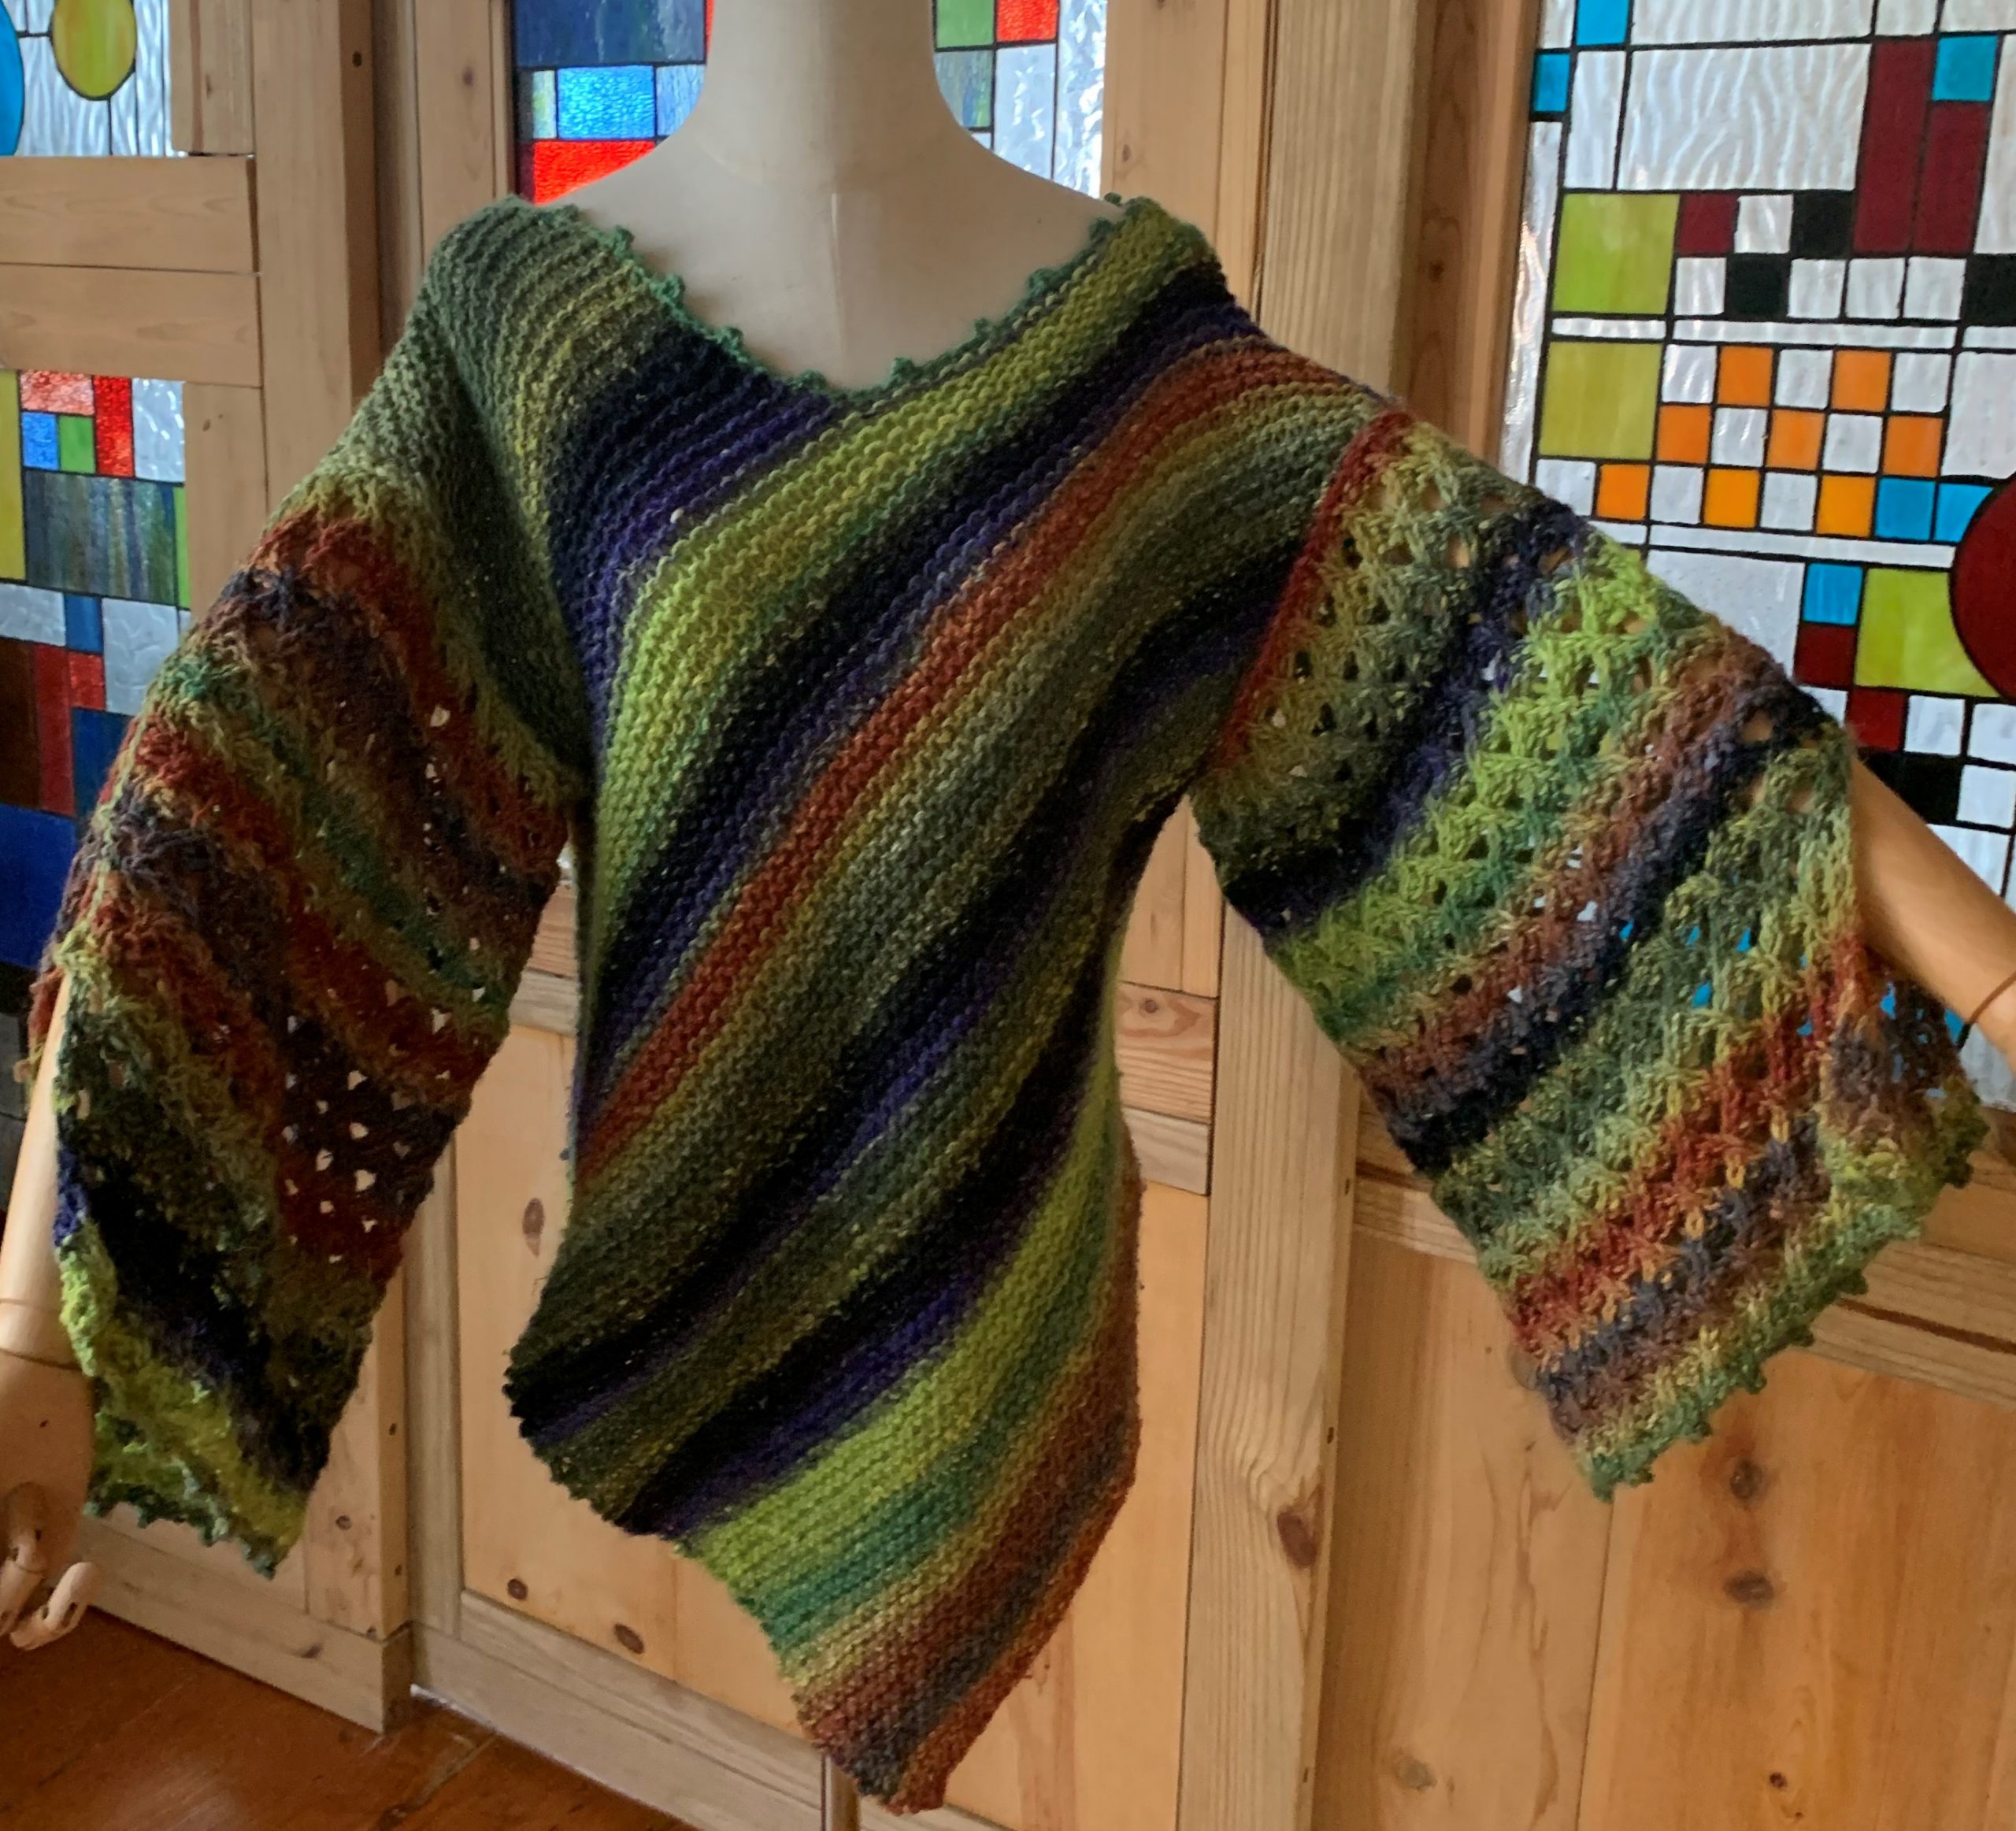
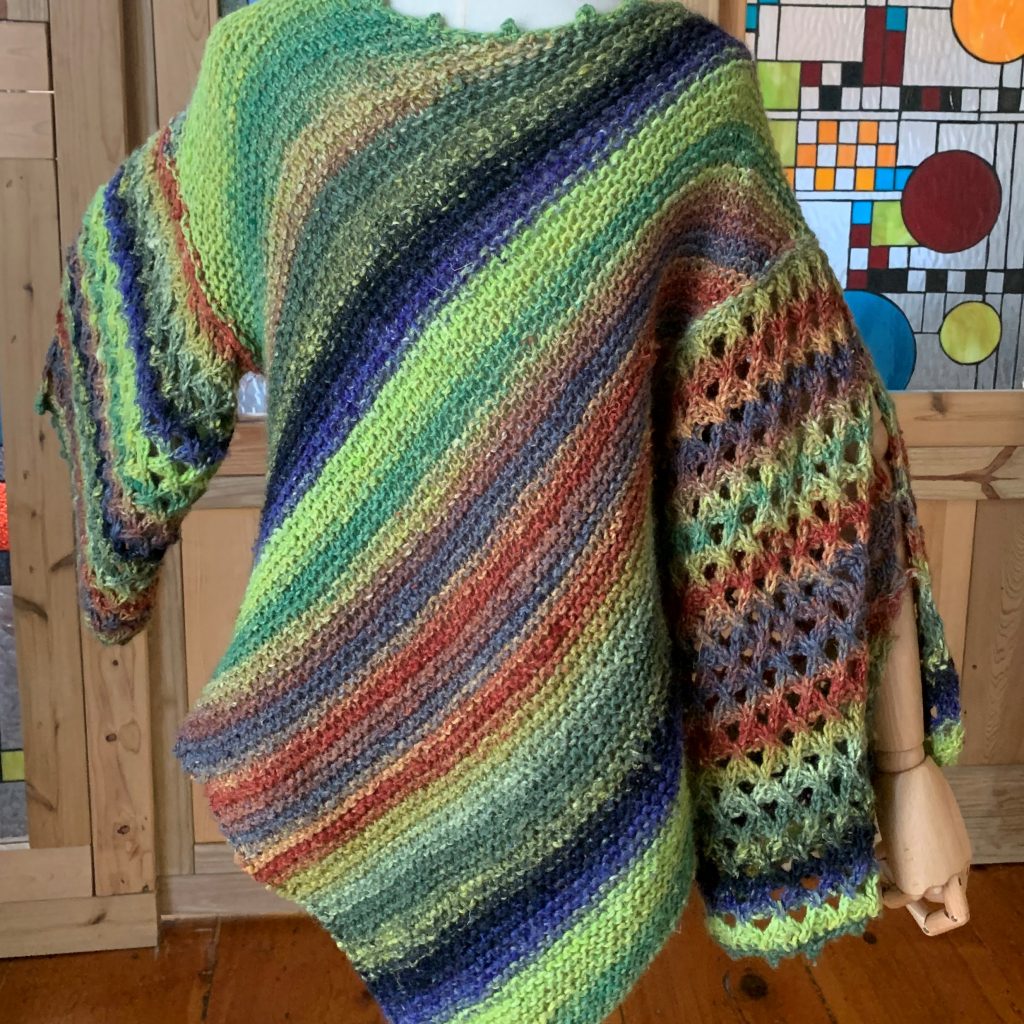
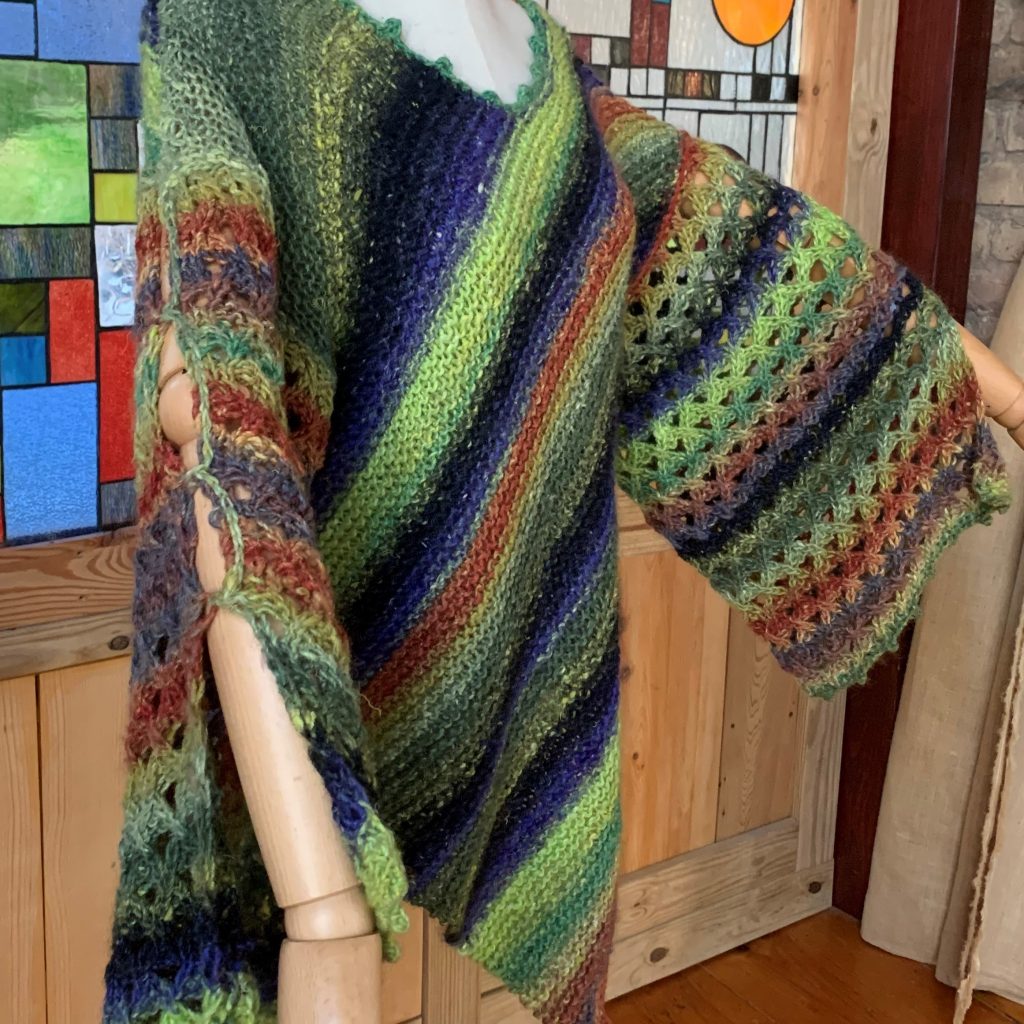
Yearning something warm yet light and flowy for the in-between seasons? This diagonal body top with open lace sleeves might give you just that.
Making most of an impulse yarn purchase
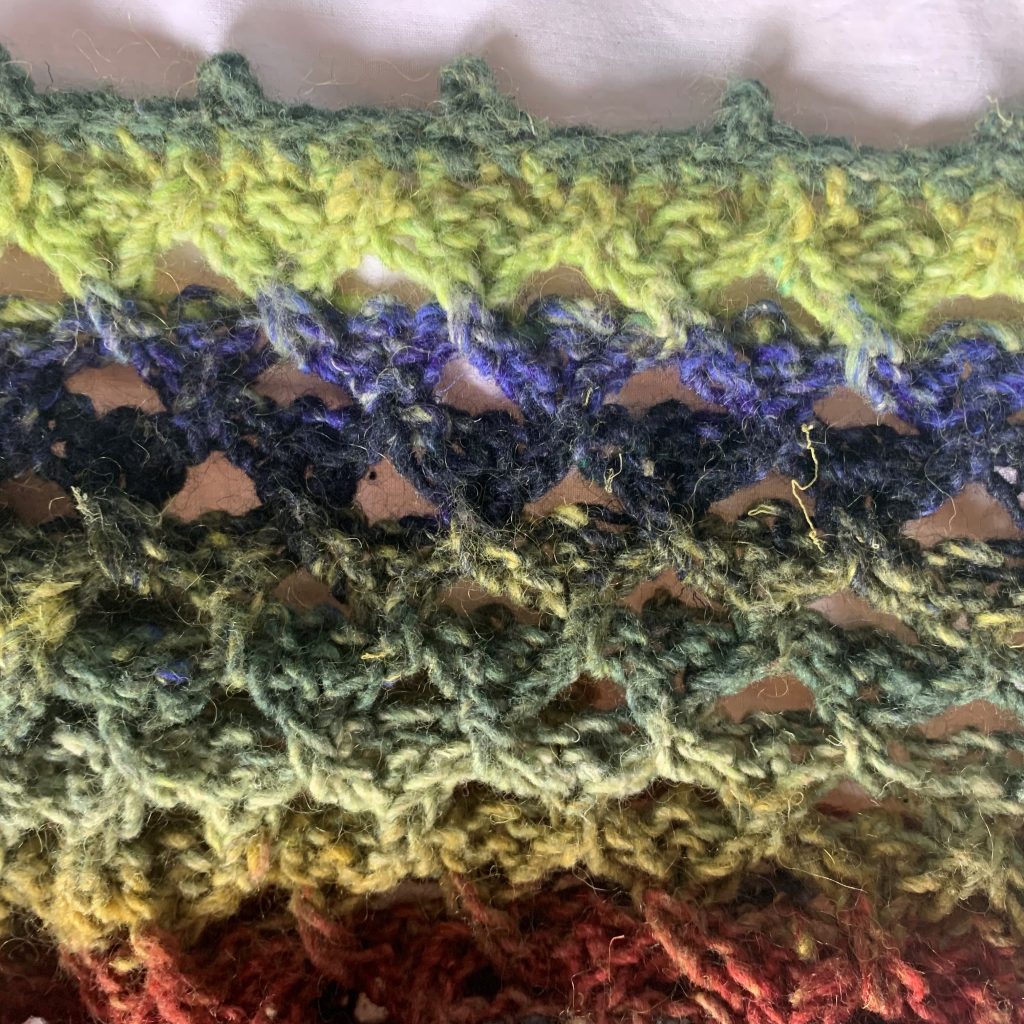
This is what happens with an impulse buy of discontinued color yarns – there is no flexibility in the amount of yarns, and the design choices can be limited. I had nine skeins of Noro Silk Garden (self striping yarns) and while the color combination (green, yellow, orange, blue, black) is stunning, it was not in the hues I naturally gravitate toward and was not sparking inspirations.
This is a typical example of my knitting projects, as you see in my Knitting page, about making most of yarns I have in simple, easy patterns and stitches.
Different yarns for different needs
While I think self striping yarns will create the most drama out of the diagonal construction, you can certainly use any type of DK or worsted yarn. If you use cotton or linen, you can wear into summer and with merino, alpaca, or cashmere, this could be a winter top. If you would forego the lace pattern for the sleeve and instead use a simple garter stitch, it will be even more winter appropriate. Please customize and create your own version.
Striped diagonal body with open lace sleeves
I only had a starting point thought – because of the natural striping, I thought the yarns could work great with a diagonal design, and after much browsing, I found this “Sideways Glance” sweater in DROPS Design and decided to adapt it. I wanted to lift it up with lighter, airy elements, and saw a lace sleeve sweater in Noro’s magazine cover (Issue 14). It could really have been any lace pattern – if you are in search of lace pattern ideas, a fabulous DROPS Design even has an online library of free lace stitches.
Easy and simple pattern repeats
Body here is knit flat in garter stitch throughout from a diagonal bottom side up with easy increase and decrease stitches by section. After sawing front & back, sleeves are knit flat & straight in lace, and spot bound in 3-4 spots on the top side.
NOTE: I knit this piece in Small, and I did my best to extrapolate stitch/row counts for M/X/XL.
Yarn (S/M/L/XL)
900/1,000/1,100/1,200 yrds of worsted yarns. For small, I used 9 skeins of Noro Silk Garden, 50g/108 yrds (45% Silk/ 45% Kid Mohair/ 10% Lambs Wool)
Needle
US #9 (5.5 mm) circular needle.
#8 (5 mm) crochet hook (for finishing edges)
Gage
Garter st: 12 sts x 24 rows
Lace st: 13 sts x 15 rows
Construction
Body – knit flat front & back
Sleeve – knit flat after sewing sides
Knitting chart and instructions:
RS – “right” side
RS – “wrong” side
CO – cast on
BO – bind off
M1 – to increase one stitch, knit into a loop between two stiches
k2tg – to decrease one stitch, knit two stitches together
Picot – to create a “dot” shape, crochet 3 chain sts and insert the hook through the base crochet st to connect.
Front Body
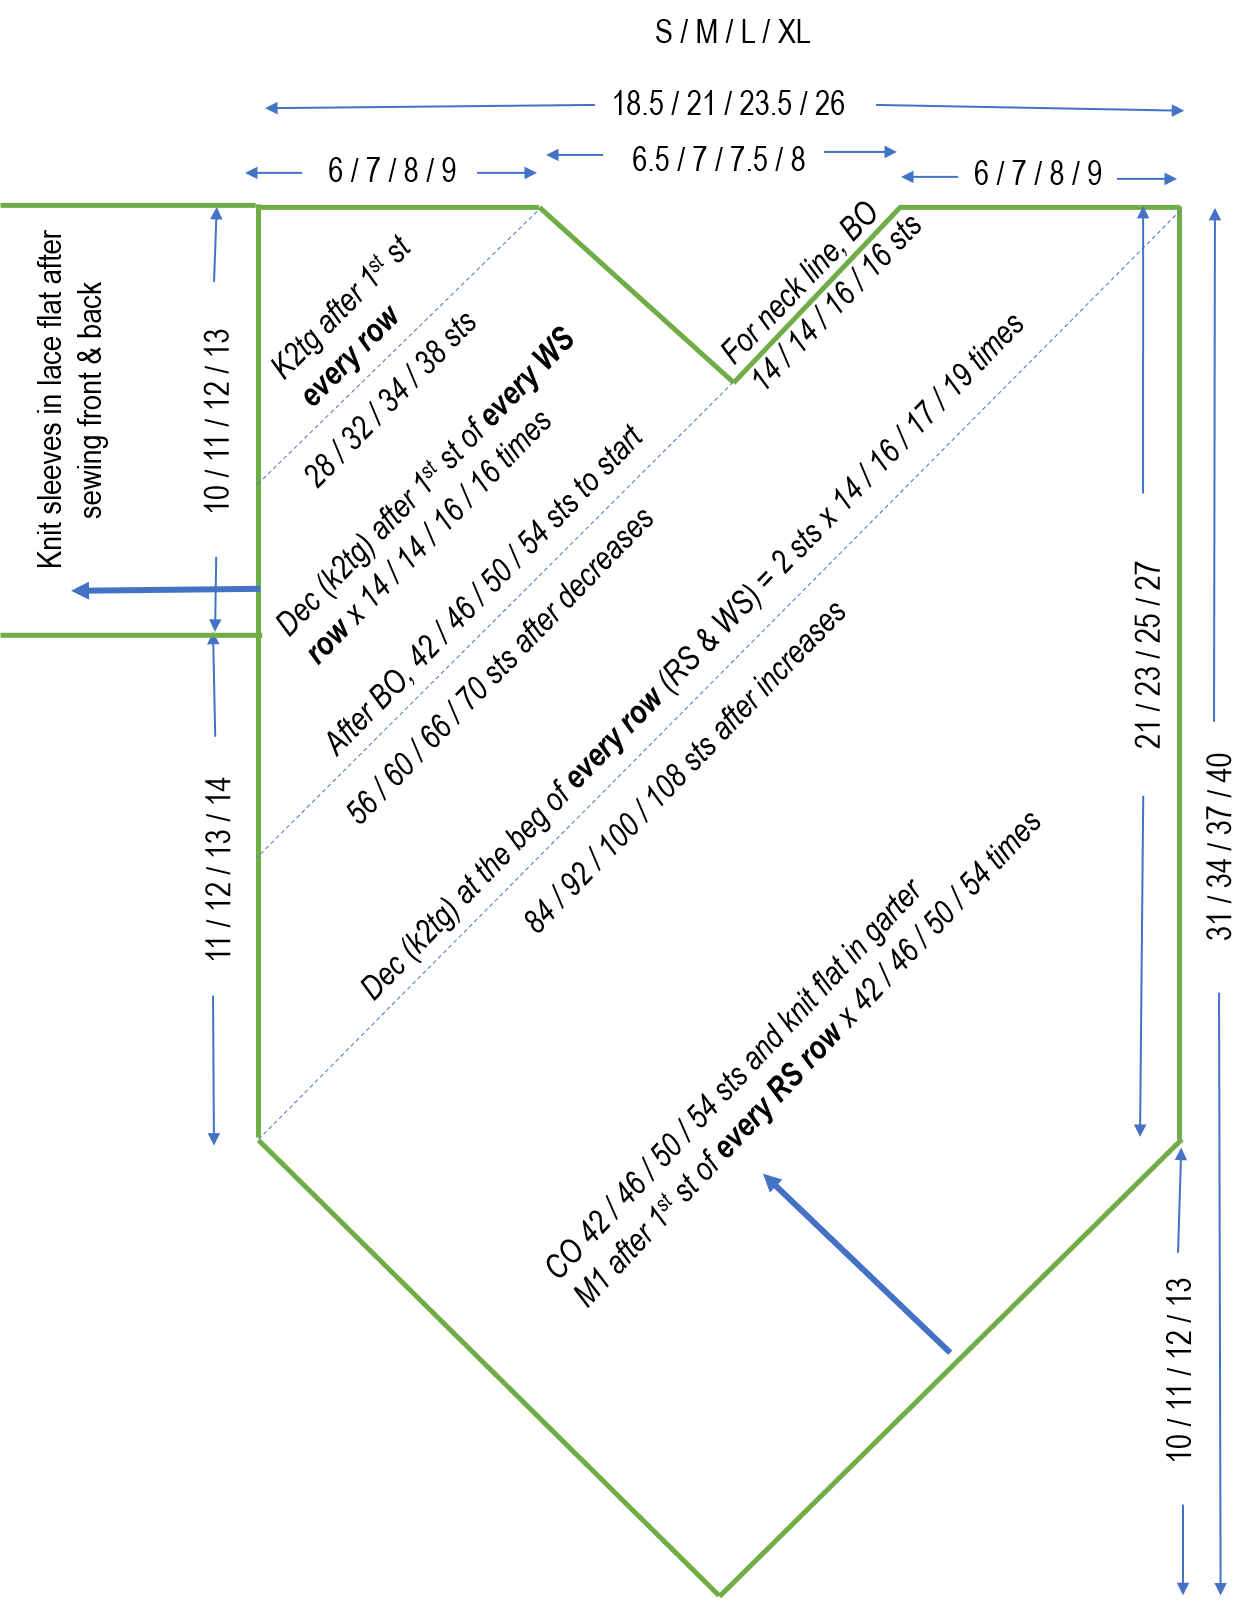
- CO and increase on right side: With US#8 needle (circular needle will be easier), cast on 42/46/50/54 sts and work in garter st. throughout. Increase one st (M1) after 1st st of every RS row 42/46/50/54 times, ending up with 84/92/100/108 sts.
- Decrease on both sides: K2tg once at beginning of every row to decrease 14/15/17/19 times (decrease of 28/30/34/38 sts in total), ending up with 56/60/66/70 sts.
- BO neckline and decrease on left side: At beginning of RS, BO 14/14/16/16 sts, leaving 42/46/50/54 sts. At beginning of every WS row, k2tg to decrease 14/14/16/16 times, ending up with 28/32/34/38 sts.
- Finishing up Front Body: K2tg every row 14/16/17/19 times until no stitch remains on needle.
Back Body
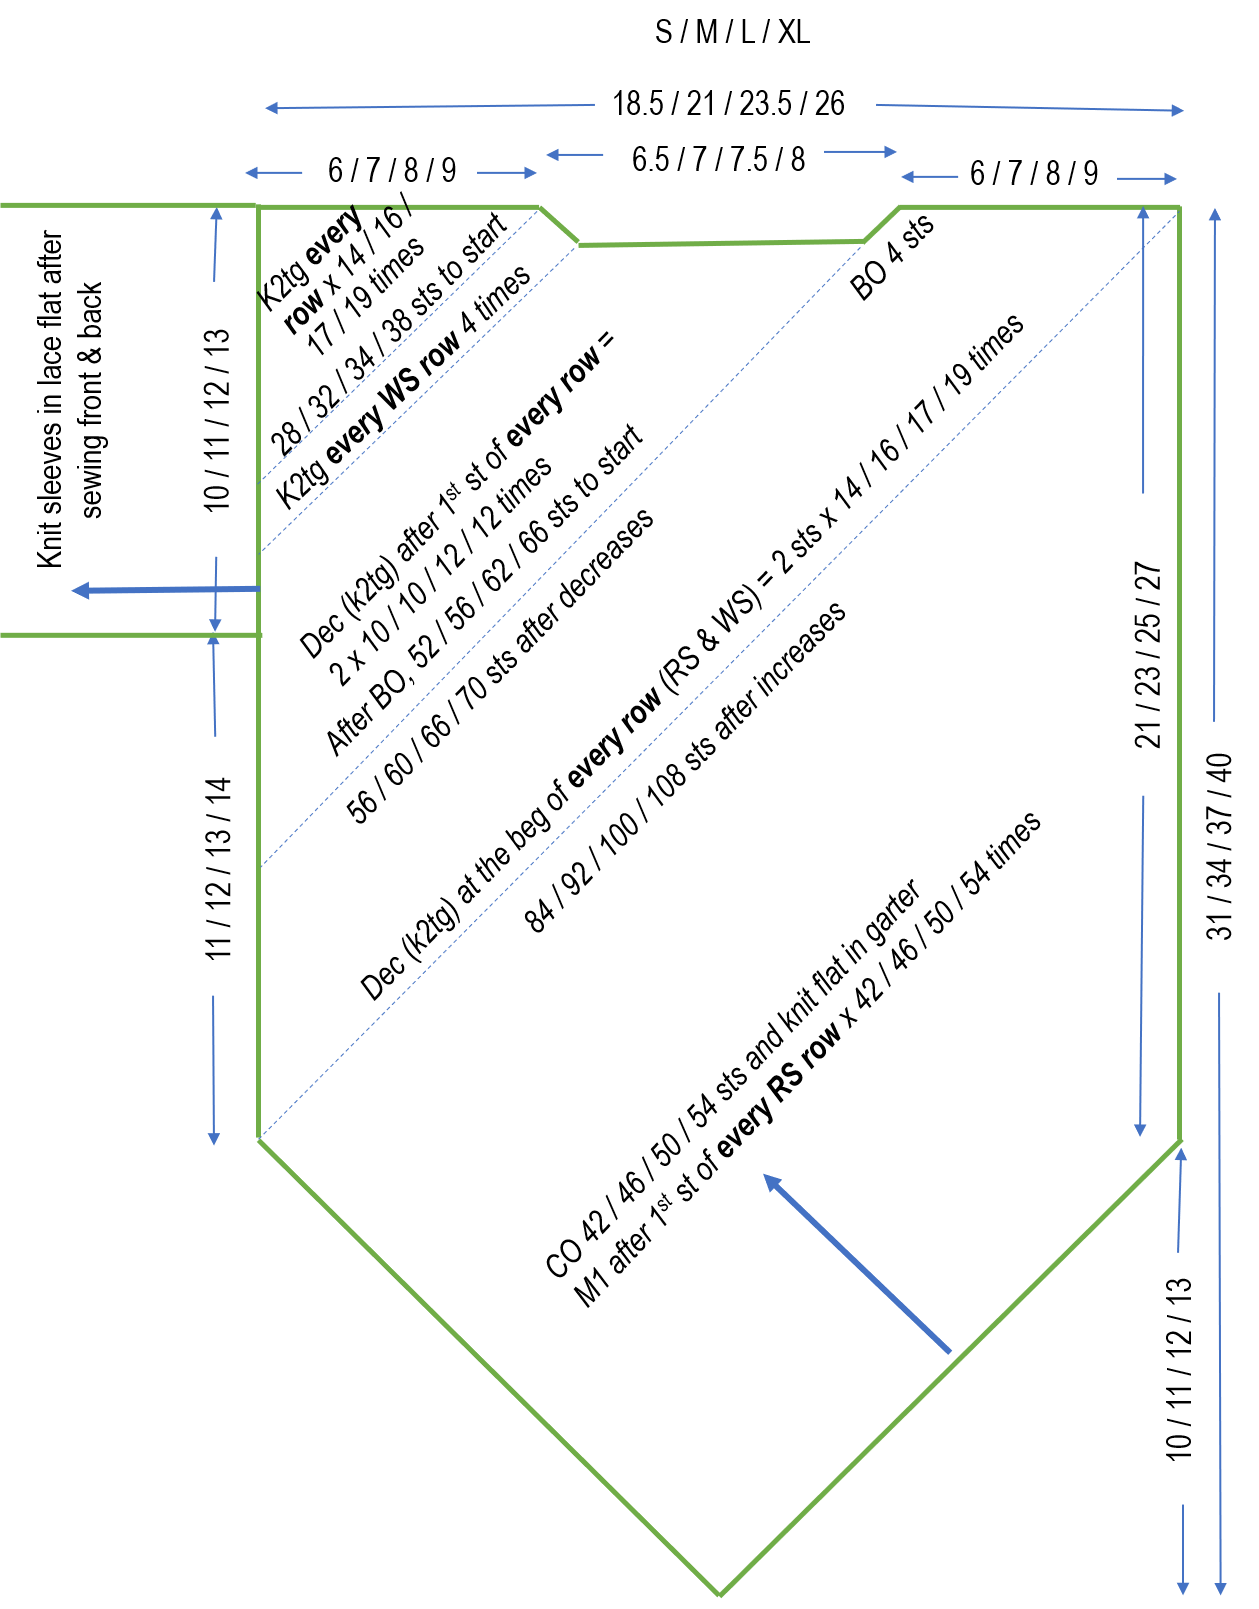
- CO and increase on right side: With US#8 needle, cast on 42/46/50/54 sts and work in garter st throughout. Increase one st (M1) after 1st st of every RS row 42/46/50/54 times, ending up with 84/92/100/108 sts.
- Decrease on both sides: K2tg once at beginning of every row to decrease 14/15/17/19 times (decrease of 28/30/34/38 sts in total), ending up with 56/60/66/70 sts.
- BO neckline and decrease on both sides: At beginning of RS, BO 4 sts. leaving 52/56/62/66 sts. At beginning of every subsequent row, k2tg to decrease 10/10/12/12 times, ending up with 32/36/38/42 sts.
- Decrease on left side: K2tg at beginning of every WS row 4 times, ending up with 28/32/34/38 sts.
- Finishing up Back Body: K2tg every row 14/16/17/19 times until no stitch remains on needle.
Sew sides and knit Sleeves flat:
- For each side, sew together front & back sides with WS facing out until it measures 11/12/13/14″ from bottom, leaving10/11/12/13″ for Armhole for each front/back sides. Do not yet sew Shoulders.
- Right Sleeve – Flip to RS facing. Starting at top of front Armhole/Shoulder, pick up 86/90/94/98 (about 1 st per every garter row).
- R1 (WS) – Purl all sts
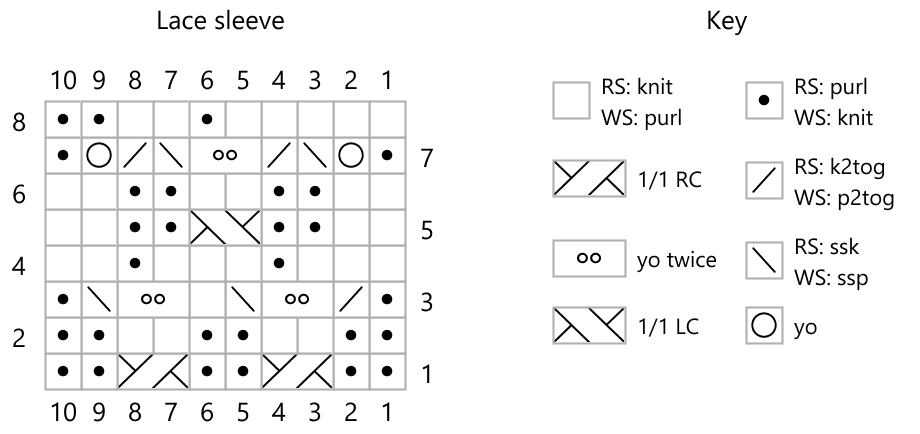
- Start Lace Pattern st (4-st and 8-row repeat) – R2 (RS), k1, knit Pattern st 21/22/23/24 times, end with k1
- Continue with Pattern st until it measures 20/21/22/23″, 74/78/82/86 rows, i.e., about 9/9.5/10/10.5 Pattern repeats, ending with WS row. BO loosely.
- Left Sleeve – Flip to RS facing. Starting at top of back Armhole/Shoulder, repeat same process as Right Sleeve.
Sew Shoulders, trim and spot-bind Sleeves with crochet hook:
- Sew Shoulders – Flip to WS facing and sew Shoulders one by one until beginning of Sleeve. Do not cut Yarn.
- Trim Sleeve 1st side – Flip to RS facing. With #8 crochet hook, pick up Yarn and trim one side/vertical edge of Sleeve with loose slip st (one st per row) until it reaches Cuff.
- Trim Sleeve Cuff – At both beginning/end corners, crochet 3 single sts per one Lace Pattern st to create a square shape. Thereafter, crochet one single st per one Pattern st, inserting picot st every 5th or 6th st.
- Trim Sleeve 2nd side and spot bind – Continue to trim 2nd side/vertical edge of Sleeve with loose slip st (one st per row), binding both Sleeve sides every 3-5″ until it reaches Shoulder.
(Optional) Trim Neckline with Crochet hook:
Neckline can be left as is. For me, it looked a bit too loose, so decided to trim with single crochet with occasional picot similar to Sleeve Cuffs.
Hope you enjoy this project and will be pleased with the result!
About The Author
MayumiW
Related Posts
Easy Vertical Stripe Lounge/Sleep Tunic Dress
Like many knitters, I have random bits of yarns from various projects I stash for…
April 18, 2024Easy Snazzy Summer Fun Knitted Tunic Dress (Free Pattern)
While this fun and easy tunic dress is knit straight bottom up in a simple…
July 12, 2023


Leave A Comment